

I’m a big fan of a variety of different camping scenarios, from 20lb ultralight and minimalist backpacking over long distances, to heavy load backpacking with an external frame load carrier allowing for extra gear, to lighter car camping to all out glamping. They’re all fun in their own little ways.
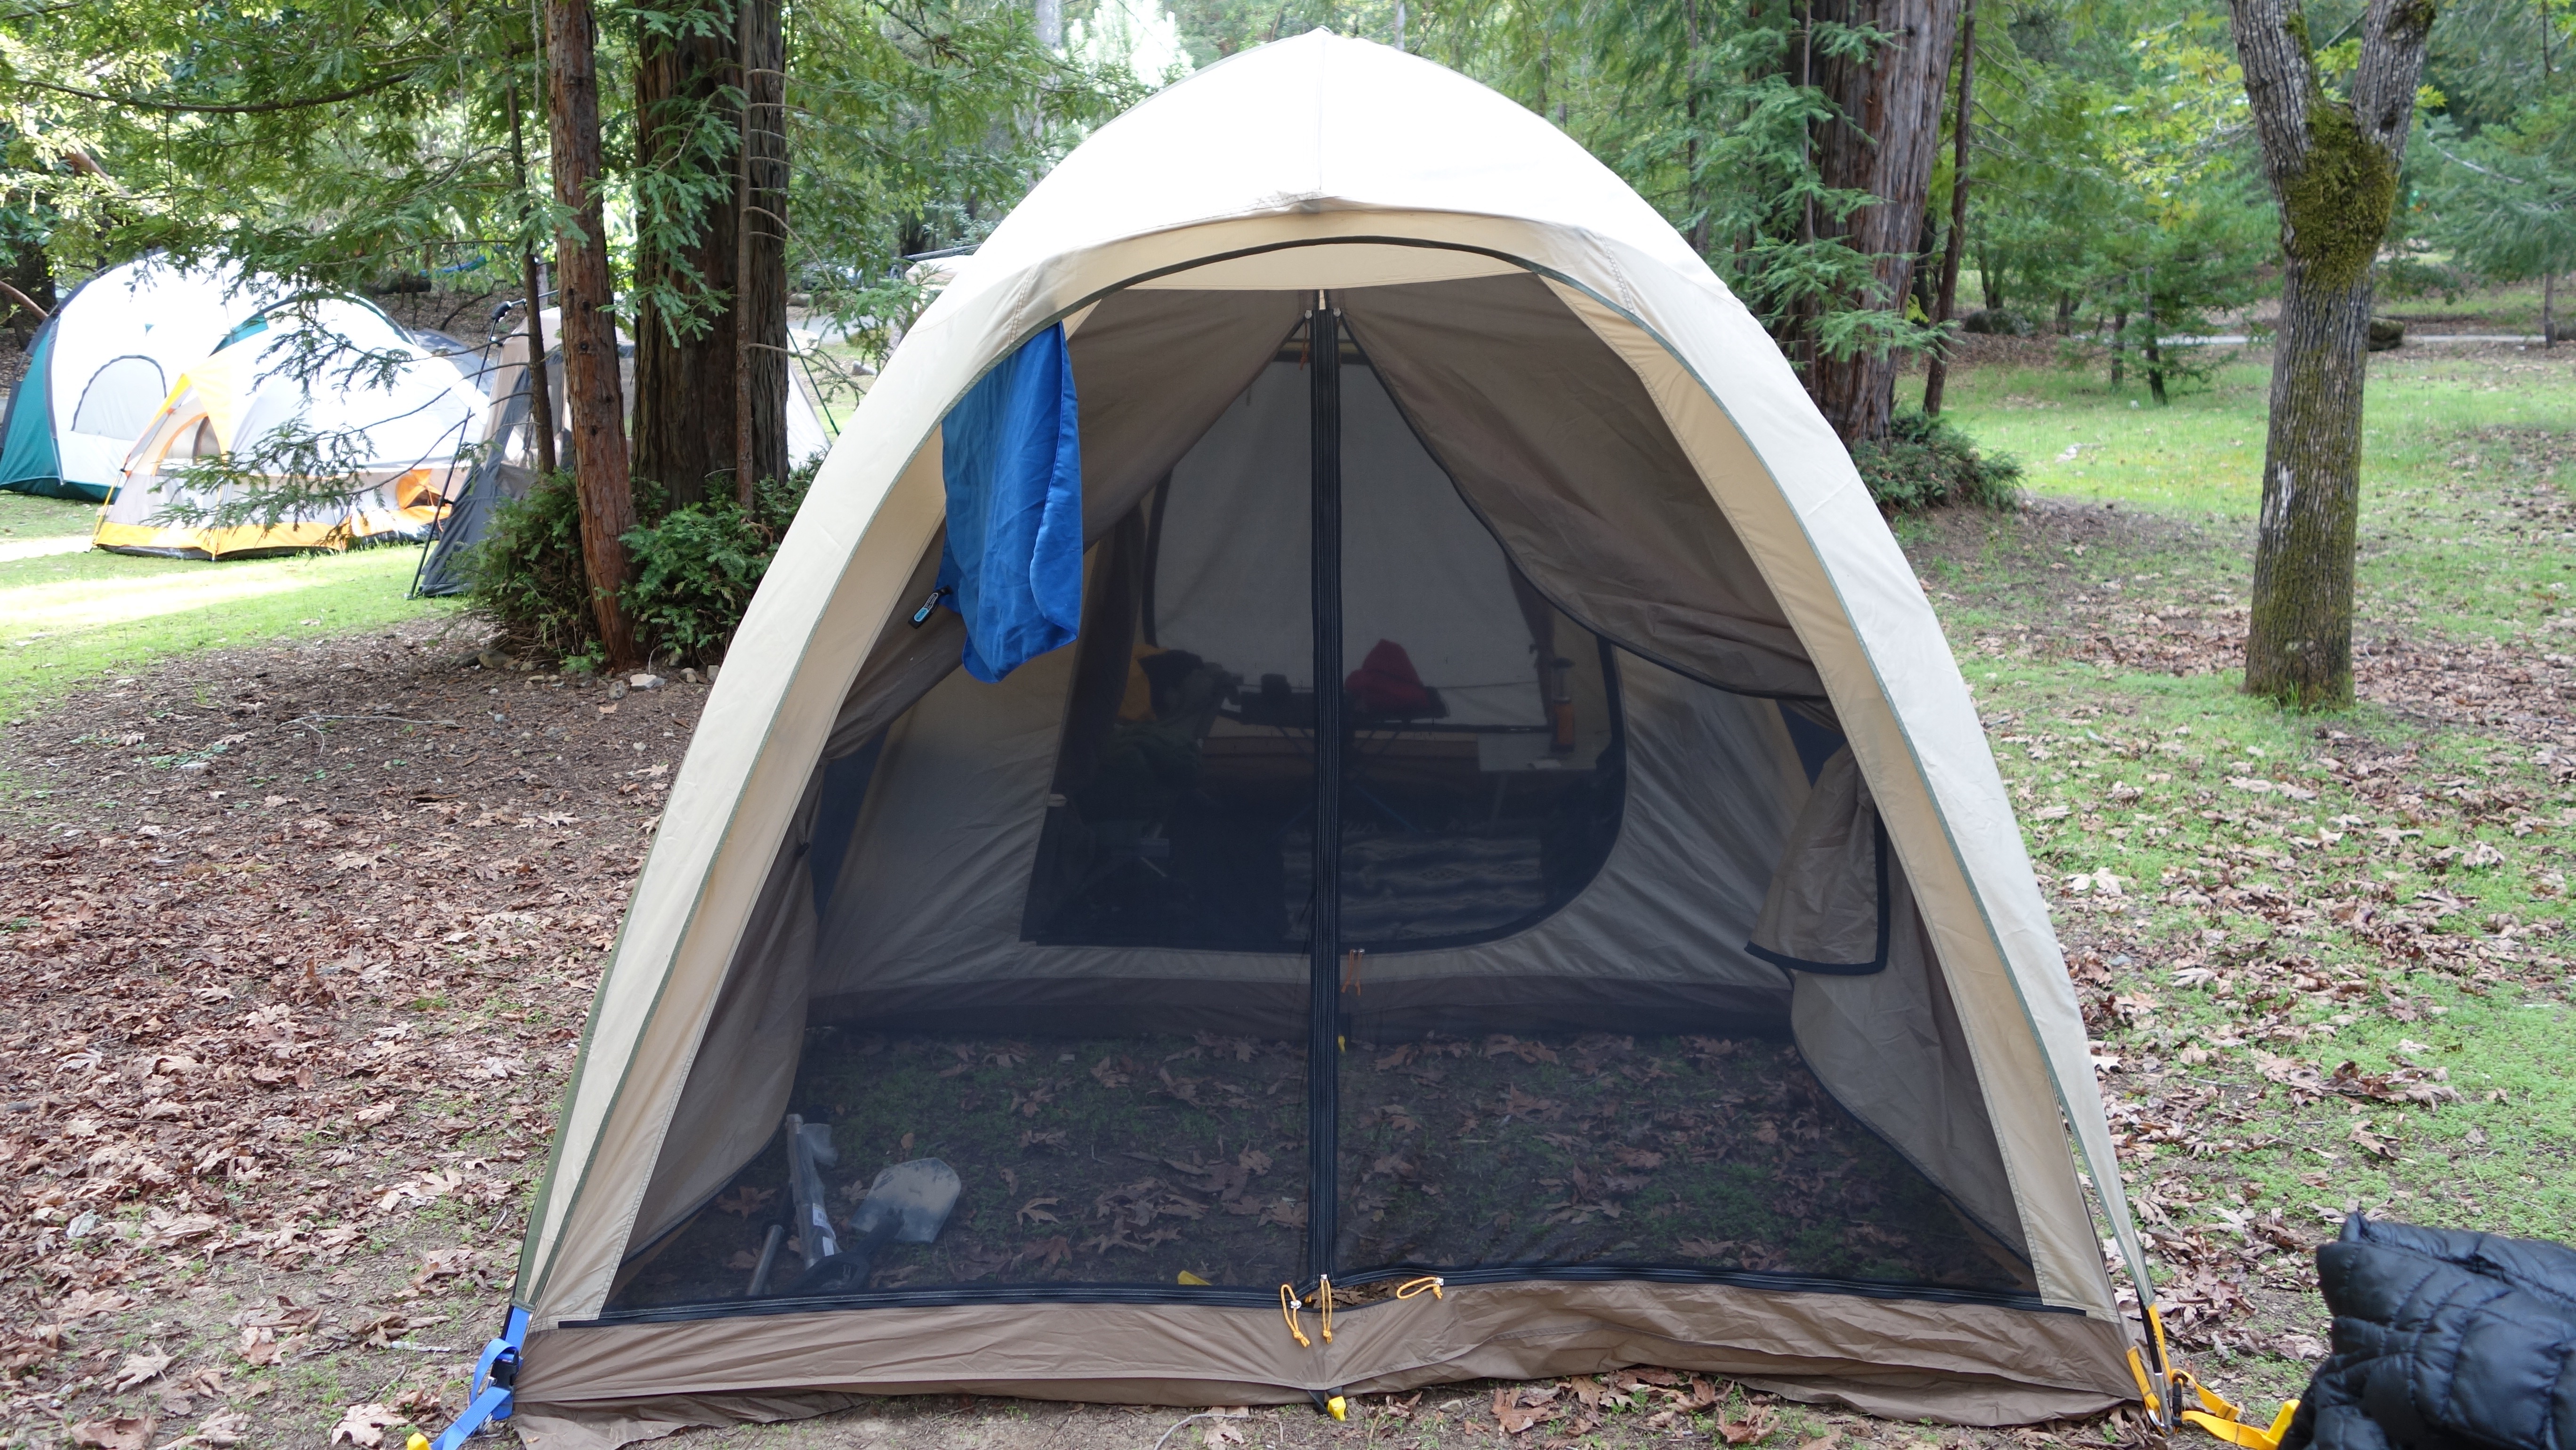
The L.L. Bean King Pine 4-person tent is as close to glamping as I get while still having my own tent.
– Overall dimensions: 7’10” x 7’9”
– Main tent: 61 square feet
– Porch (screen room): 38 square feet
– Rear vestibule: Dunno, at least 12 square feet, I think.
– Peak height 6’3”
– Weight: 23 lbs minimum, more like 25+lbs with carry bag and stakes
For one person, it’s a palatial experience of the first order. For two people, it’s a major luxury with space a plenty. For three or four, it starts to require a few compromises, but still very luxurious for camping. In a pinch, you could squeeze 6 people.
Three things really make the tent especially impressive from my perspective.
– First, it has two rooms, and the outer room has very large windows and a large door with no-seeum mesh to get great shade and great ventilation.
– Second, the structure is very well designed and extremely stable. While I haven’t used this tent in stormy conditions, I’ve read about enough experiences folks have had with this tent to be sure of its stability in windy stormy conditions. The fabric and double dome pole structure with an overlay portion exudes stability.
– Third, unlike the L.L. Bean King Pine 6-person tent, this tent can be easily setup by one person as long as things are done in sequence and with a little creativity.
Description.
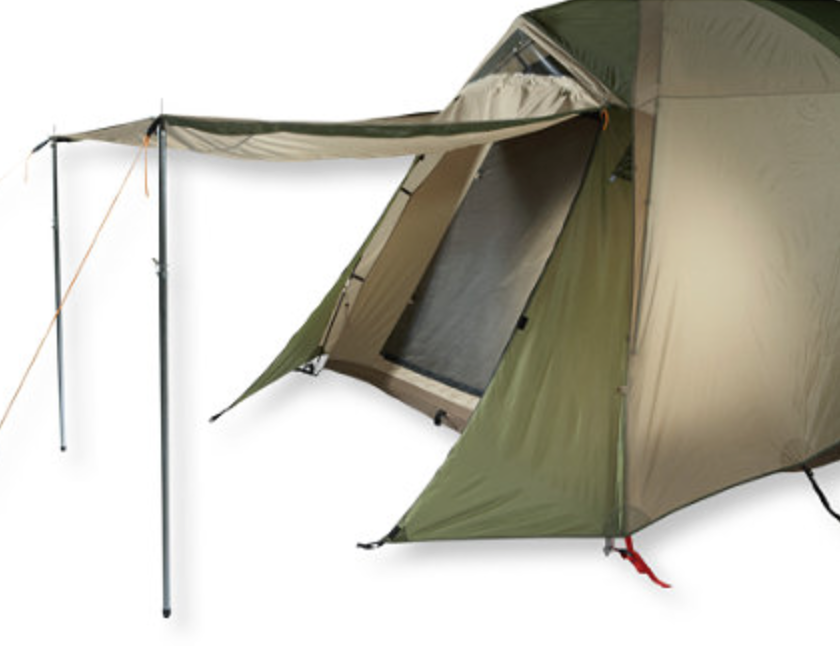
As mentioned the King Pine 4-person has two rooms, the main tent room with a tough bathtub floor and the larger of the two rooms, the porch (screen room) which is plenty large in its own right, and a rear vestibule (which has no floor) which is also a back door that can be unzipped and lifted up and tied to poles or a tree for an awning.

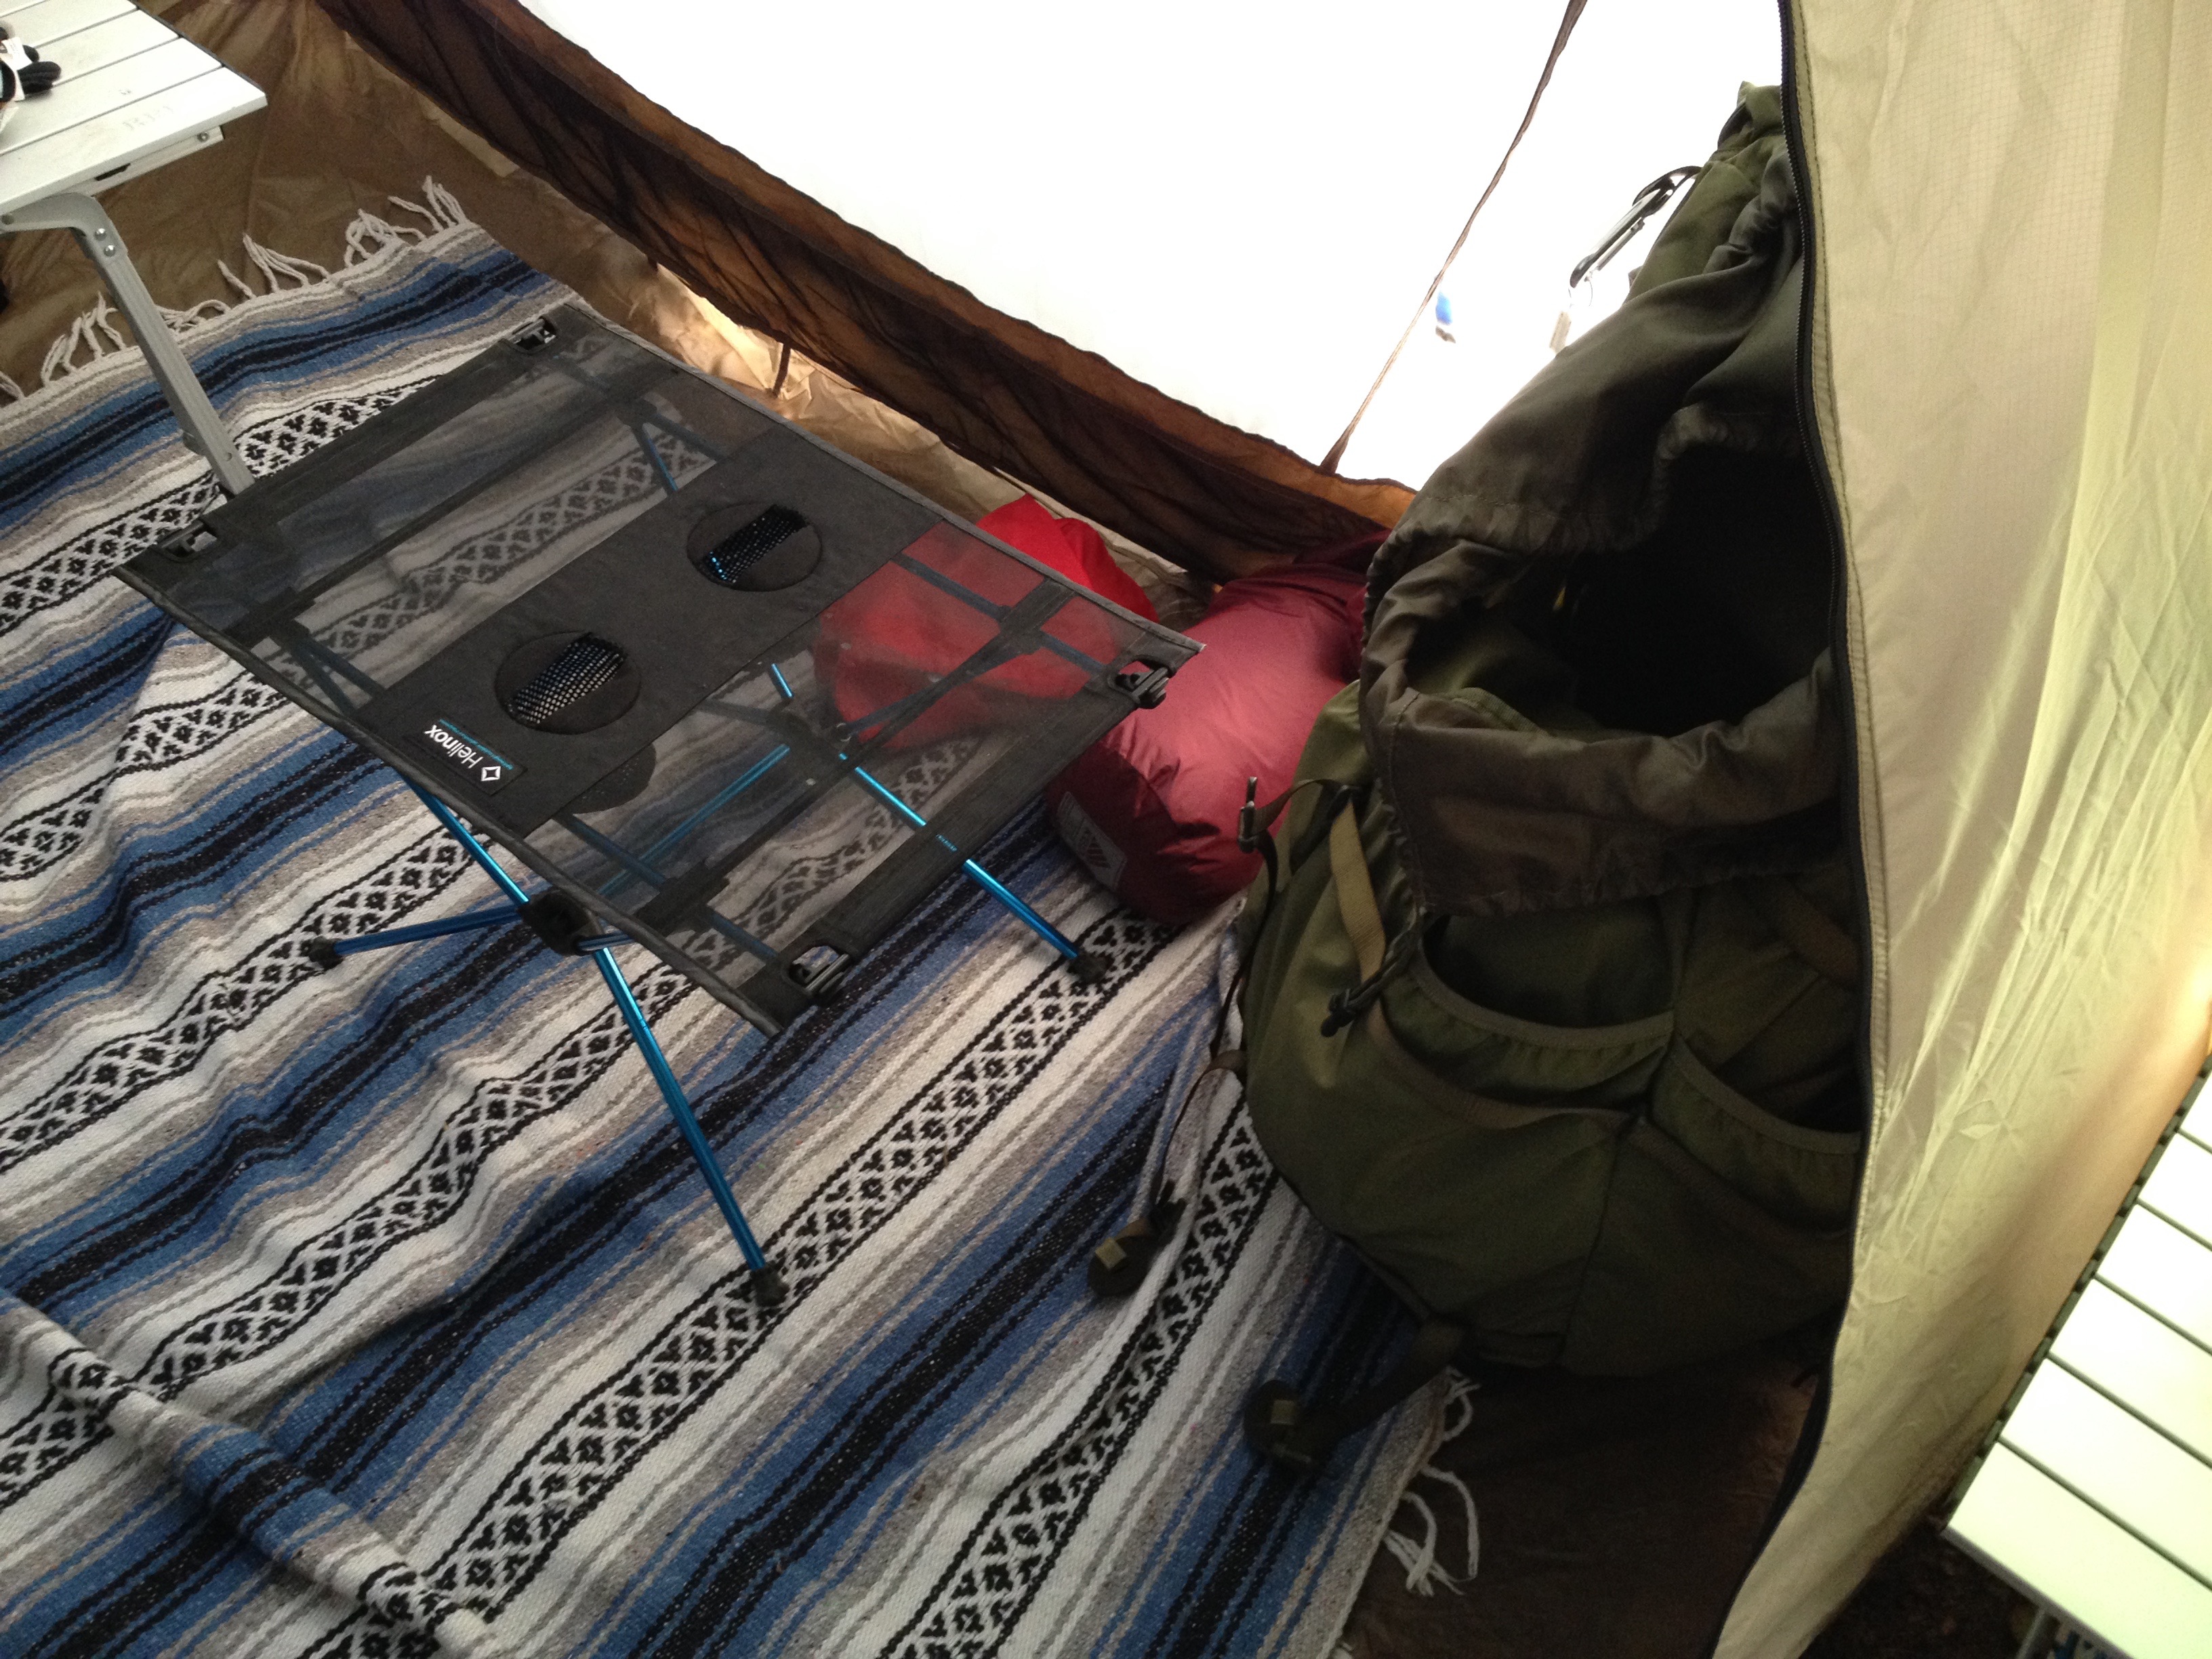
The main room is long enough to just barely fit a military camp cot. If car camping alone, you could easily have the cot, a table, a chair, plenty of space for dry gear and still have tons of room to stand and stretch out in. As it’s designed for four sleeping bags side by side, the space is really palatial for one. Quite a few times I’ve gotten up in the morning, sat on the cot with my legs stretched out and crossed on the floor, enjoying a hot cup of morning coffee while listening to rain outside. This main room has two large doors, one facing the front porch and the other facing the rear vestibule. You can fully stand in this main tent room and take a step or two in any direction without your head ever hitting the ceiling of the tent. That tall height also encourages use of vertical stacking. This means a cot is especially useful because you can stow gear underneath. Spacious indeed!
The top is also no-seeum mesh, which provides great ventilation and also prevents condensation. There’s a little loop to tie off a little lamp. I love being able to stand up, look around, change, clean up, or do quick checks when leaving or entering the main room. All this means that I’m never crouching or getting my pants or thermals on while doing crunches so my lower back never hurts when glamping in this tent.
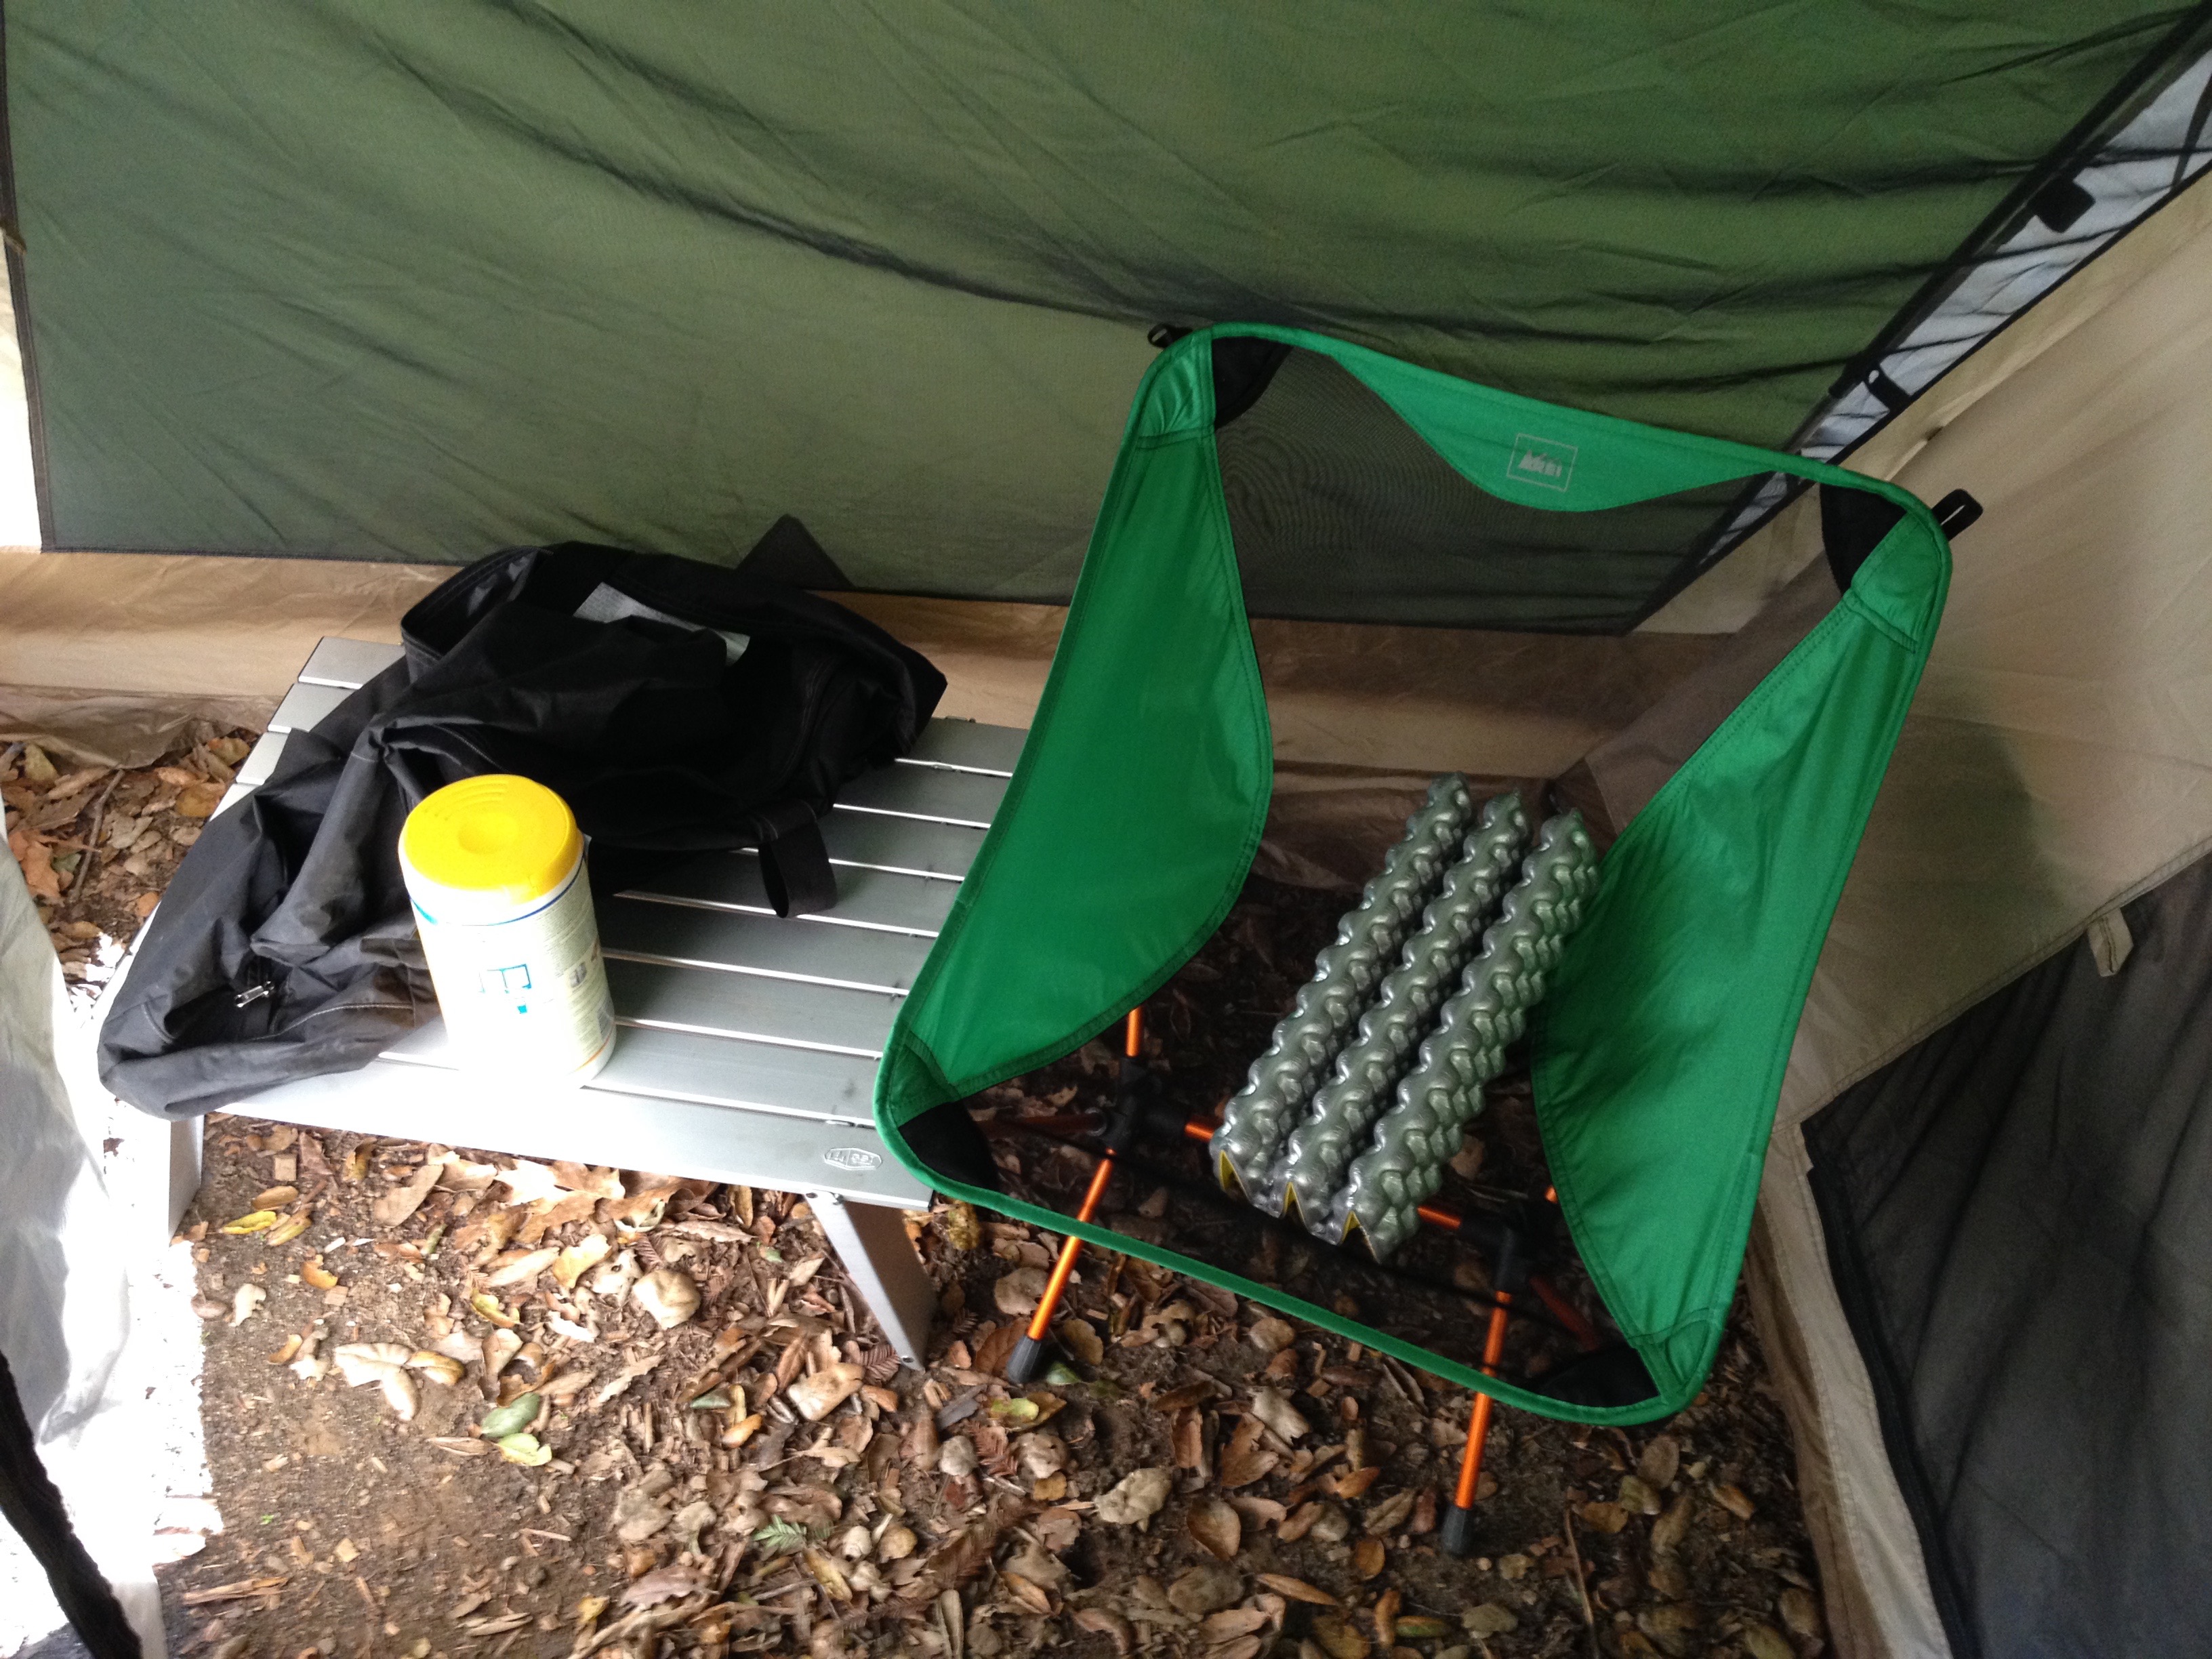
The rear vestibule is also plenty spacious even when the outer rainfly flap is zipped closed. To take glamping another notch up, I sometimes bring a laundry rack, like the kind you see in hotel closets to rest your suitcase on, and leave wet gear on there to prevent it getting wet from the rain soaked and sometimes puddling ground. Is that glamping or what?!
The front porch (screen room) is floorless, so you step onto the dirt when stepping onto the porch.
This is really key. It means you can be relatively dry, clean, and worry free in this area, but also use it to stow dirty gear without worrying about having to clean the floor later, or, if it’s raining but windless enough that you can leave the mesh windows and mesh doors (unzipping the waterproof flaps), some rain will get inside, but since the screen room is floorless, there’s no worry about puddles forming in the bathtub floor. It’s really rather ingenious.
Great place to leave your shoes, hang any wet clothes, or if you backpack is dirty, leaving that out there as well.
What’s more, to really take glamping in this tent as far as it can go, I usually have another chair and table in the porch. And when it’s stormy outside, this is also where breakfast gets made and eaten. When glamping with a few other friends who each have their own tent which might be smaller, this is also a great place to hang out to get out of the rain. Bring a larger camping table, have one person sitting in a chair in the main tent facing outward with the door fully open, and then a person on each side of the table and a fourth person with their back to the front door of the porch, and it’s plenty of space for 4 around the table for cooking or card games or just chilling. A little hanging lamp and you have a great little lounge.
If necessary, you could lay down a tarp and have two people sleeping in that front porch as well. That would technically allow 6 people to sleep in the tent. If you have a dog, you could have the dog sleeping in the front porch as well, to keep the main tent room’s floor protected from scratches or rips.
For the rear vestibule, note that unzipping either side and lifting up the central flap to make an awning is really for shade and ventilation. Don’t do that in the rain as the flap will collect water in the center and skew the tent, perhaps even damaging it if enough water puddles up. But on hot days it’s a real godsend, It completely opens up the back, and the doors on both sides of the main tent room are a two layer design like the porch windows and main porch door, meaning that you can unzip the waterproof flap while leaving a no-seeum mesh zipped up, allowing for complete pass-through ventilation from floor to ceiling. When the sun is blazing, this is hard to beat.
SETUP:
The instructions are pretty easy. You get 8 regular poles, one super long one, and one aluminum polished thin and curved one. You attach 4 poles to each hub, making a twin dome structure. The large pole goes into the rain fly in the center, and then the whole rain fly goes over the top. Once secured, the thin cured pole goes out front over the front porch.
It’s all pretty intuitive, but one piece of advice if you’re setting this up alone: Once the twin dome is setup, set the rain fly on the ground upside down on one side and buckle in that side to the anchors. Then get the pole inserted. Then I would attach a small rock at either end on the side than isn’t buckled in. Then lift the flap and get the rocks over the other side. The reason to do this is that the big central pole is pretty heavy and doesn’t stay balanced at the top and will keep falling back down on the buckled in side. I have setup the tent without this method, but this has proven the easiest and fastest for one person setup, at least for me.
With all these luxuries, and the sheer weight and mass of all the gear such a glamping trip would entail, this is really best for multi-day trips with a base camp. A good trip would be about 4 or 5 days minimum. Anything shorter and the sheer effort to get everything setup wouldn’t really feel worth it. The longest I’ve gone camping with this tent was 6 days, but this would be plenty comfortable for a couple of weeks as a home base while doing shorter overnighters and day trips.
