

Base stats:
– BTU: 7K max (LPG or white gas)
– Weight: 29 oz (1lb 13oz)
– Stove comparison chart
As stoves go, the Primus ETA Power EF is an incredibly over-engieered work of art, best suited for a heavy cooking car camping trip.
While definitely not suited for a one person backpacking trip, it could be a great boon on a four person trip when distributing and sharing load.
Let’s start with the basics:
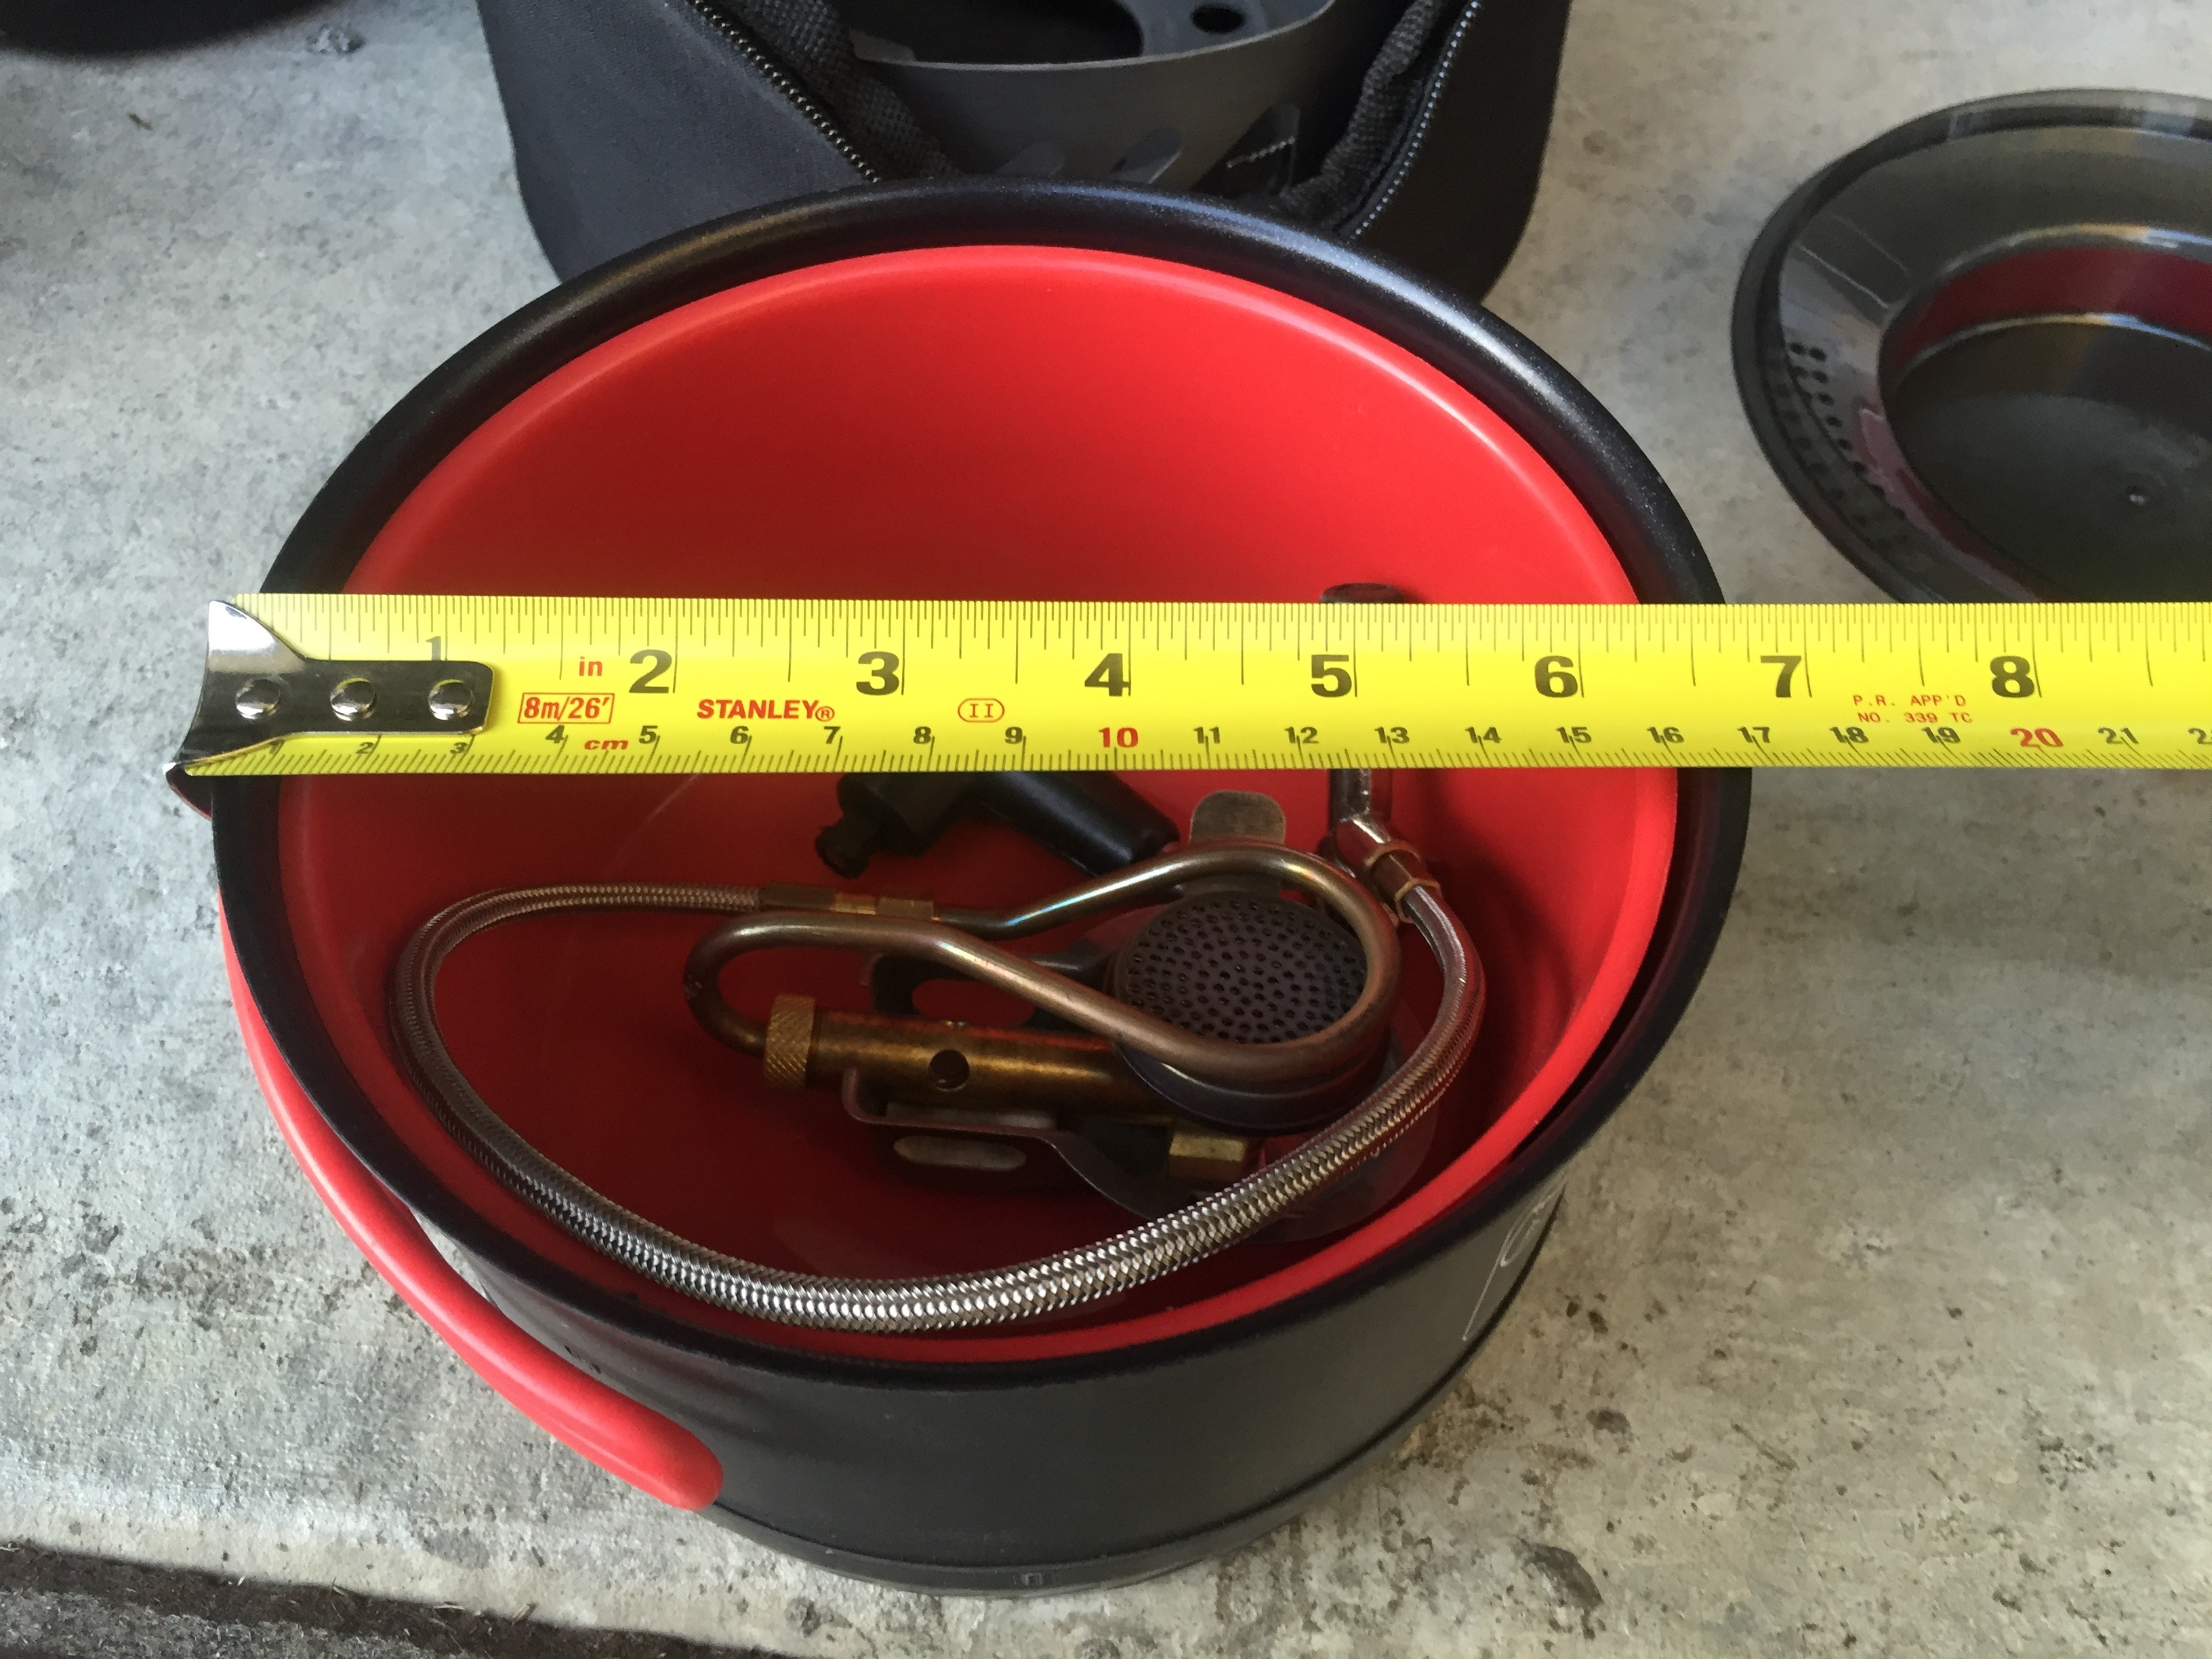
The ETA Power EF comes with
– Colander
– Base Pot (1.8L)
– Plastic Bowl (red)
– Stove Unit
– Base or windshield
This is quite the engineering marvel.
– The stove integrates into the windshield,
– the pot stand supports are very long, allowing for greater flexibility,
– there is an option to use a larger 3L pot.
– It’s very low and stable.
– Boils water incredibly fast, but has impressive simmer control.
– Works with LPG, or with a separately sold attachment, works with liquid fuels as well.
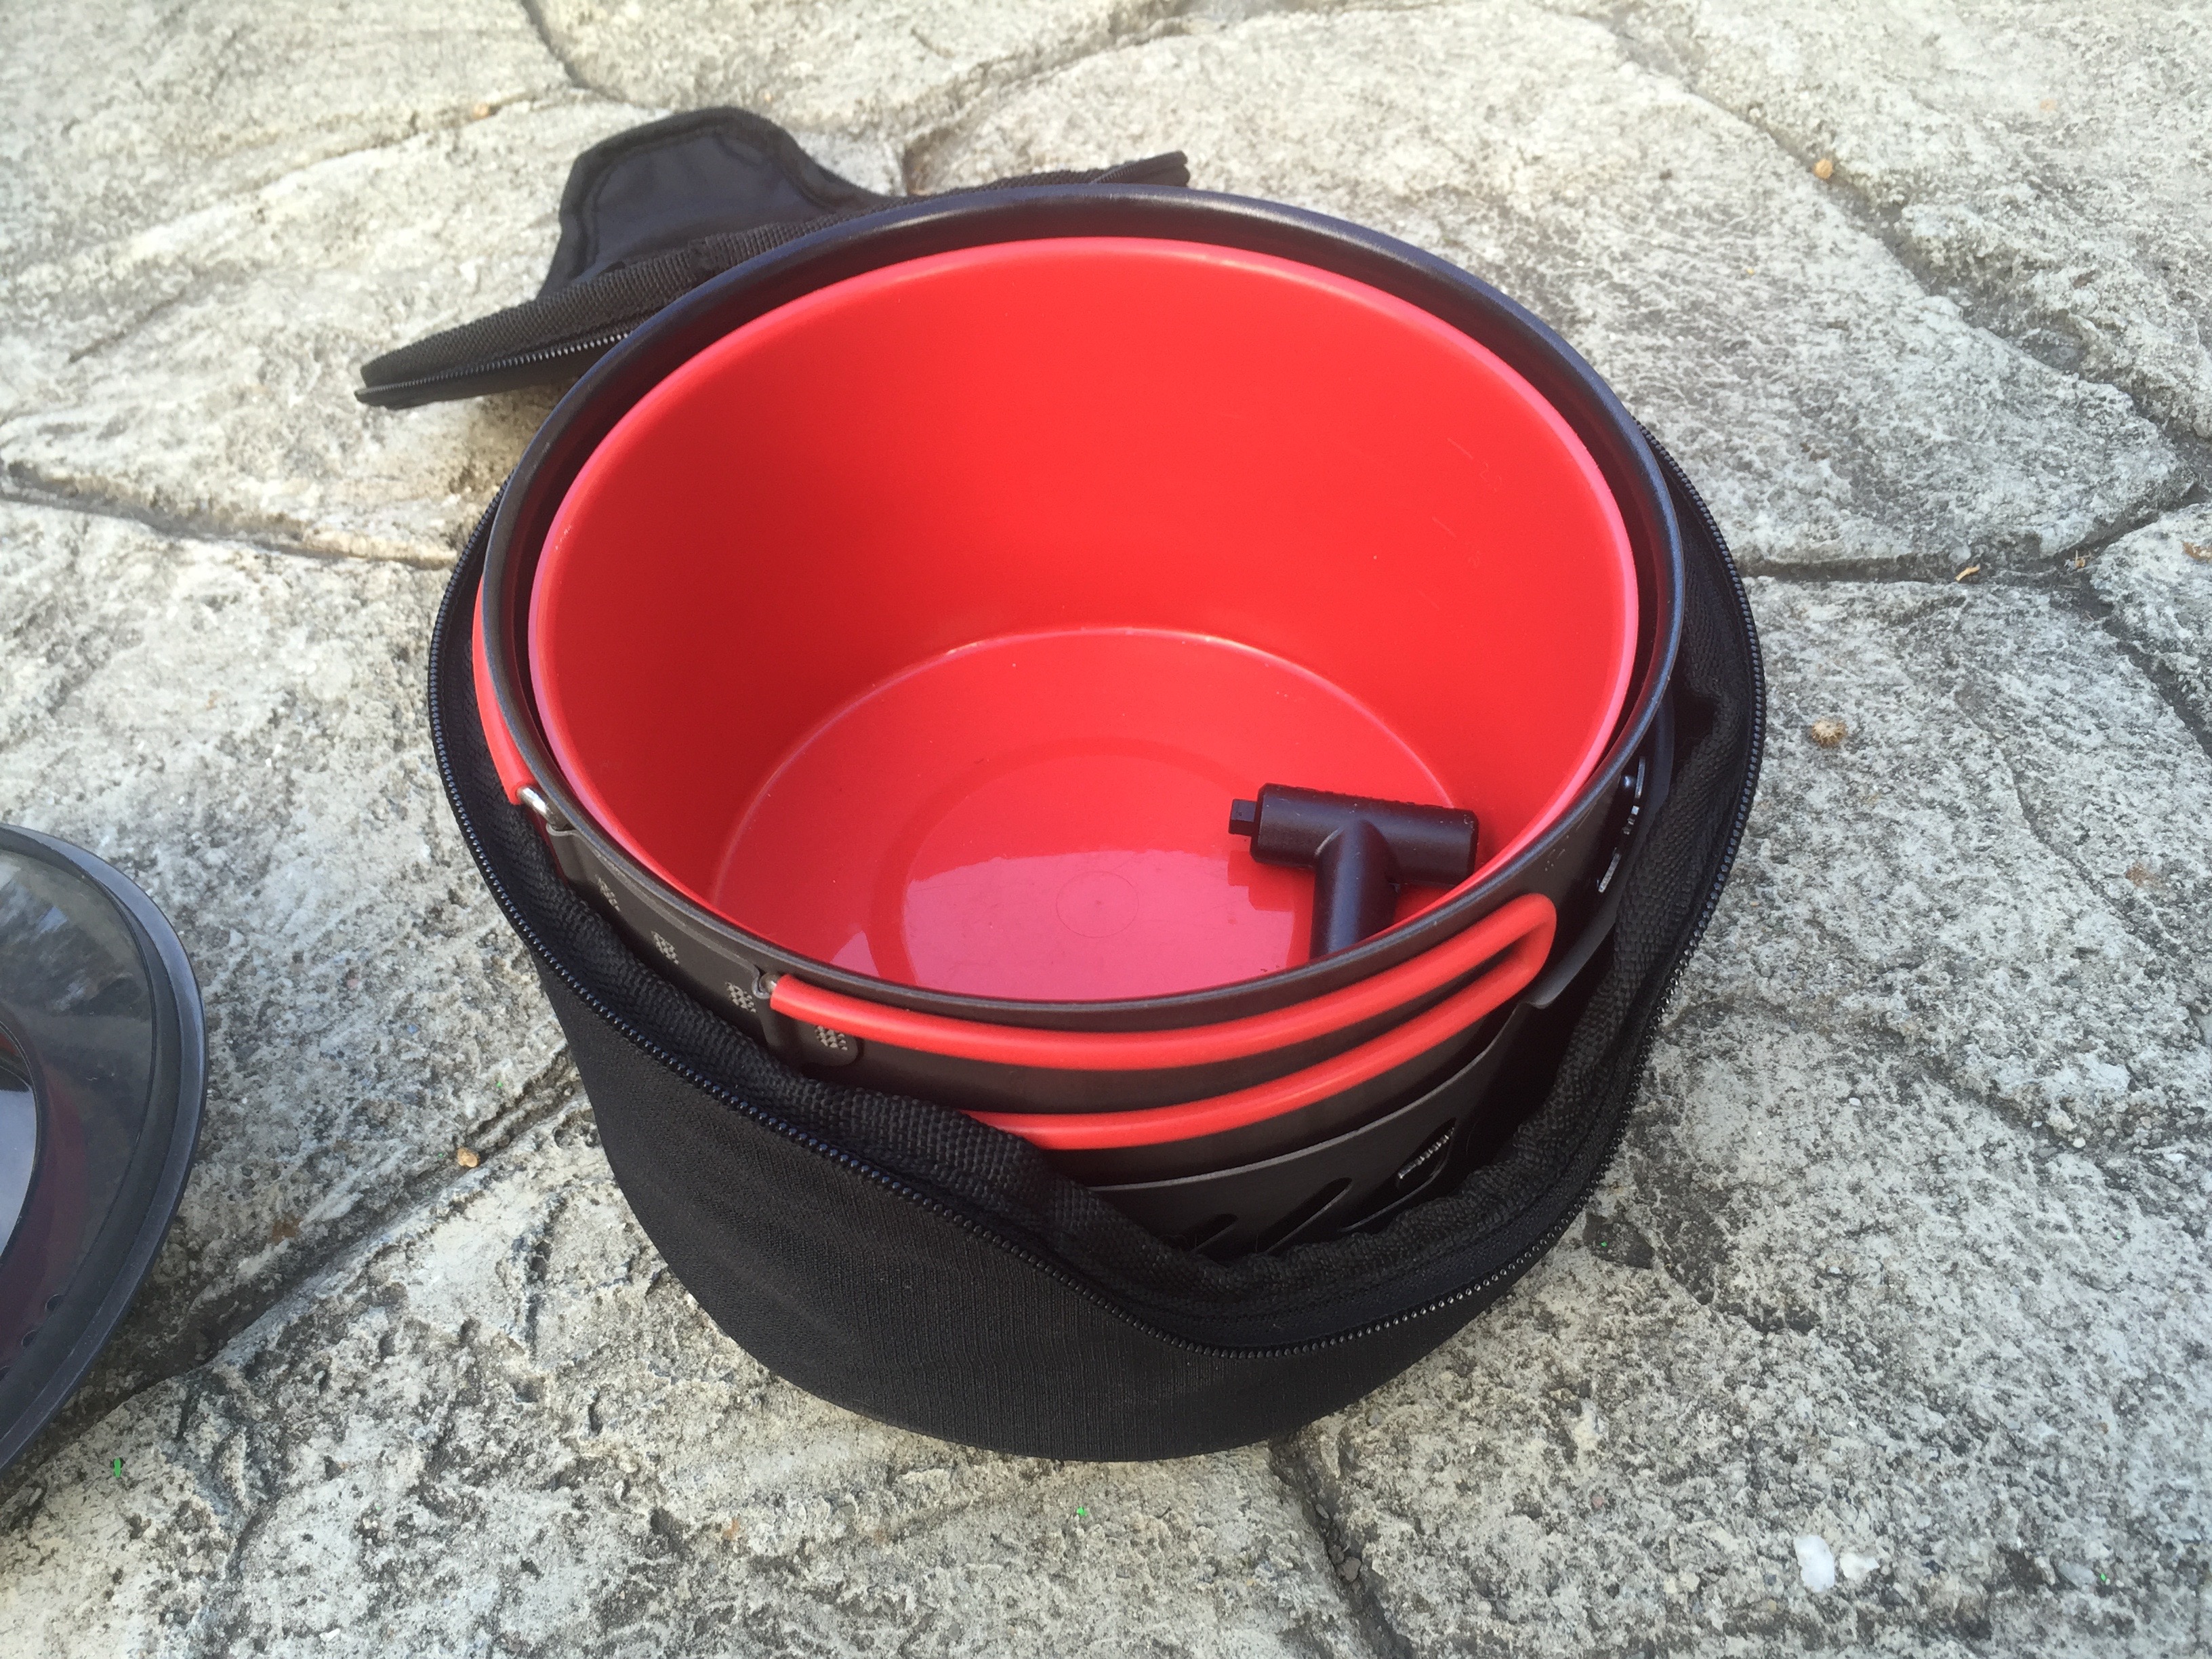
– The case is also a cozy, allowing you to start cooking up a stew, and when it’s nearly done but not quite, you can turn off the stove and move the cooking pot to the cozy to finish cooking.
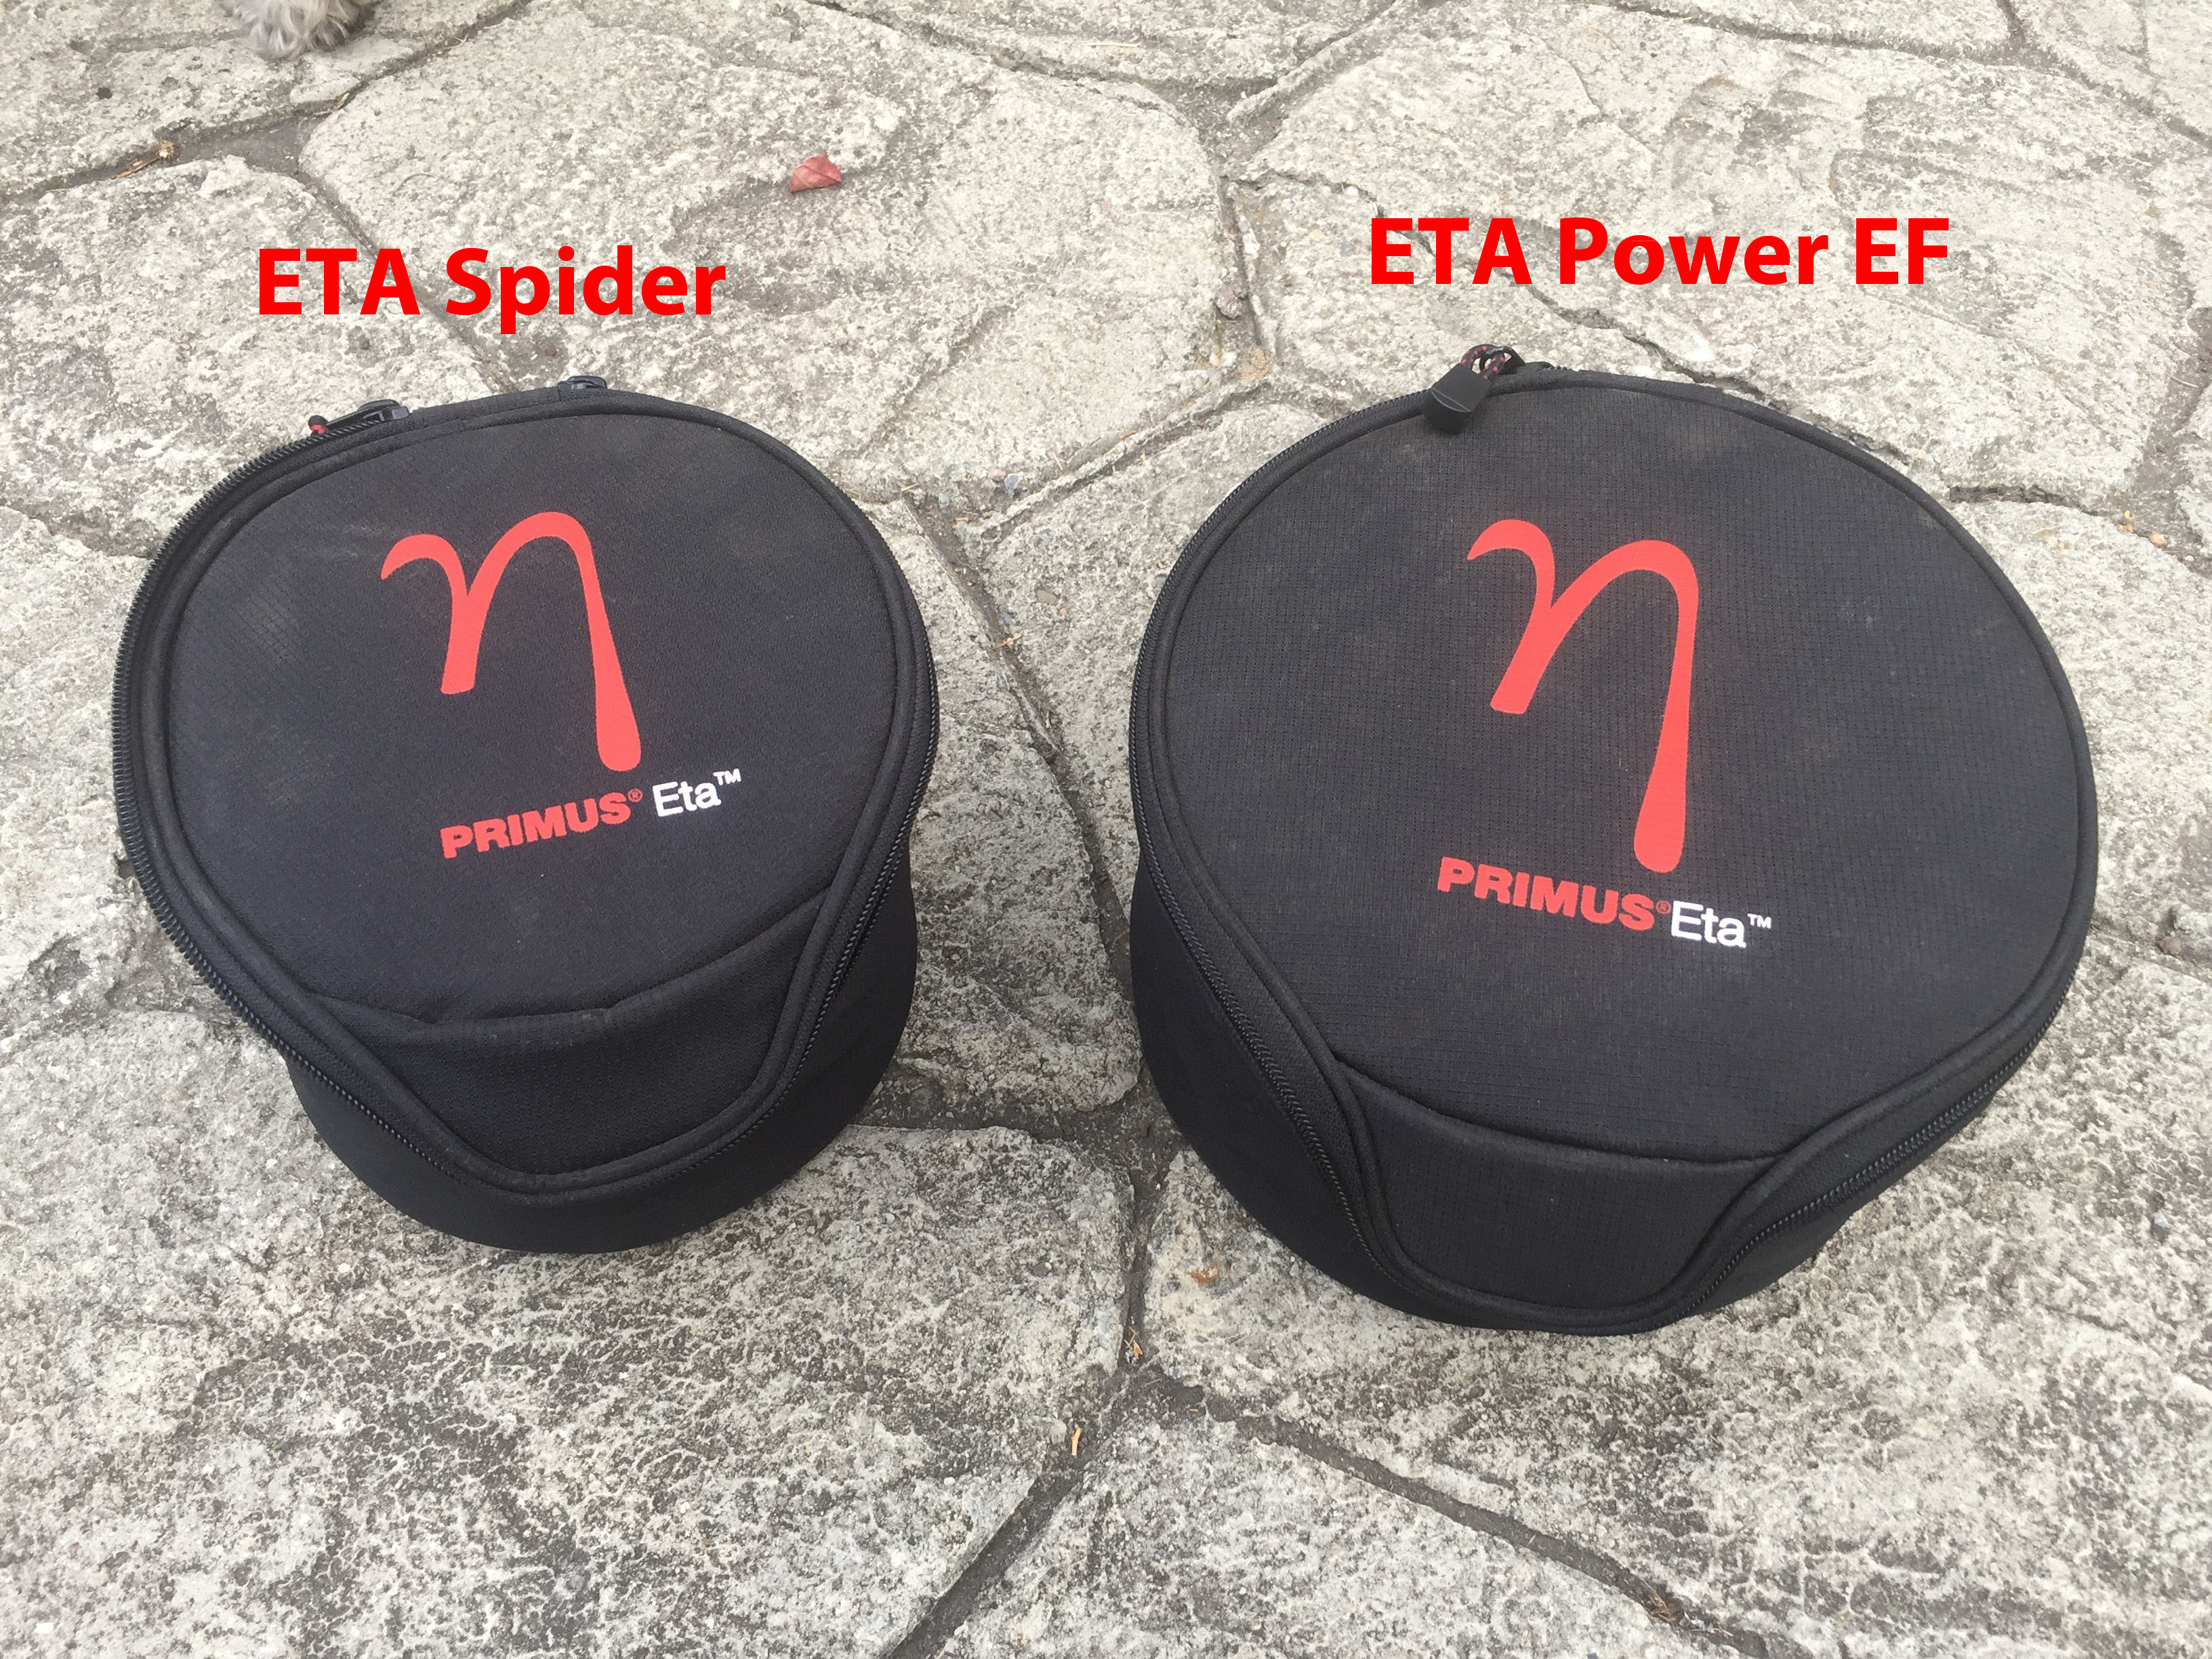
Some folks may wonder about the differences between the ETA Power EF and the ETA Spider, so I’ve tried to include several photos comparing the two. In some photos, there are additional stoves for further comparison

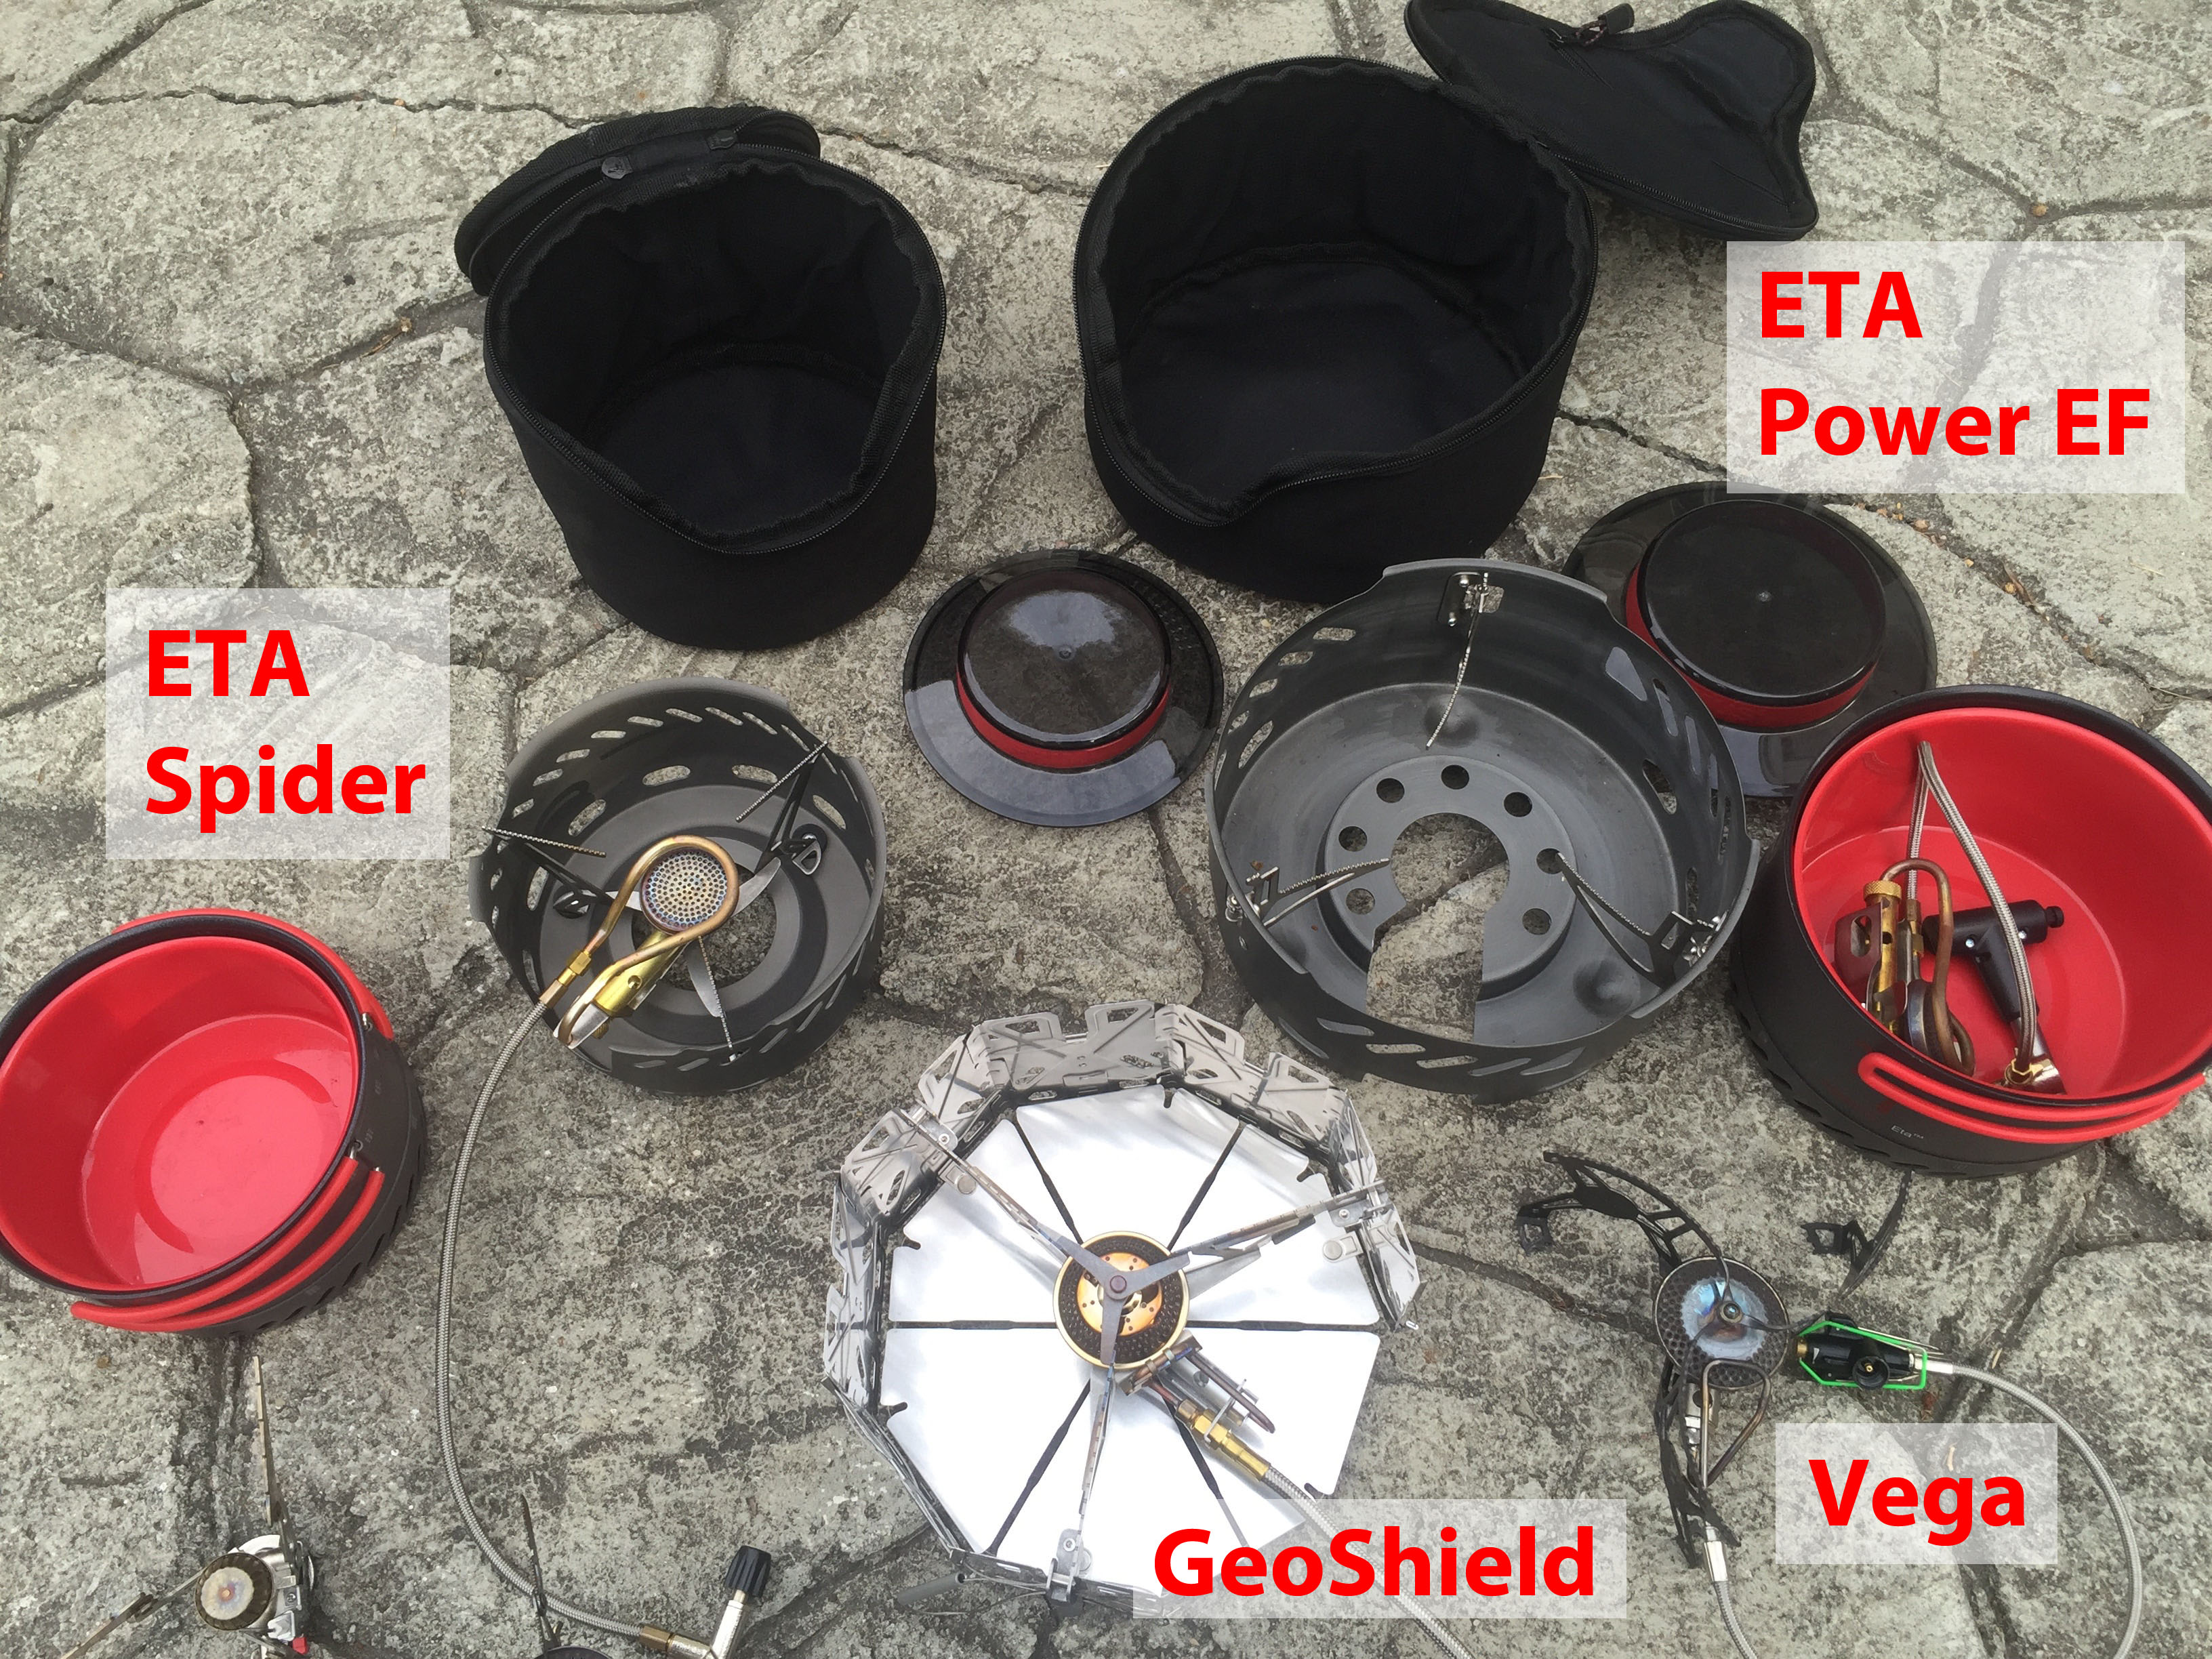
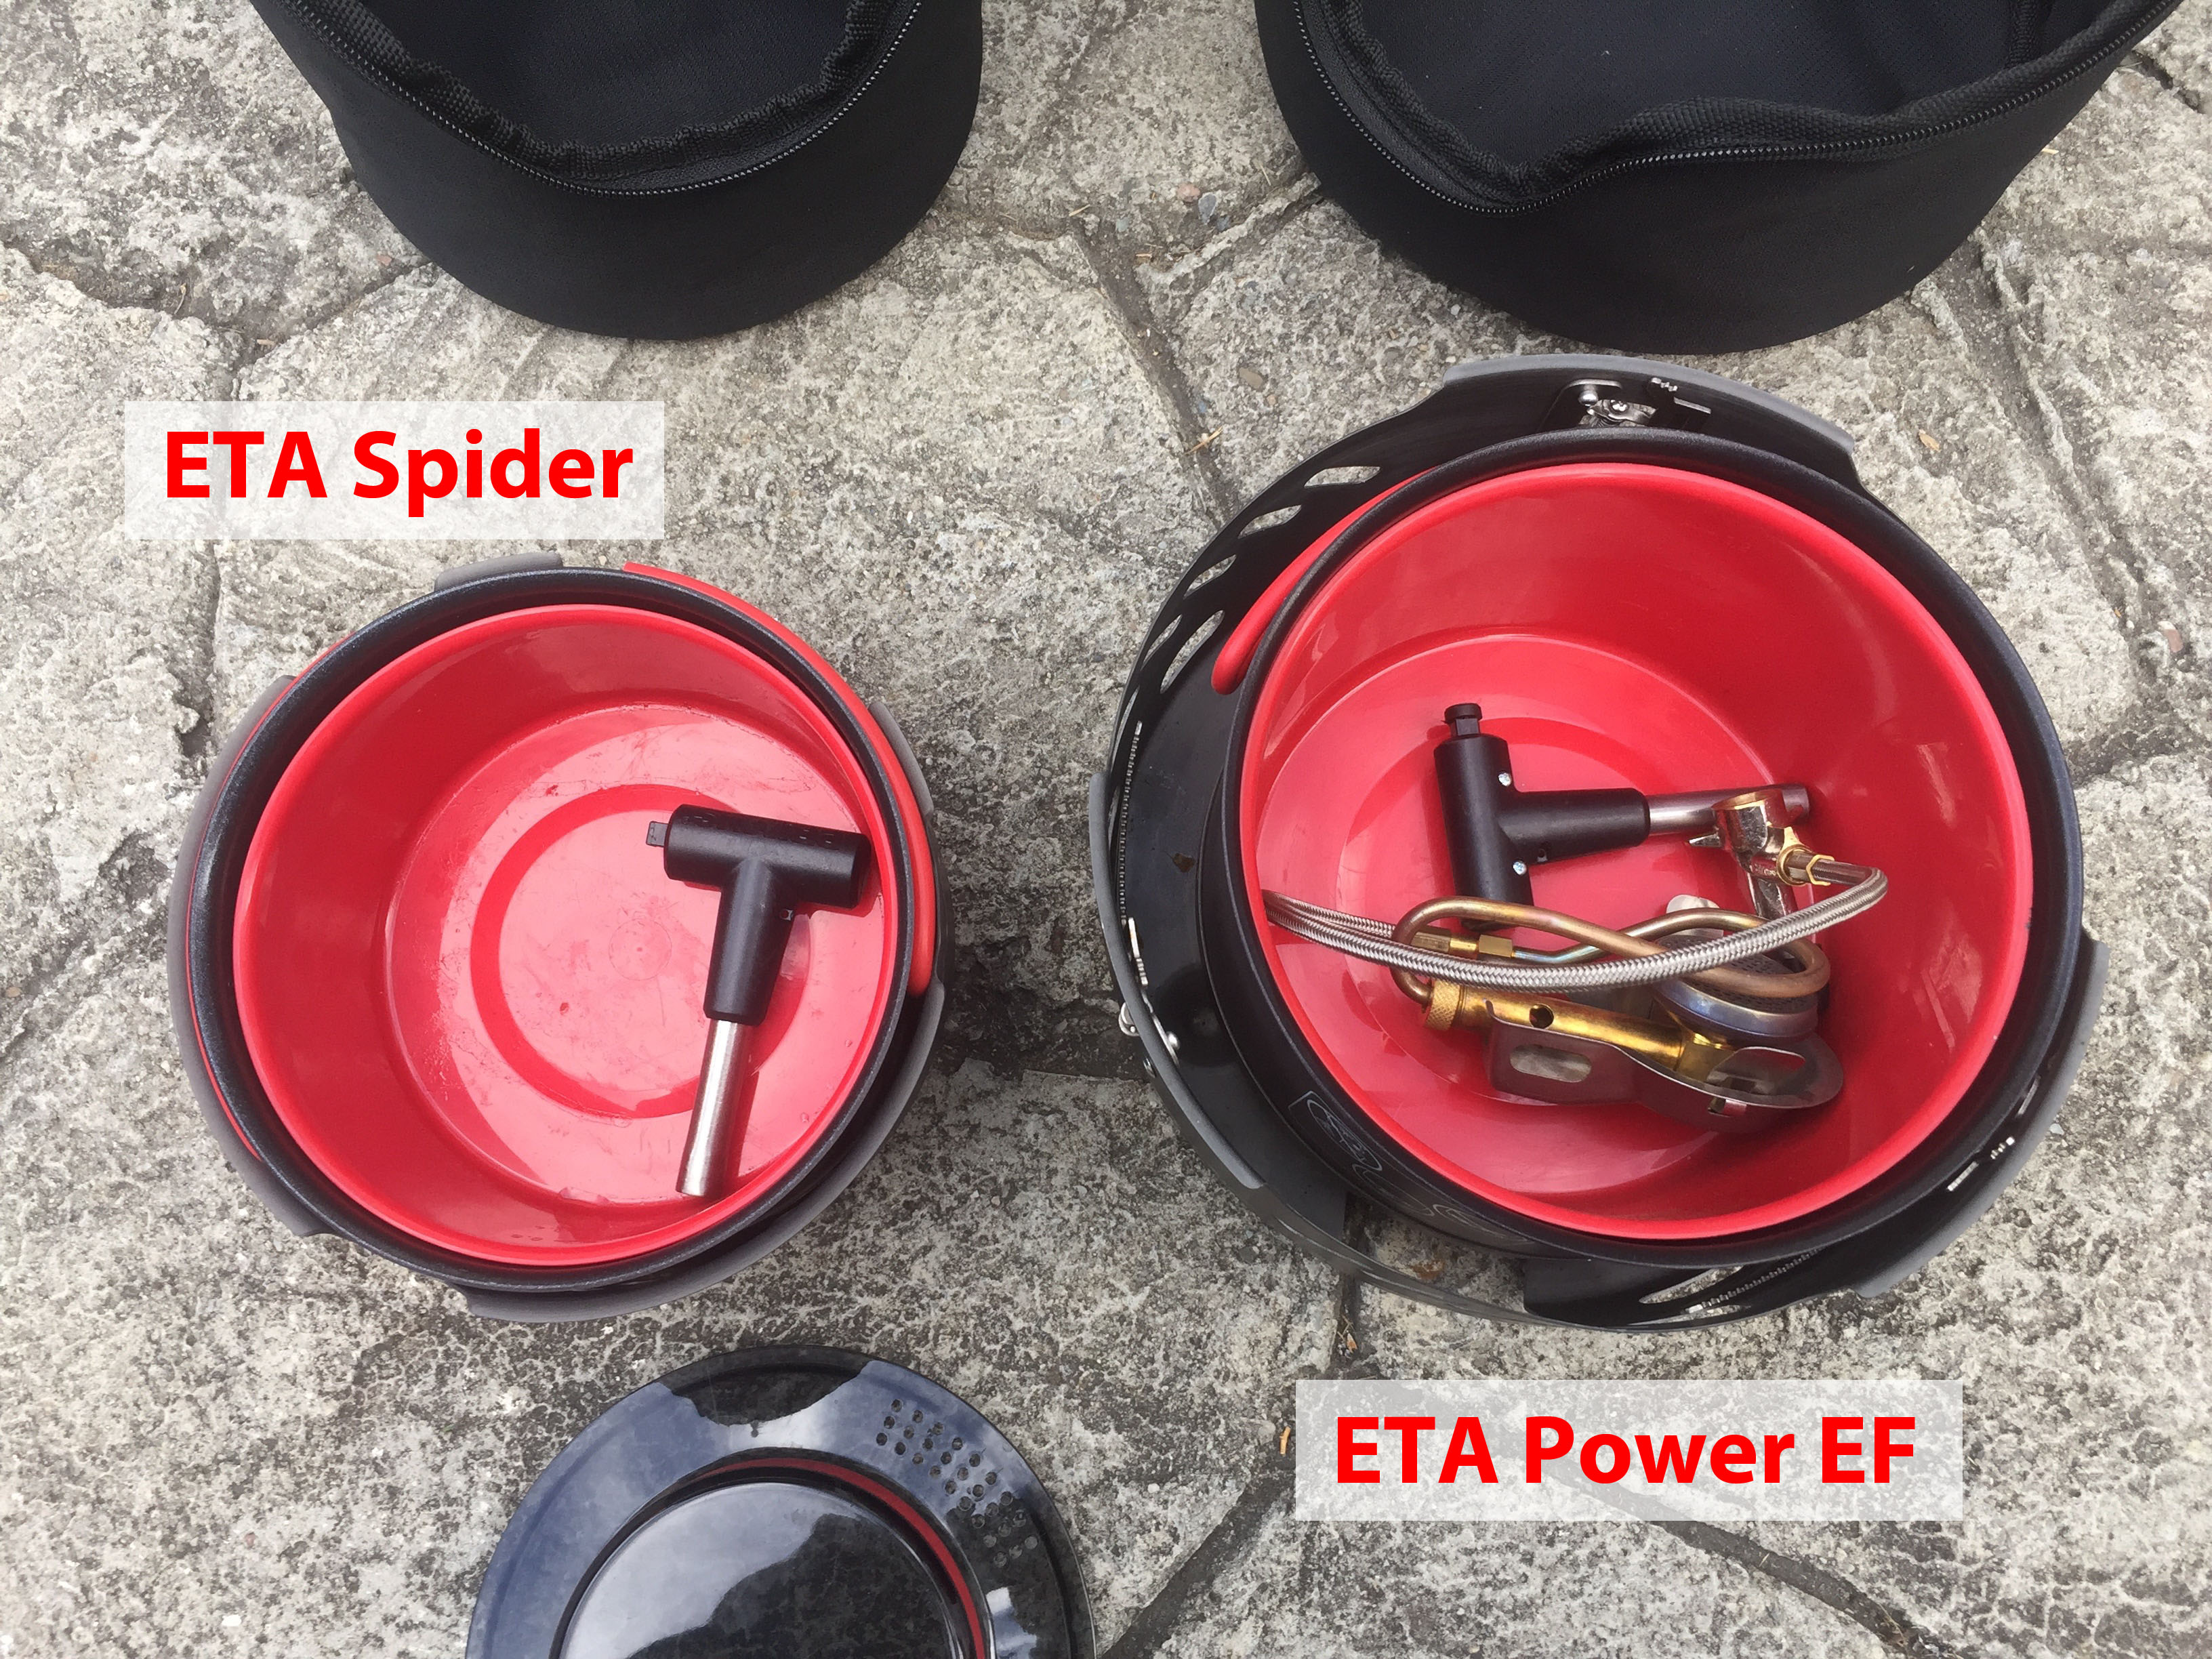
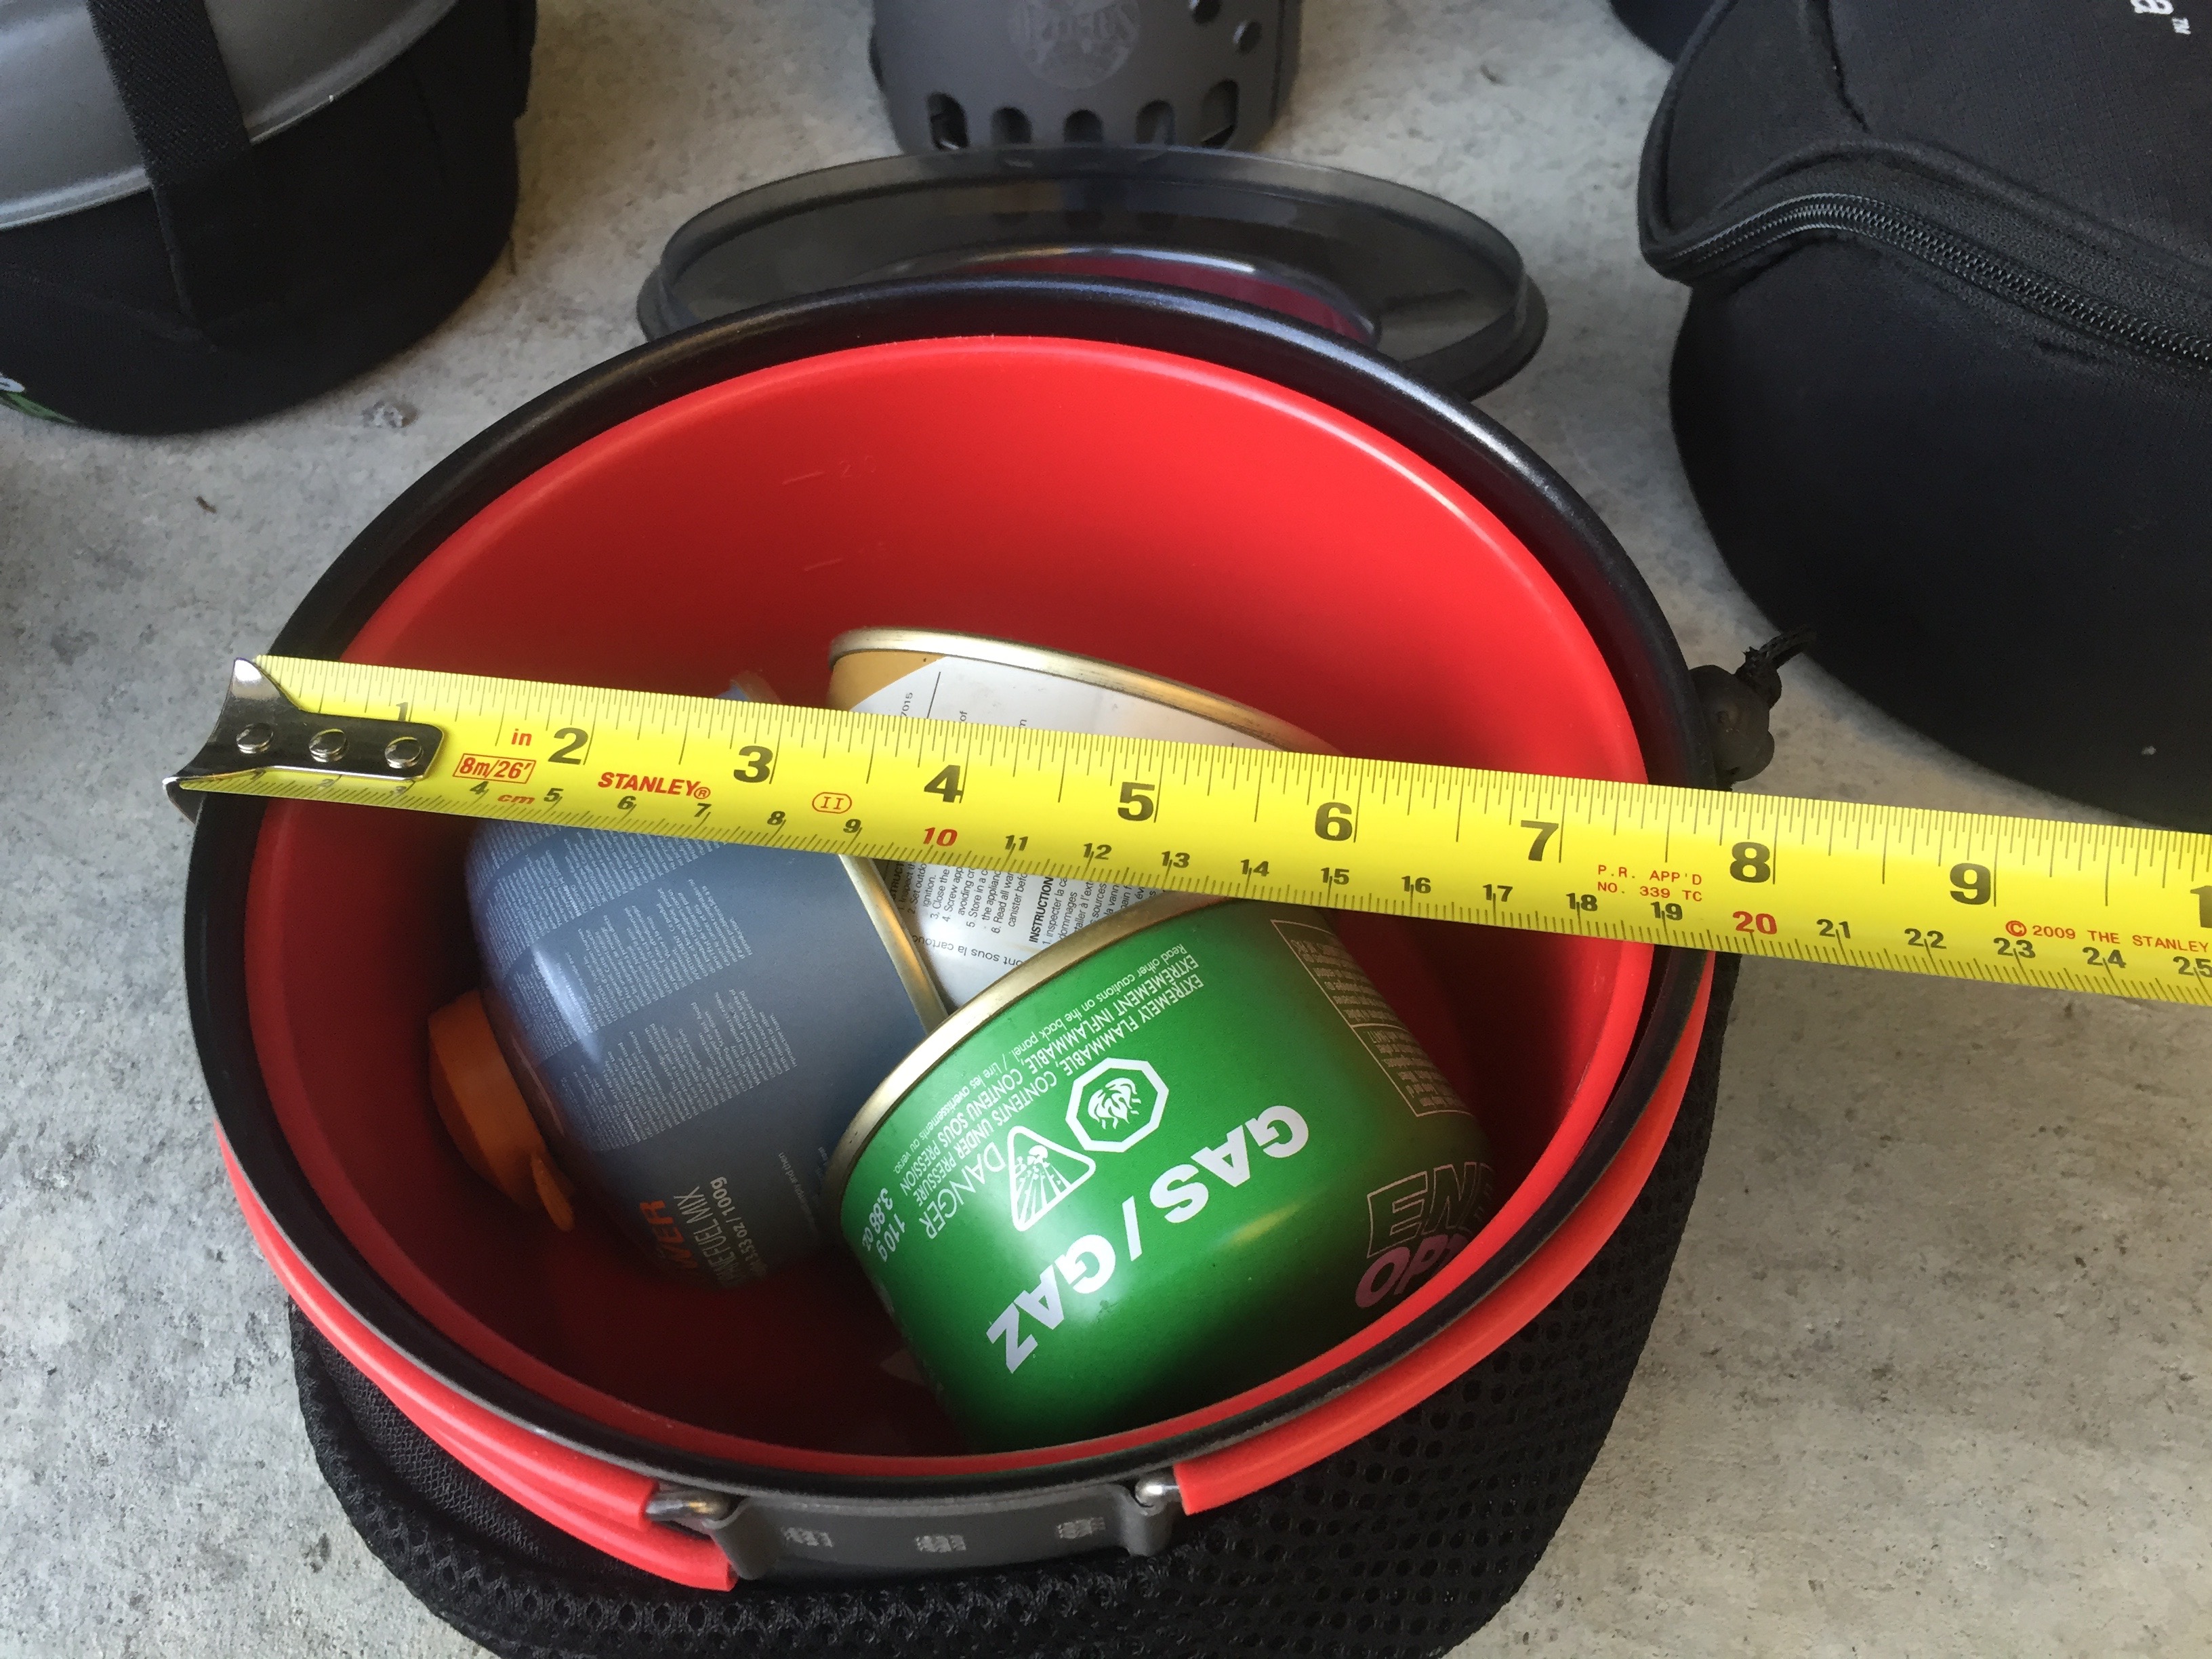
In the last photo above, one thing that’s interesting to note is that when everything is nestled together, there is a gap between ETA Power EF’s pot and the windshield. This is for optional additional use of the ETA 3.0L pot. Notice that the ETA Spider has not gap, as it’s really designed as a set system, though, the ETA Spider’s stove works independently from the windshield if so desired.
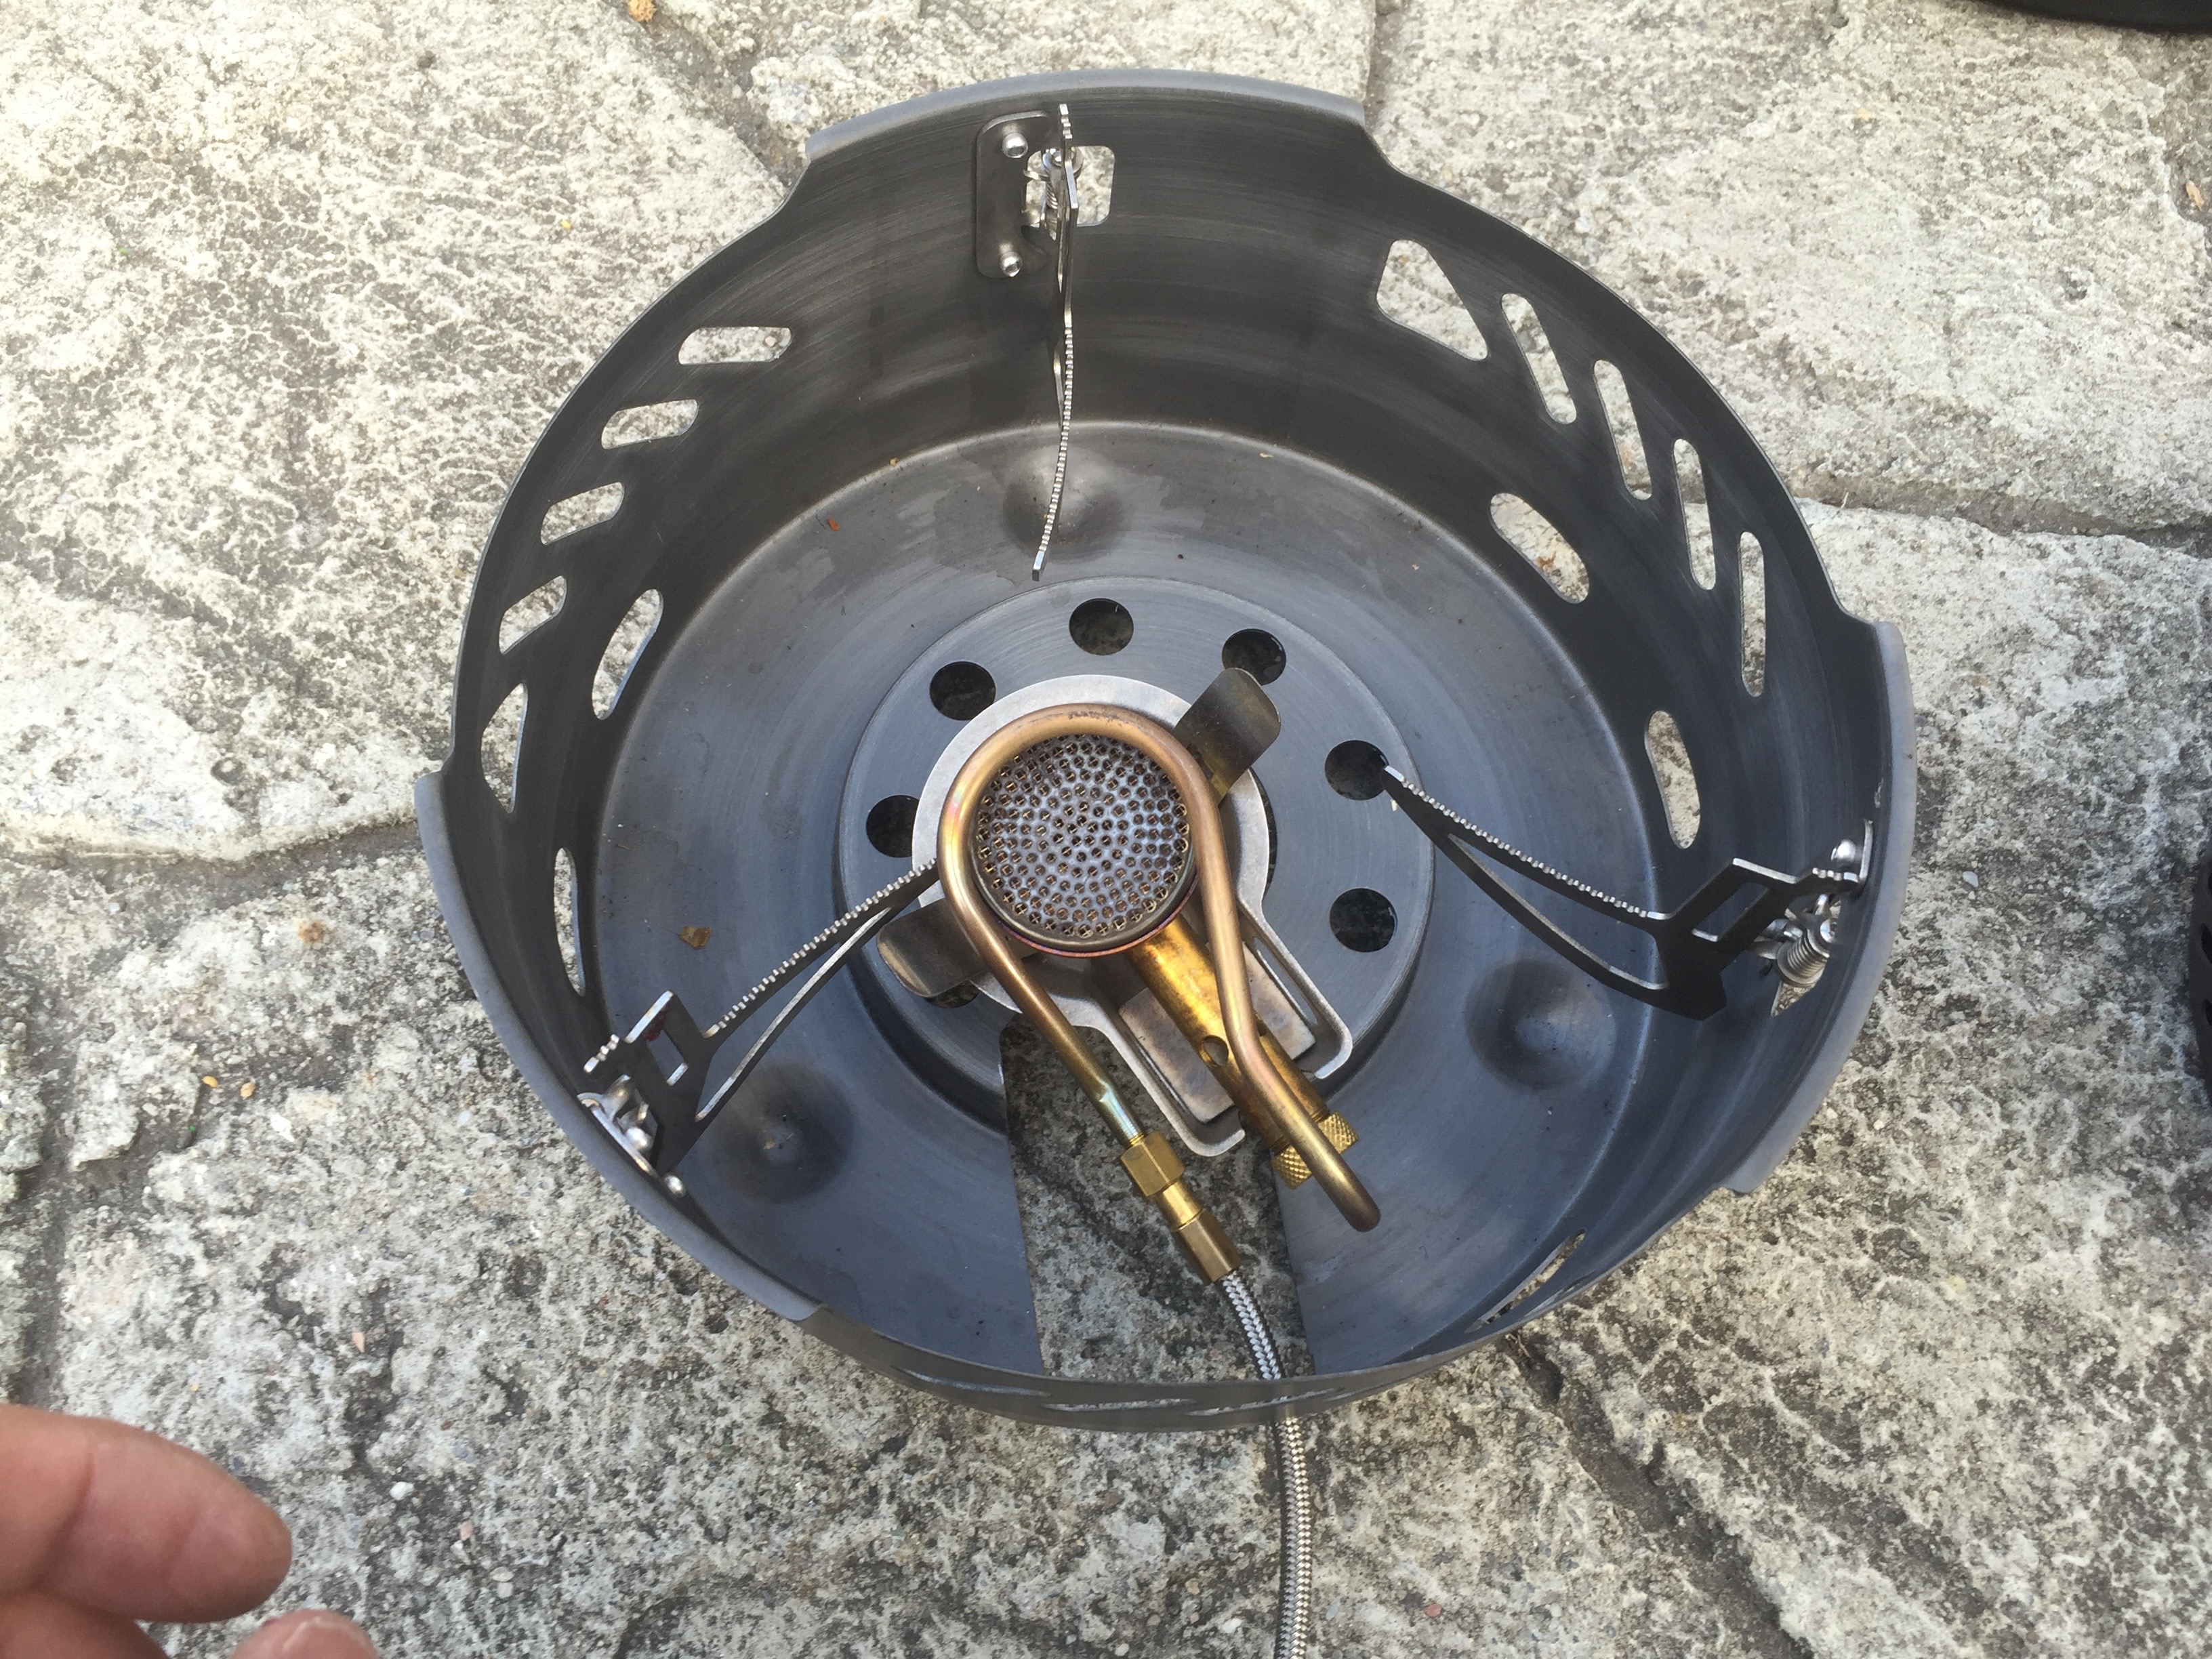
The stove is very interesting, and a lot of thought went into how it would be used.
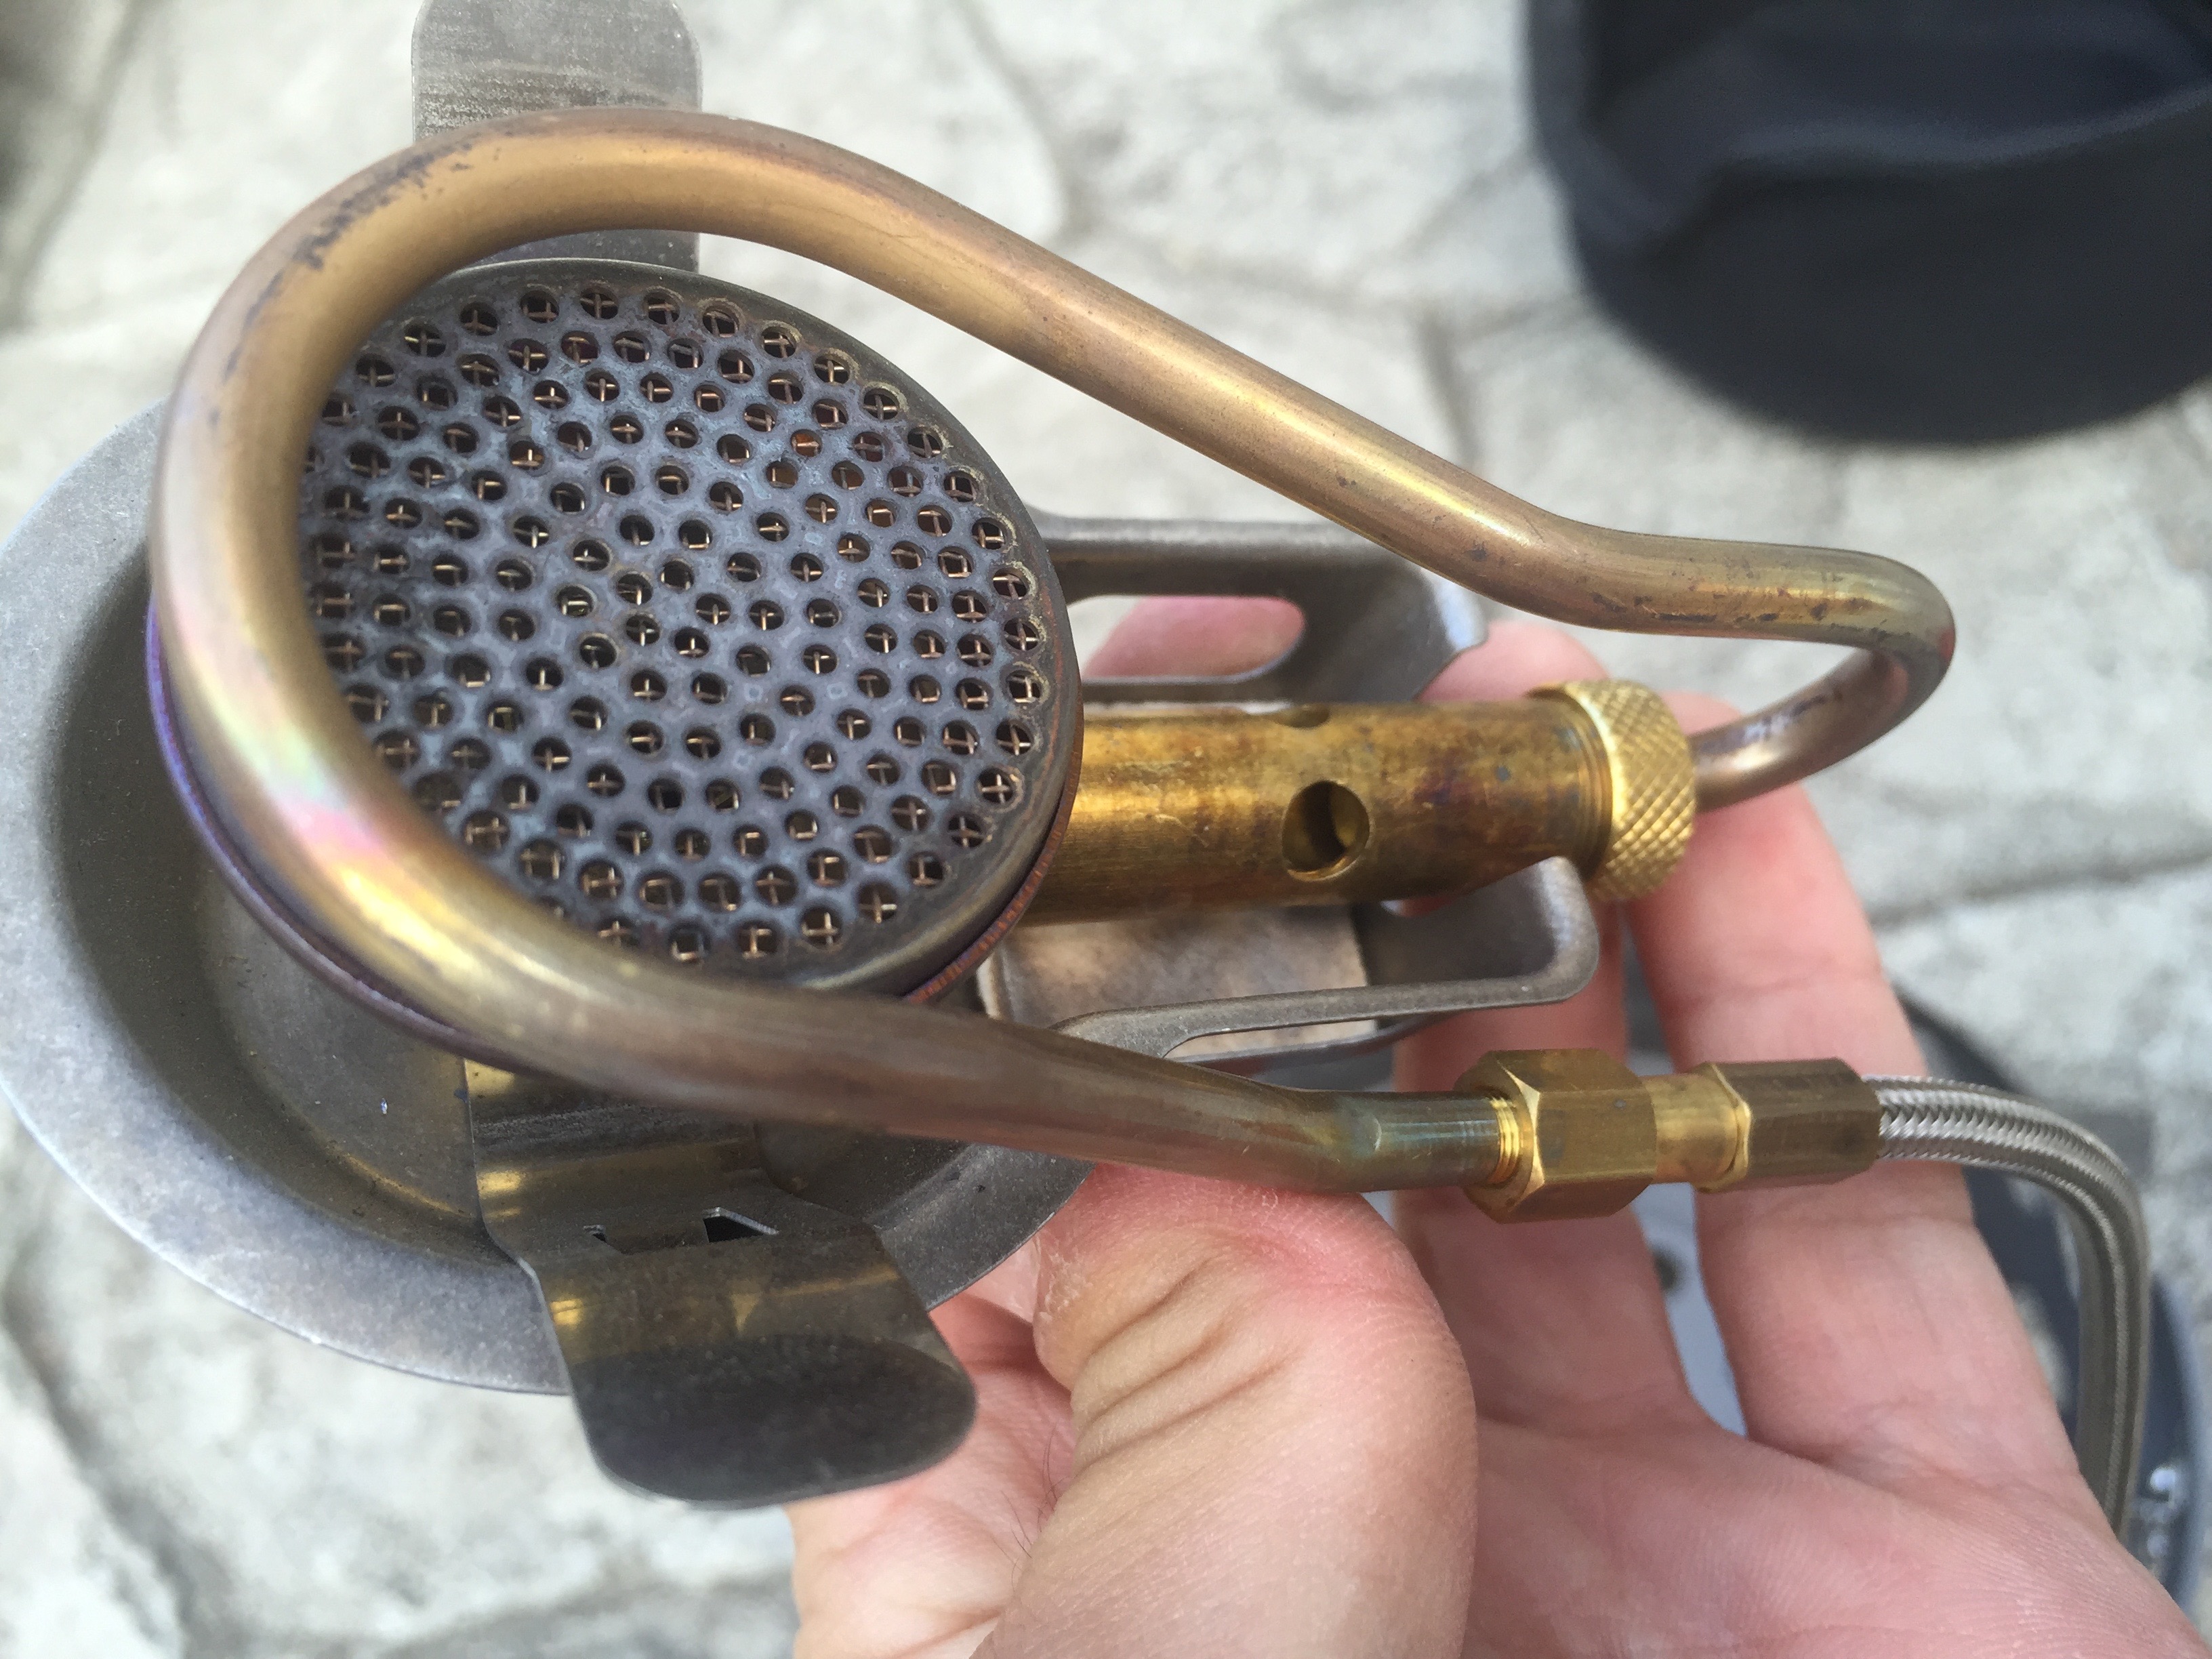
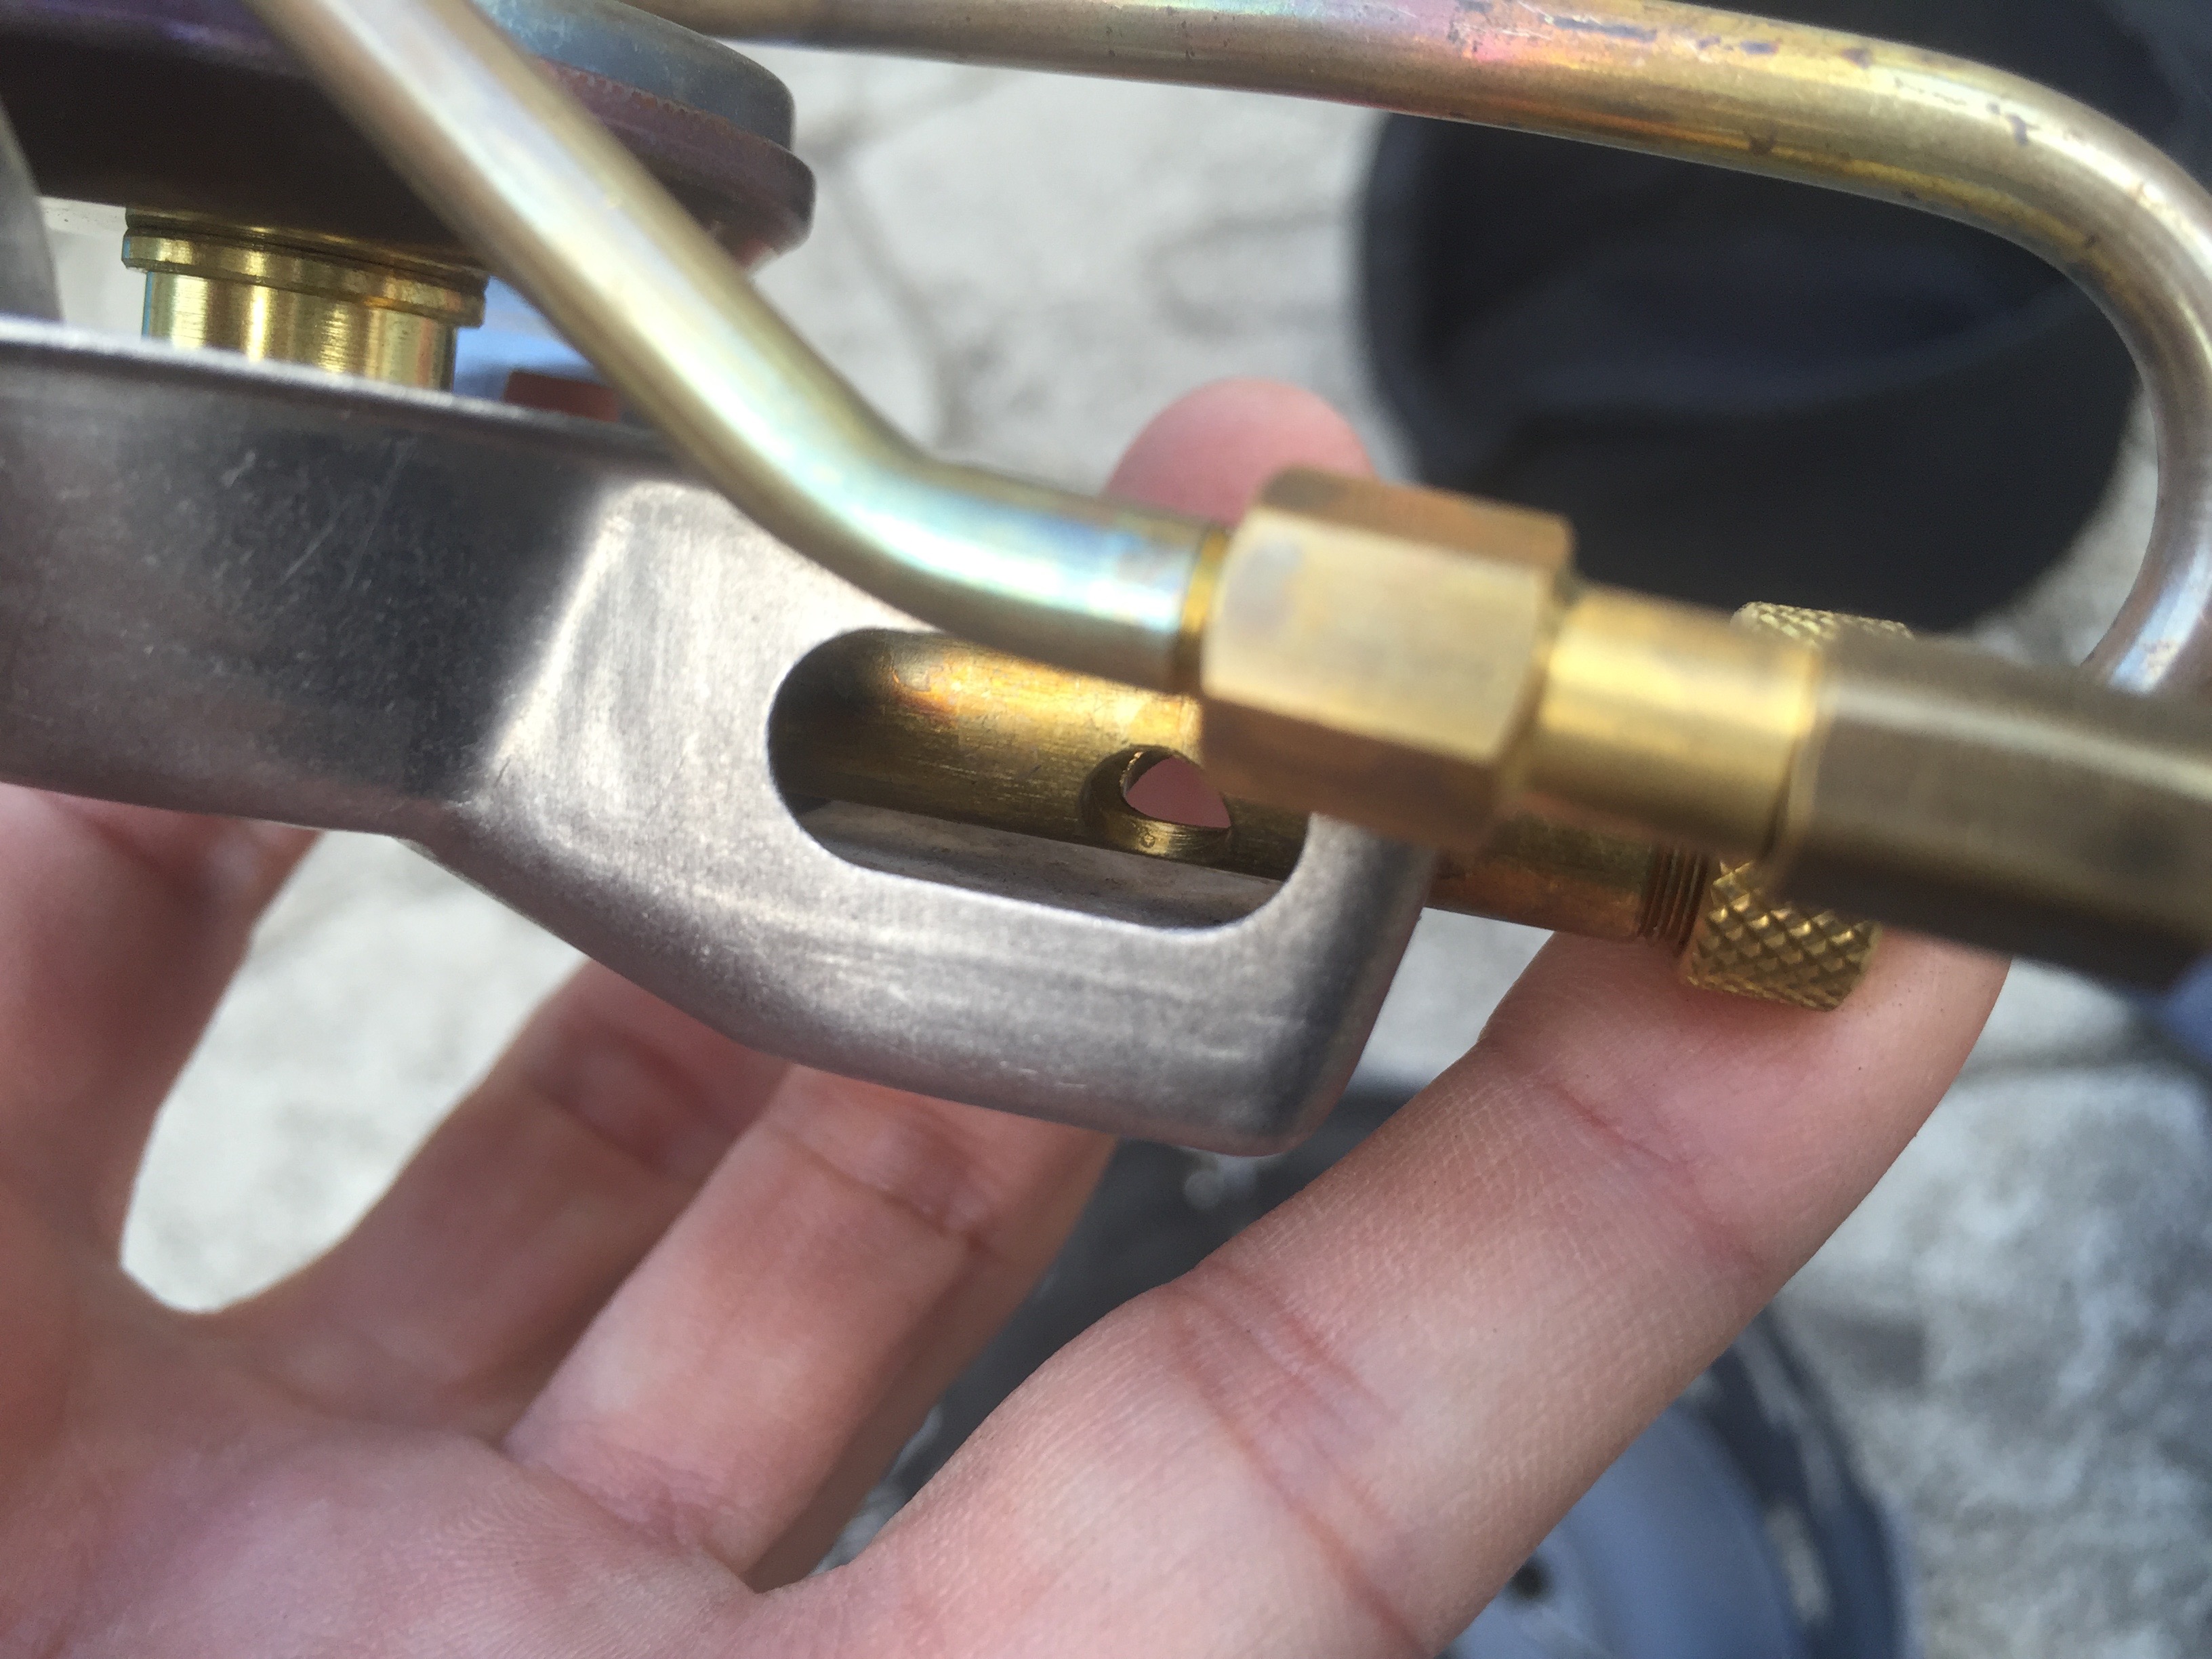
As you can see, the ETA Power EF stove has a generator coil for heating liquid fuels. What this means is that you can use LPG gas canisters inverted, running liquid fuel. Useful in cold conditions or to get the last of the fuel out.


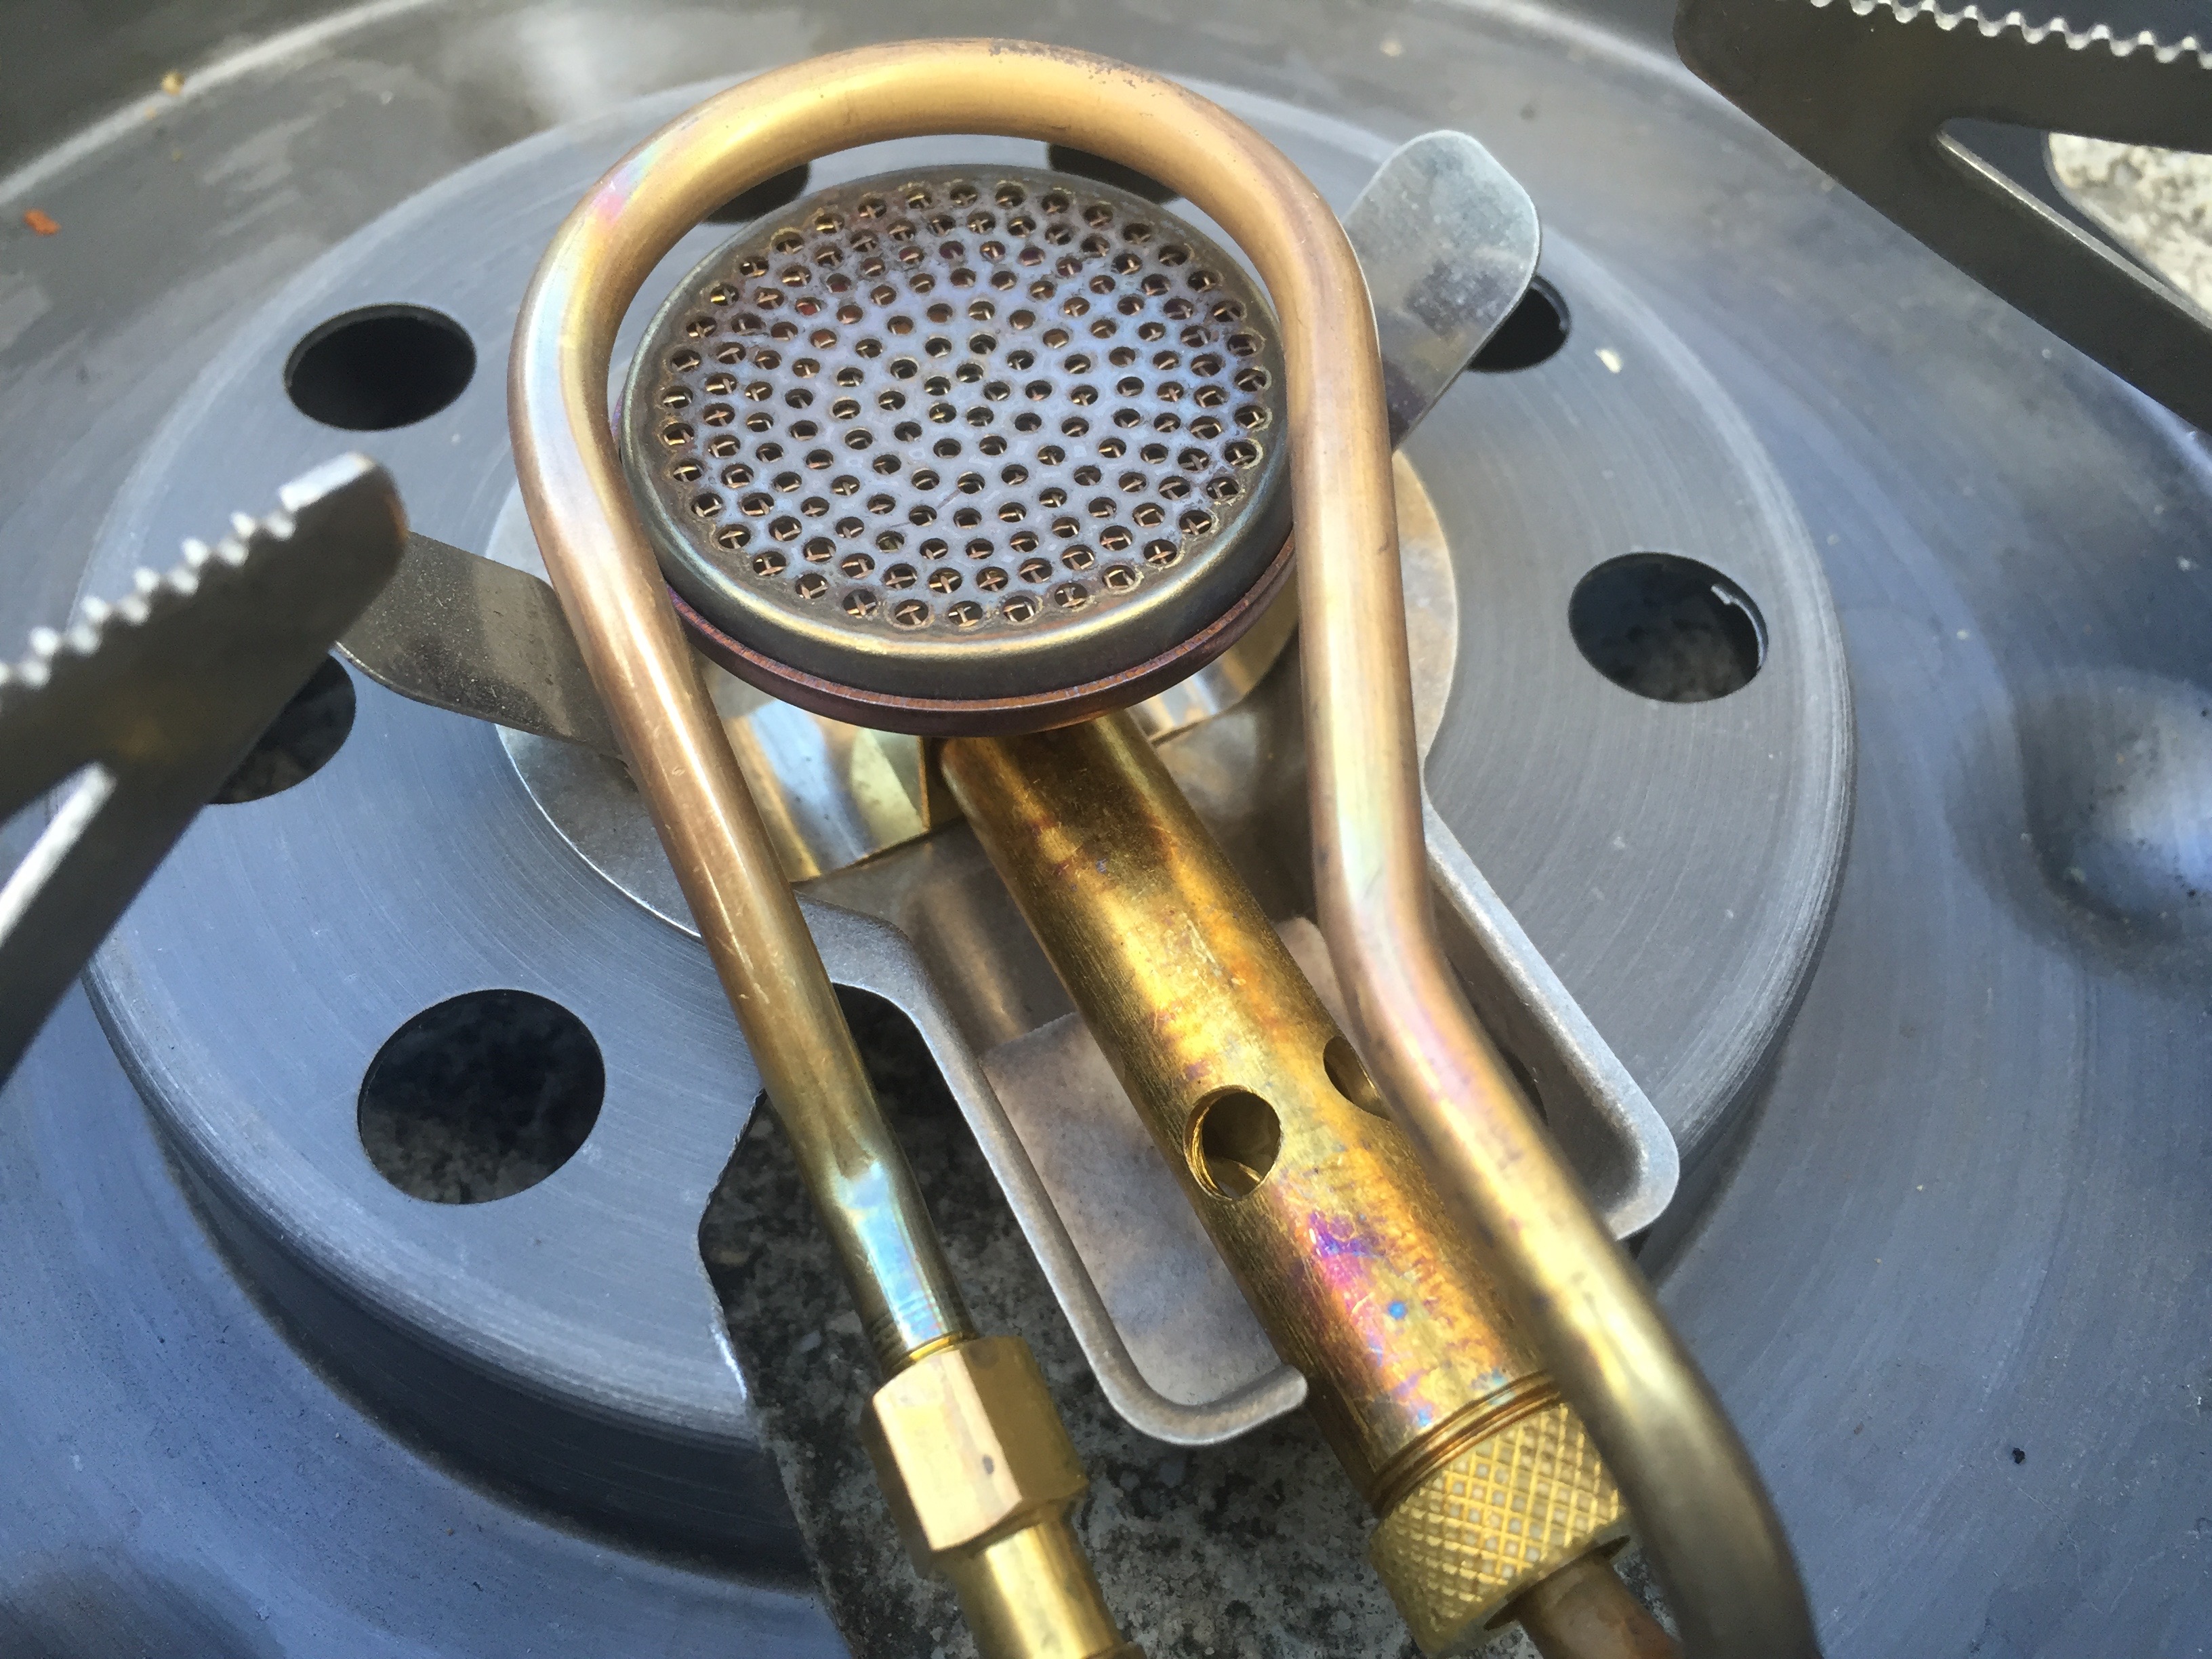
Notice the ETA Power EF (left), has no protective brackets for the generator. The Snow Peak Geoshield (right) has steel reinforcement brackets to mitigate potential damage to the generator. Brass is not as affected by heat, and transfers temp well, but is also softer, bending more easily. This product would have benefited from some reinforcement brackets.
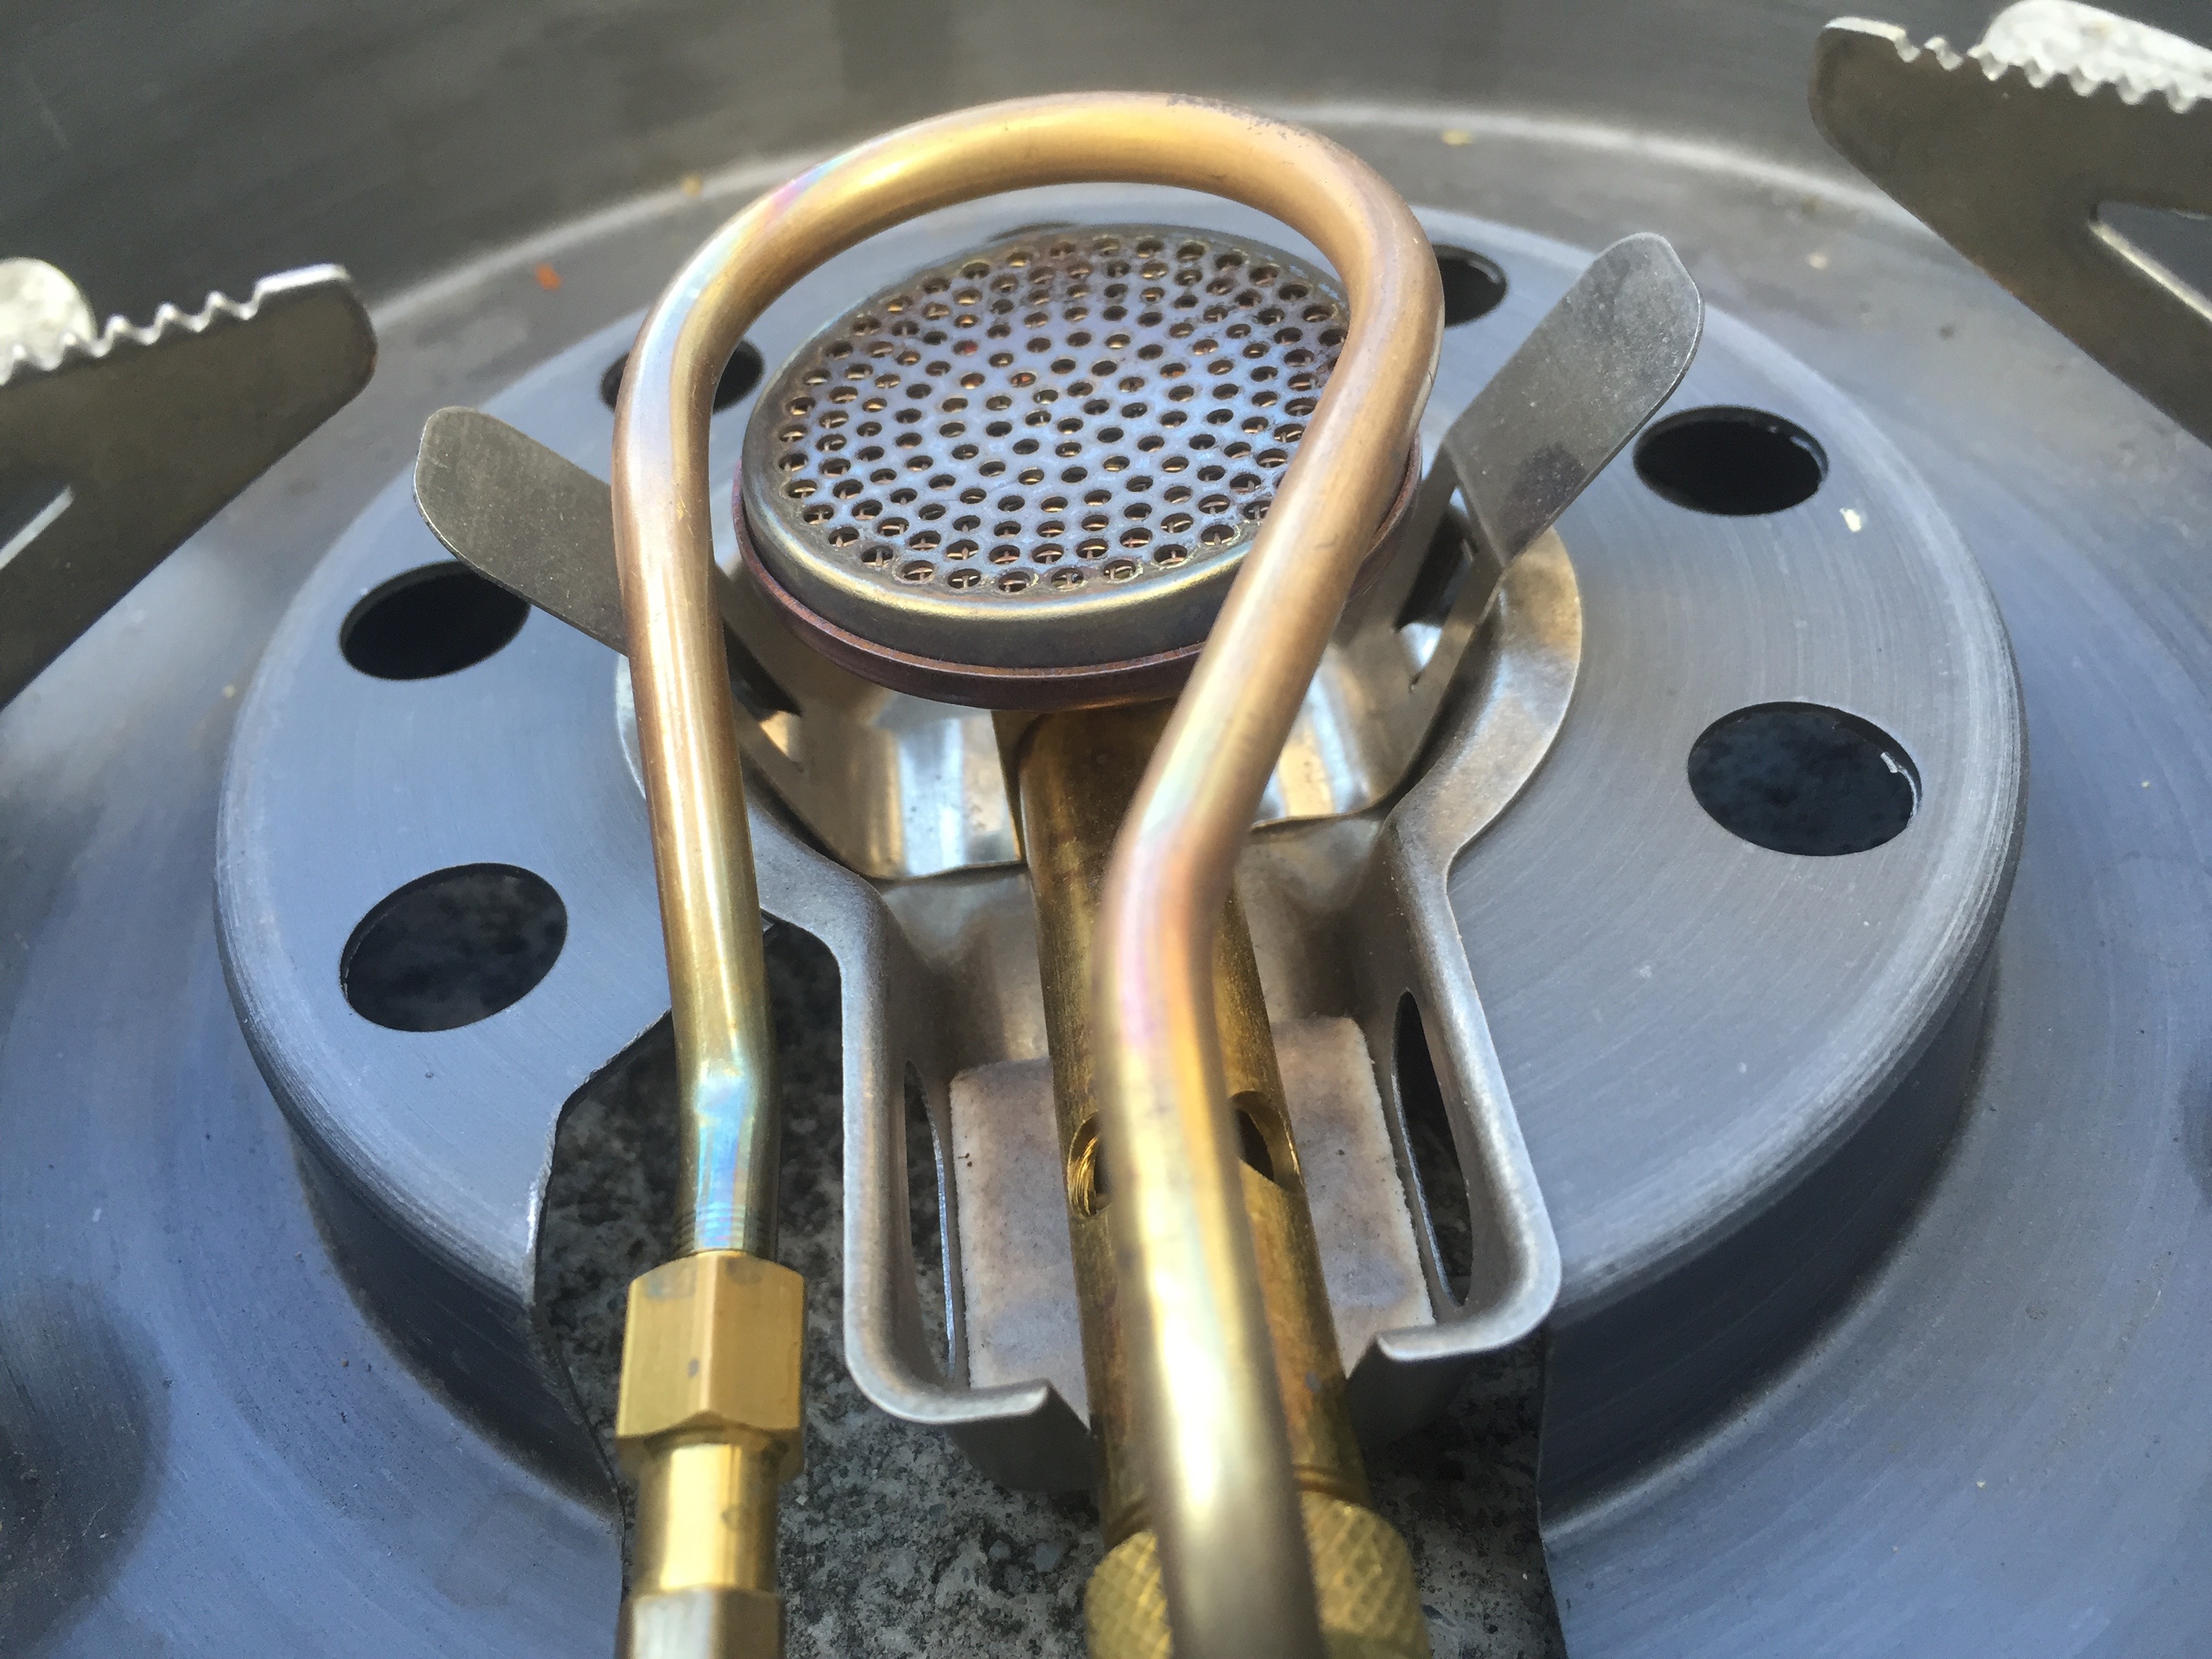
More interestingly, notice in the second photo about, the outer steel casing has a little drop, creating a little bowl beneath injector rod. That little bowl is to hold pre-heating liquid. If you’re familiar with liquid fuel stoves, pre-heating is a typically required pre-step for using white gas, kerosene, diesel, etc.
In the photo above, you can see the grip screw (towards the right). Unscrewing this gives you access to the jet bolt (a.k.a. nozzle, fuel nipple). Depending on the fuel you use, you change that jet bolt. There are three with different sized jet gauges (different sized diameter holes for the fuel to go through, in the bolt). The rule of thumb is: The larger the gauge, the cleaner the fuel. So LPG gas canisters use the largest gauge jet bolt, White gas and petrol (Unleaded) uses the middle gauge bolt, and kerosene and diesel use the smallest gauge. Incidentally, many multi-fuel stoves include “Jet Fuel” among the usable fuels. The Primus does not. Jet fuel is a type of kerosene but with slightly different properties. So I wouldn’t use it unless you have to.
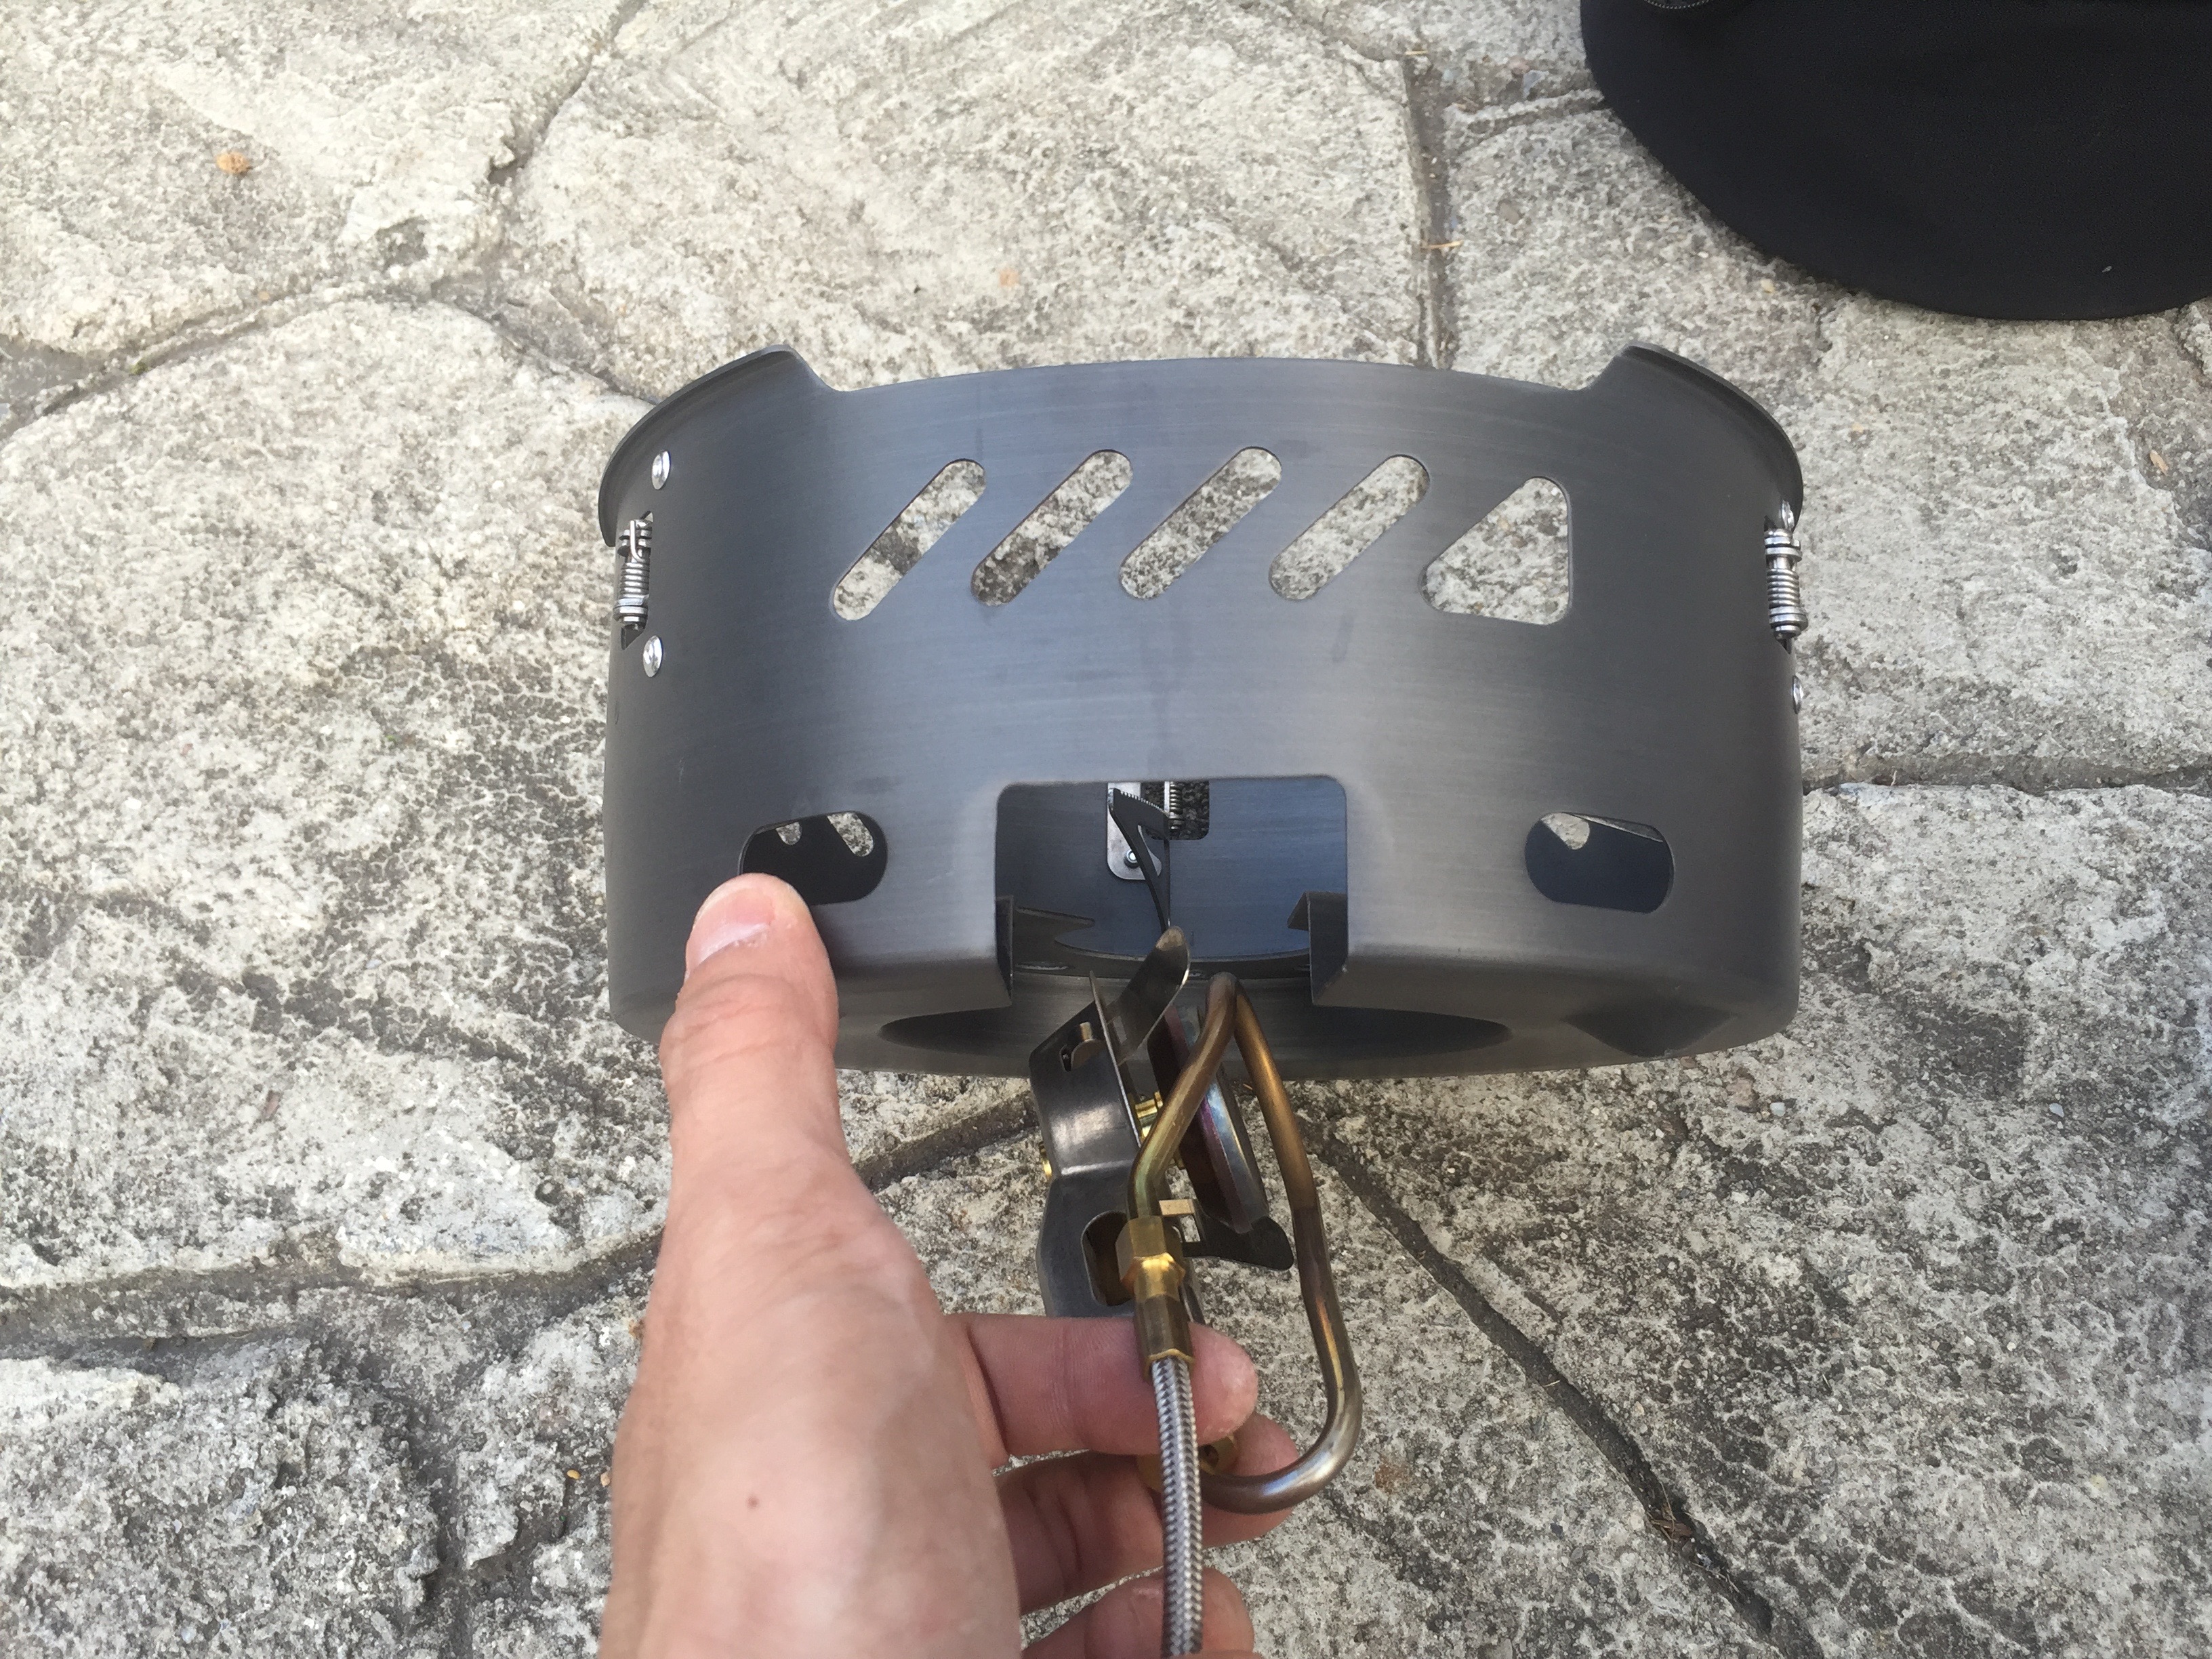
Above, you can see how the sides are designed to lock into place. You move the tabs when removing the stove.
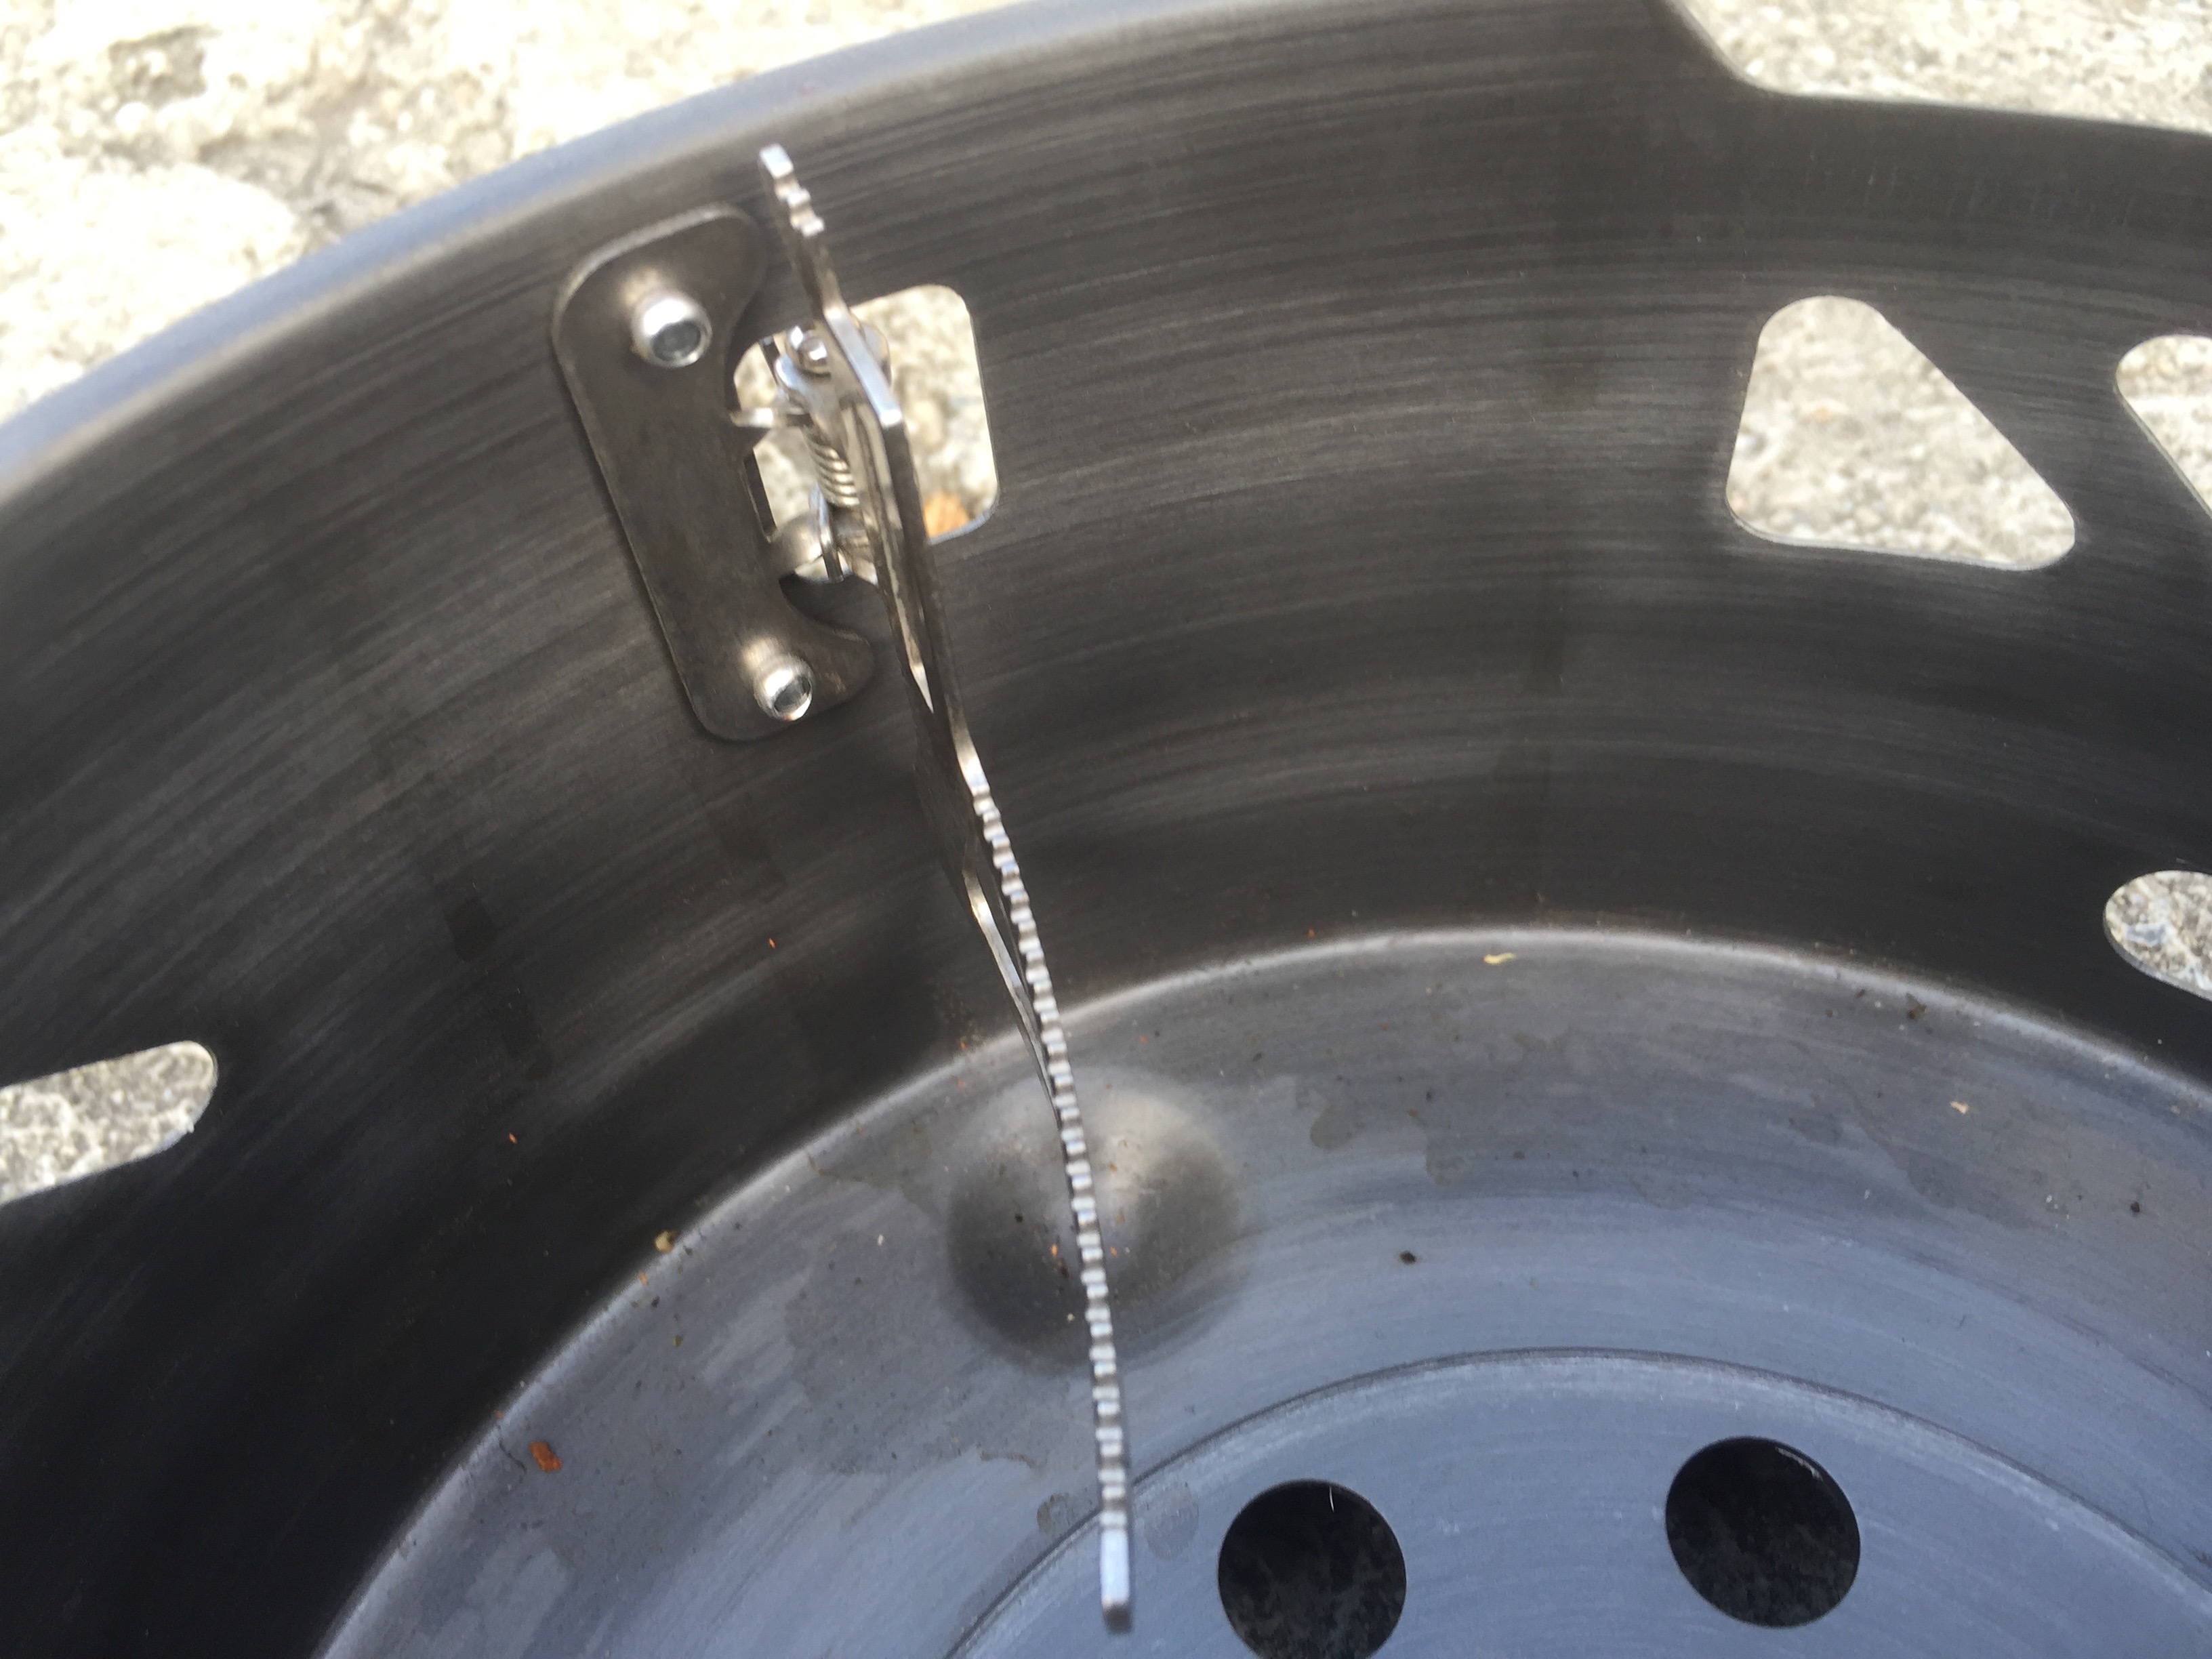
Inserting the stove into the windshield:
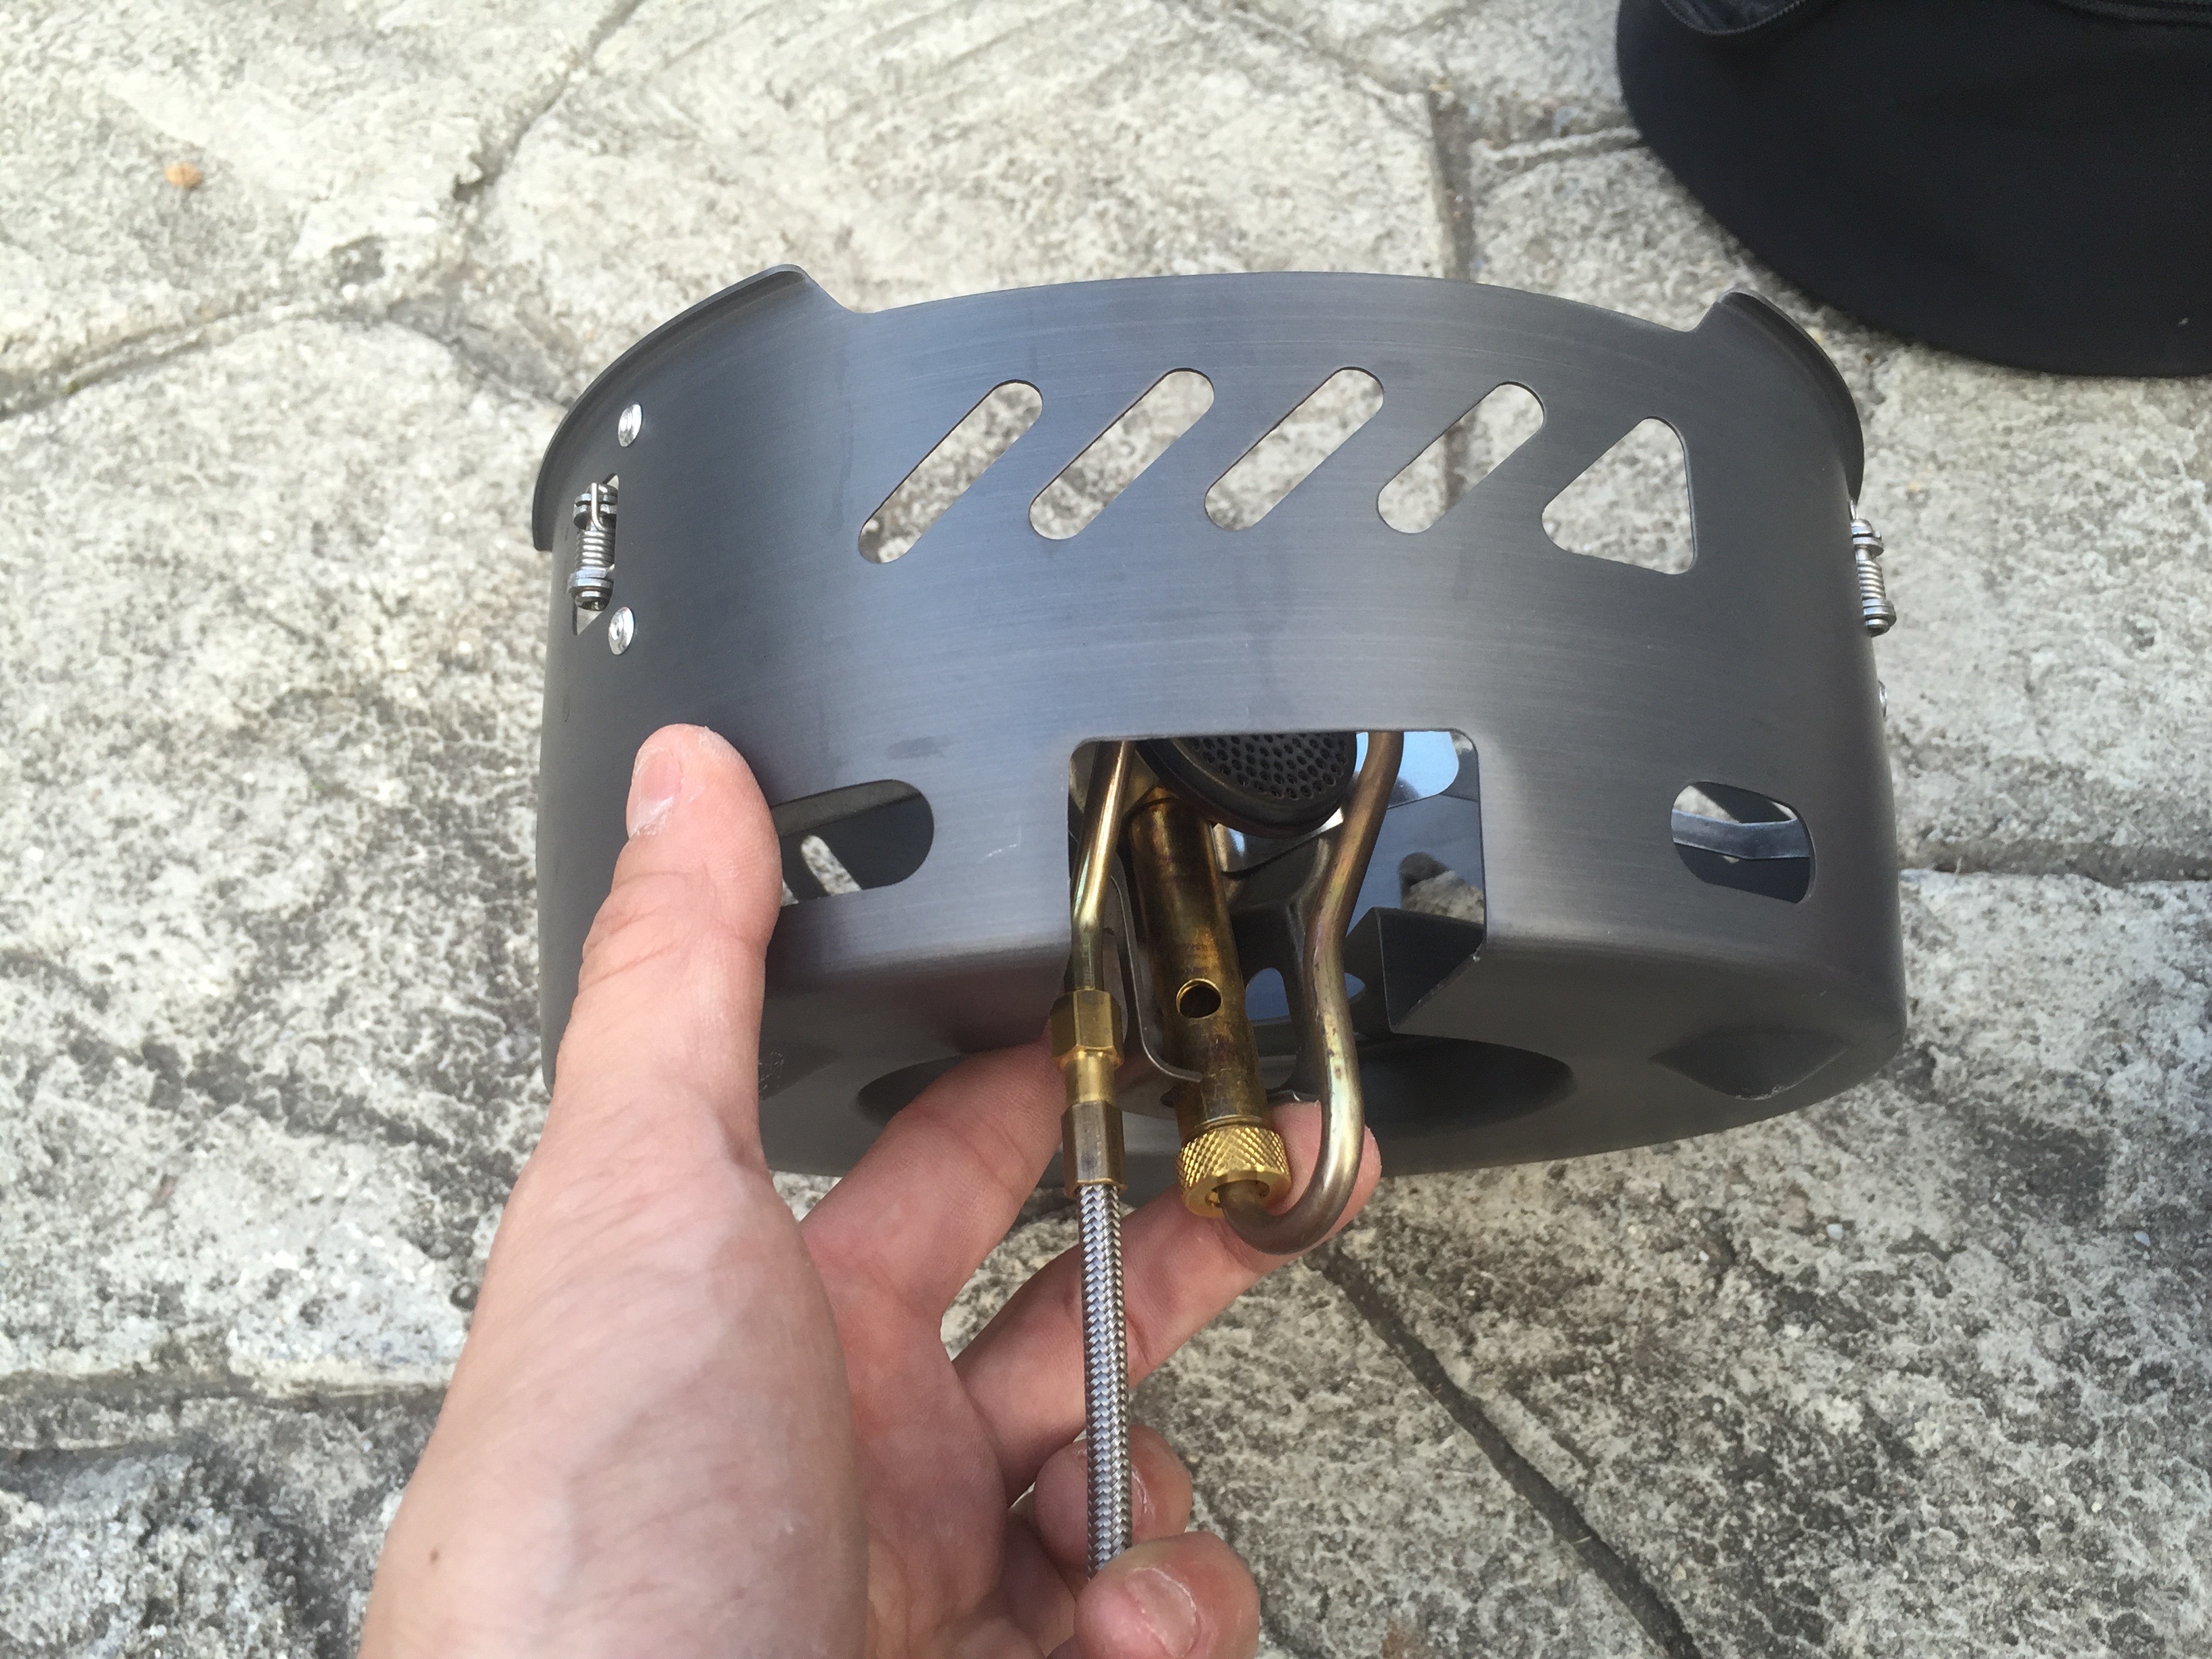
Unlike the ETA Spider, the ETA Power integrates the stove and the windshield. As you can see, there is a hole along the windshield, and you insert the stove through the hole sideways, and then snap the stove into the base.
So, unlike the ETA Spider, you can’t use the stove without the windshield.
On another, unrelated note, if they had designed the windshield and stove a little differently, they could have made this setup compatible with a Trangia alcohol stove….would have been a fun little way to make it even more flexible. But oh well.
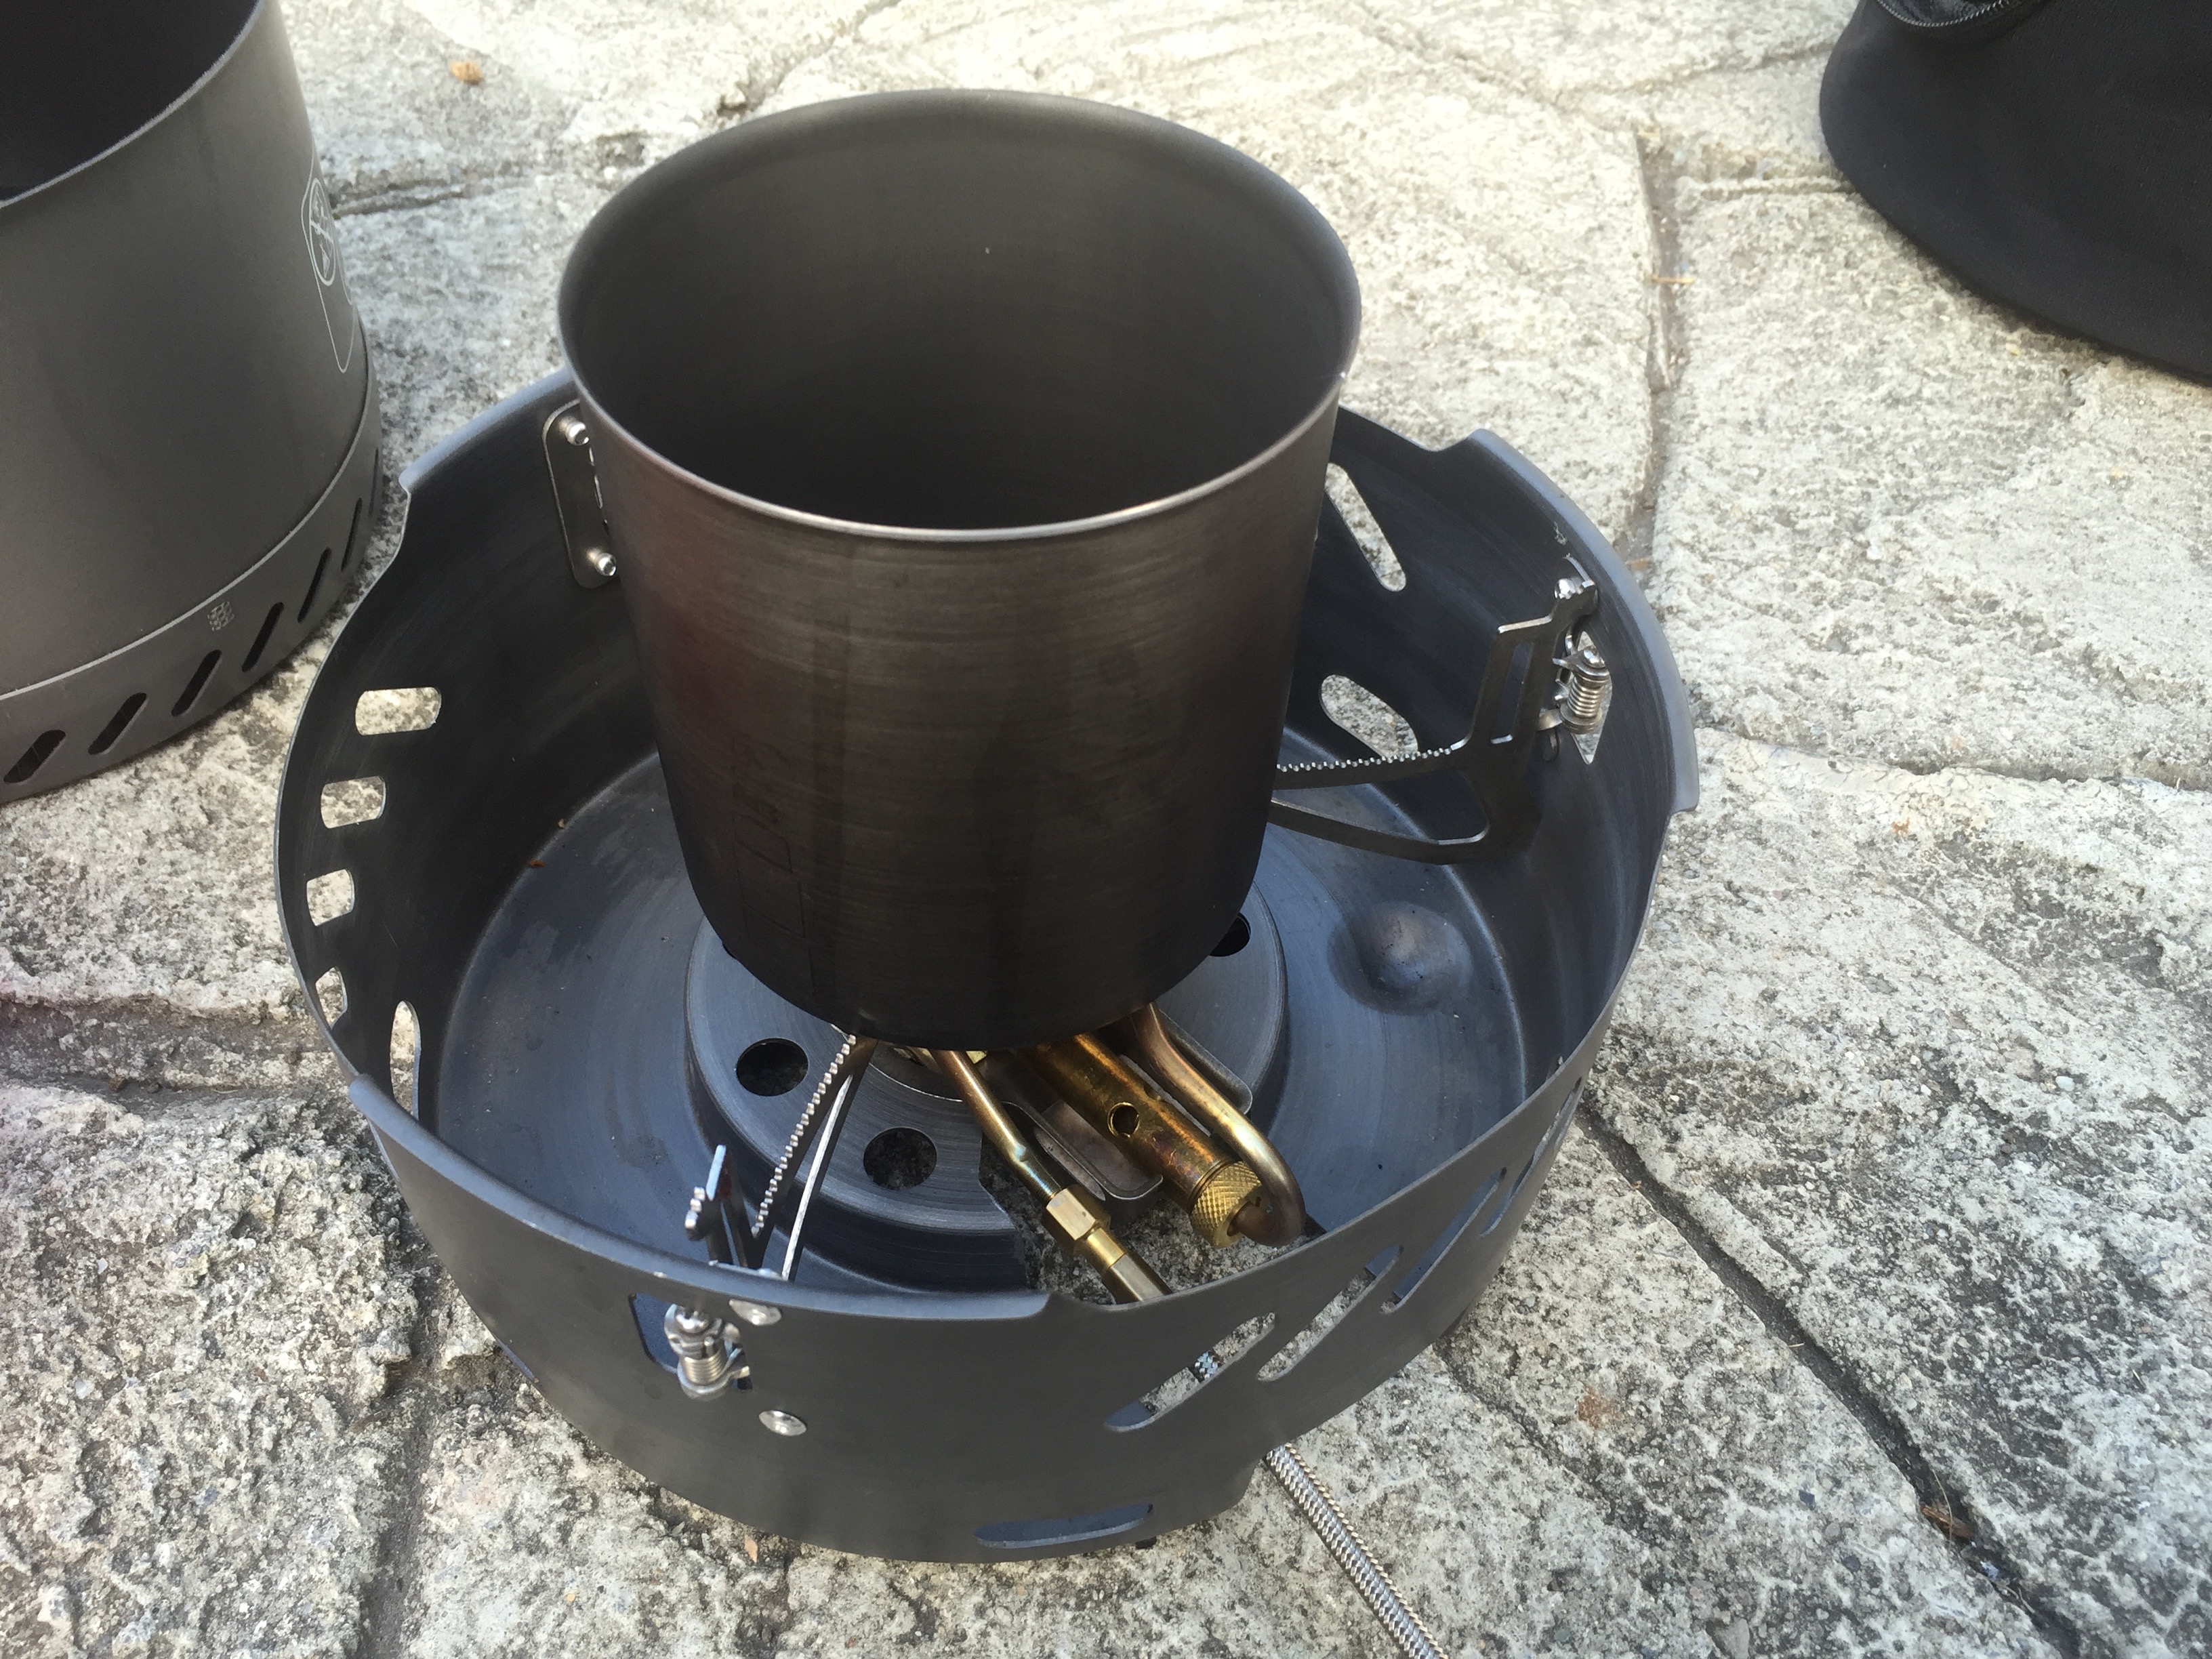
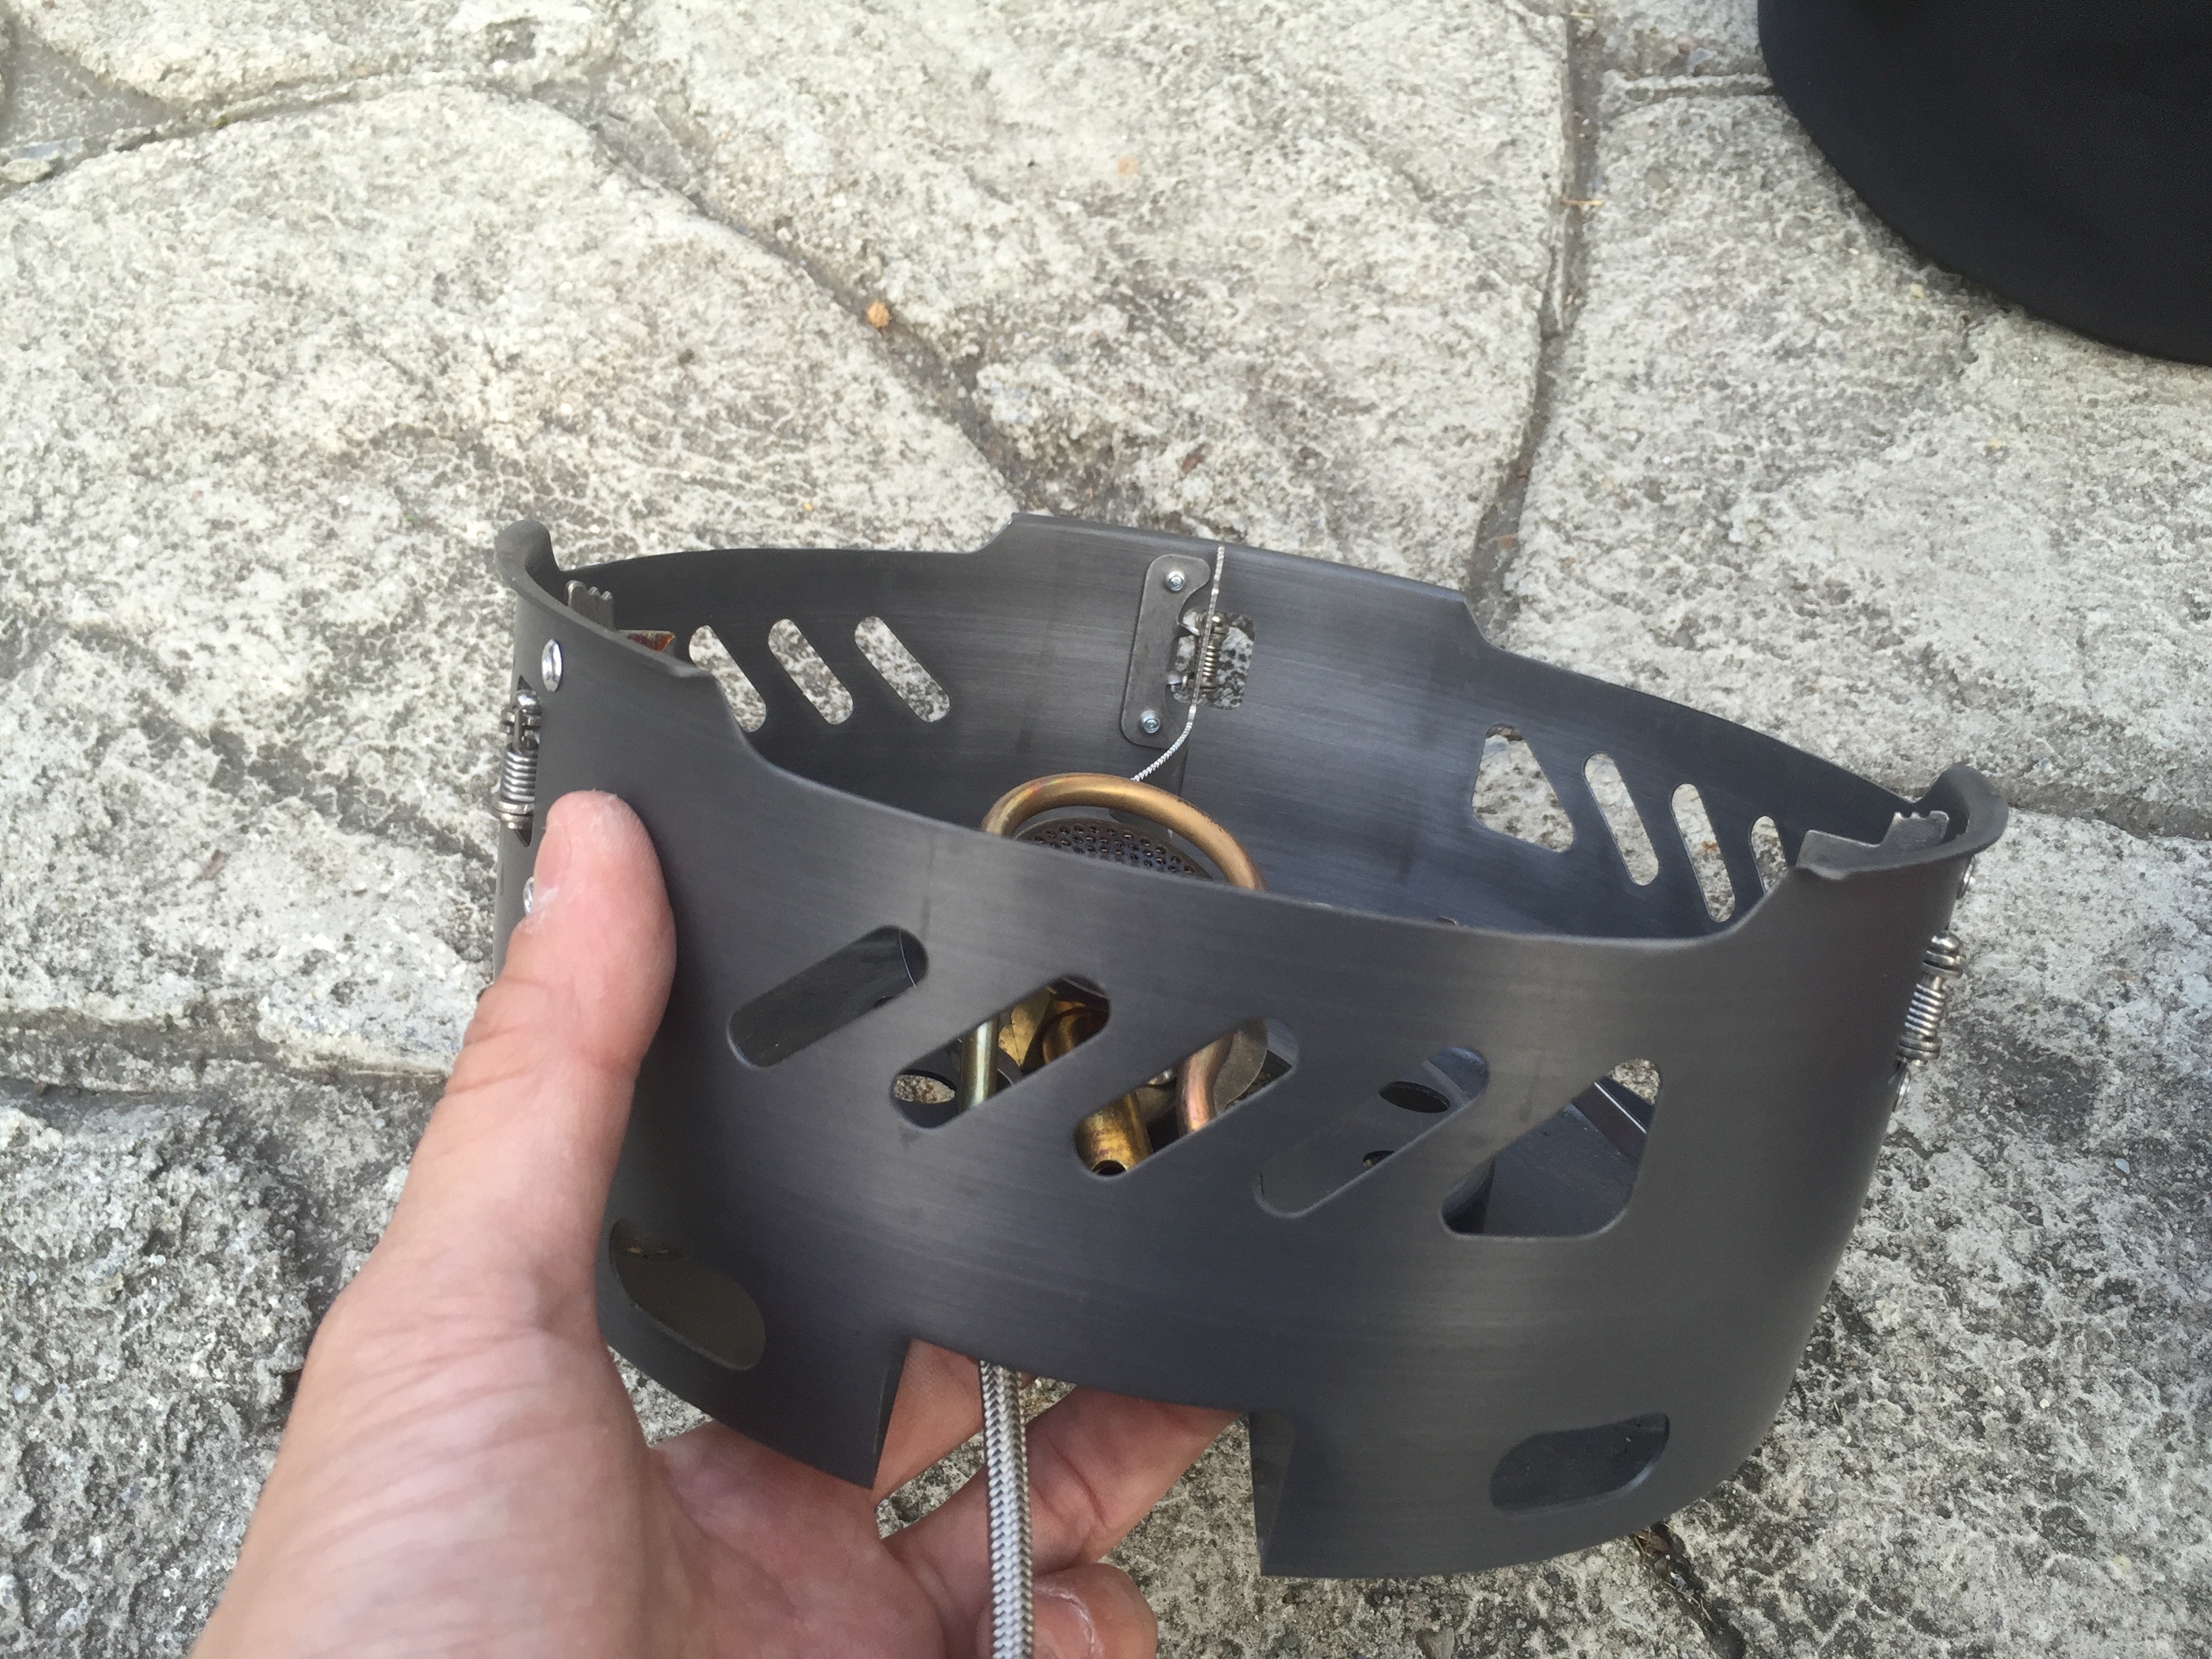
What’s also interesting is that Primus designed the windshield to also be the pot stand. The pot stand supports fold flush against the inside of the windshield normally. But rotate inward towards the center for use. The pot stand supports are so long that you could put even small items on the stove. backpacking kettles work fine, but even small cups work well, like this GSI Halulite. A little useful if you just dirtied the pots for a meal and want to enjoy a hot cup of coffee or tea before cleaning up.
Having cooked a fair bit with pots, I’ve realized that a common problem with using a gas canister stove or multi-fuel stove with a larger pot is the development of hot spots, which makes consistent cooking rather difficult.
There’s really no easy way around it. A small burner stove that naturally focused heat straight upwards, and the wide base of larger pots means hot sports.
But Primus has done an admirable job in mitigating this issue (possible side effect of dealing with other issues). There is still a burn-in hot spot, but it’s wider than you’d normally see.
The first is a much thicker non-stick ceramic coating than you see in other camping pots. Primus says it’s much more durable and with three meals with this under my belt, and many meals cooked with other pots, it certainly seems that way. The thicker overall pot seems to spread the heat some, so the hot spot is wider than in other pots.
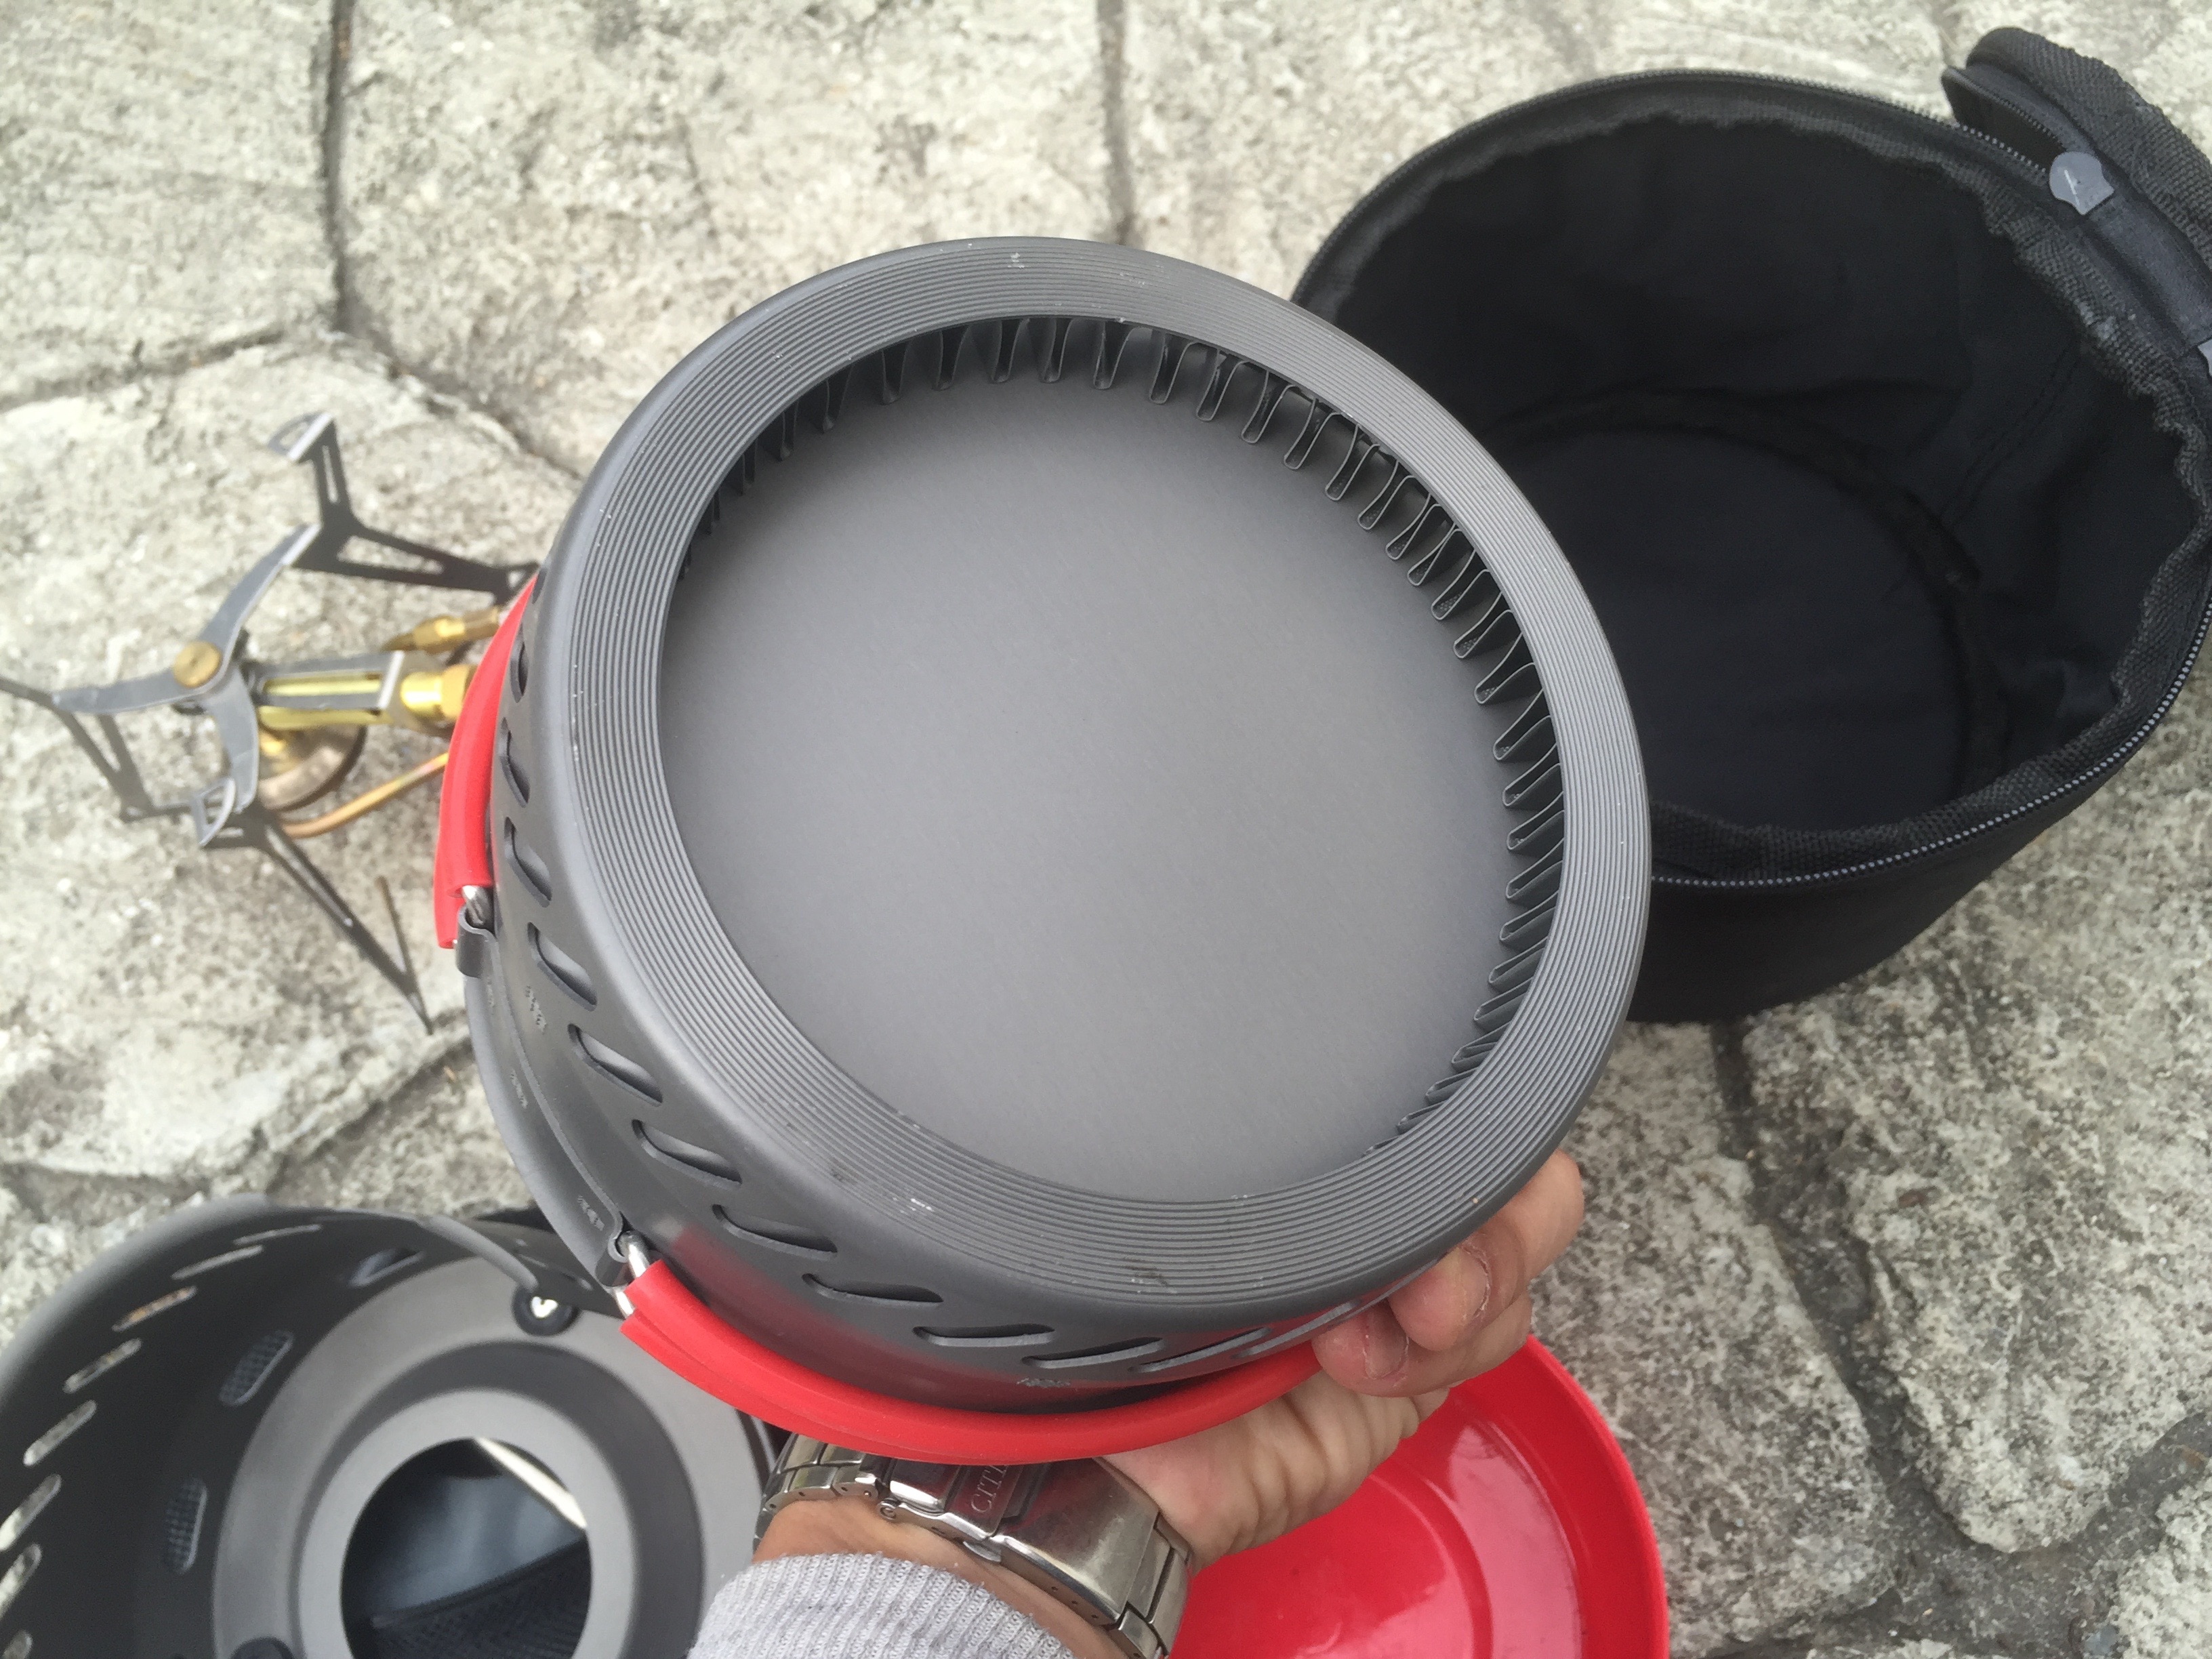
The second is the heat exchanger. Unlike like some heat exchangers that only have the zigzag portion, the Primus has an additional exterior wall around the heat exchanger portion that seems to provide additional wind protection for even greater efficiency.
The two combine to help mitigate a super high concentration of heat in one spot to one that is a little wider in diameter, with the addition of a “hot ring”.
But when simmering, these hot spots spread out even further. And heat goes up the sides a lttle too.
—
TEST MEALS:
For my first test meal, I tried a simple bean with chilli powder. The plastic bowl comes in handy here to store the diced ingredients. First cut up bacon and fried it up, being careful to keep heat low enough that nothing burned. Next went the diced onions, to caramelize using the fats from the bacon. After that went ground beef, to make it easy to crumble it up. Next comes the sliced mushrooms and some herbs and spices. Then went canned beans, water, chilli powder. Let the whole thing mix up and stew for a while on a super low simmer for an extra 20 minutes. After that, I placed the pot into the thermal case for an extra 20 minutes. I learned in a water test that the thermal case really only helps when you close it all the way. Too much heat escapes if the zipper is open, so you have to first place the pot into the thermal case, and then fold in the handles to completely zip close the case. Something like this would really be great if it could stew for several hours, but this unit isn’t really designed for 2+ hours of non-stop cooking, even on a low simmer. It would go through fuel too fast. Really pretty good.
The second test meal is ideally suited to the ETA Power EF: Pasta in cream sauce. Boil water, throw in the pasta, strain the pasta using the built-in colander in the cap, add cream sauce to warm, serve….Stupid easy.
The last test was to treat it a little like a pan. First put in some half slices of bacon, once cooked, put them aside and then fried up some eggs, and finally threw in some loose hashbrown flakes. I wish there was a pan for this set though, since the long silicone spatual I had was rather difficult to use in the deep pot.
In all three cases cleanup was the easiest I’ve ever experienced with a camping pot. I have several non-stick camping pots and you often still get some carbon burn-in, which is a chore to remove with a soft sponge. This is especially true when cooking bacon. Not so with this coating. It’s so thick, it’s much more like a home non-stick pot and pan set.
Incidentlly, you can also use a camping kettle on this stove and it works pretty well. the wind shield still works.
—-
So, because of its over-engineering to really maximize the efficiency of fuel, the extra convenience of having the plastic bowl to store ingredients or move food around when making a more complex meal, I would say this pot is good for a group backpacking trip where gear is shared and there is weight distribution between members. Since it’s so easy to clean, it’d be okay on an expedition trip where you break camp every day, but really, it’s best suited to base camping, from which you plan on having a few day trips.
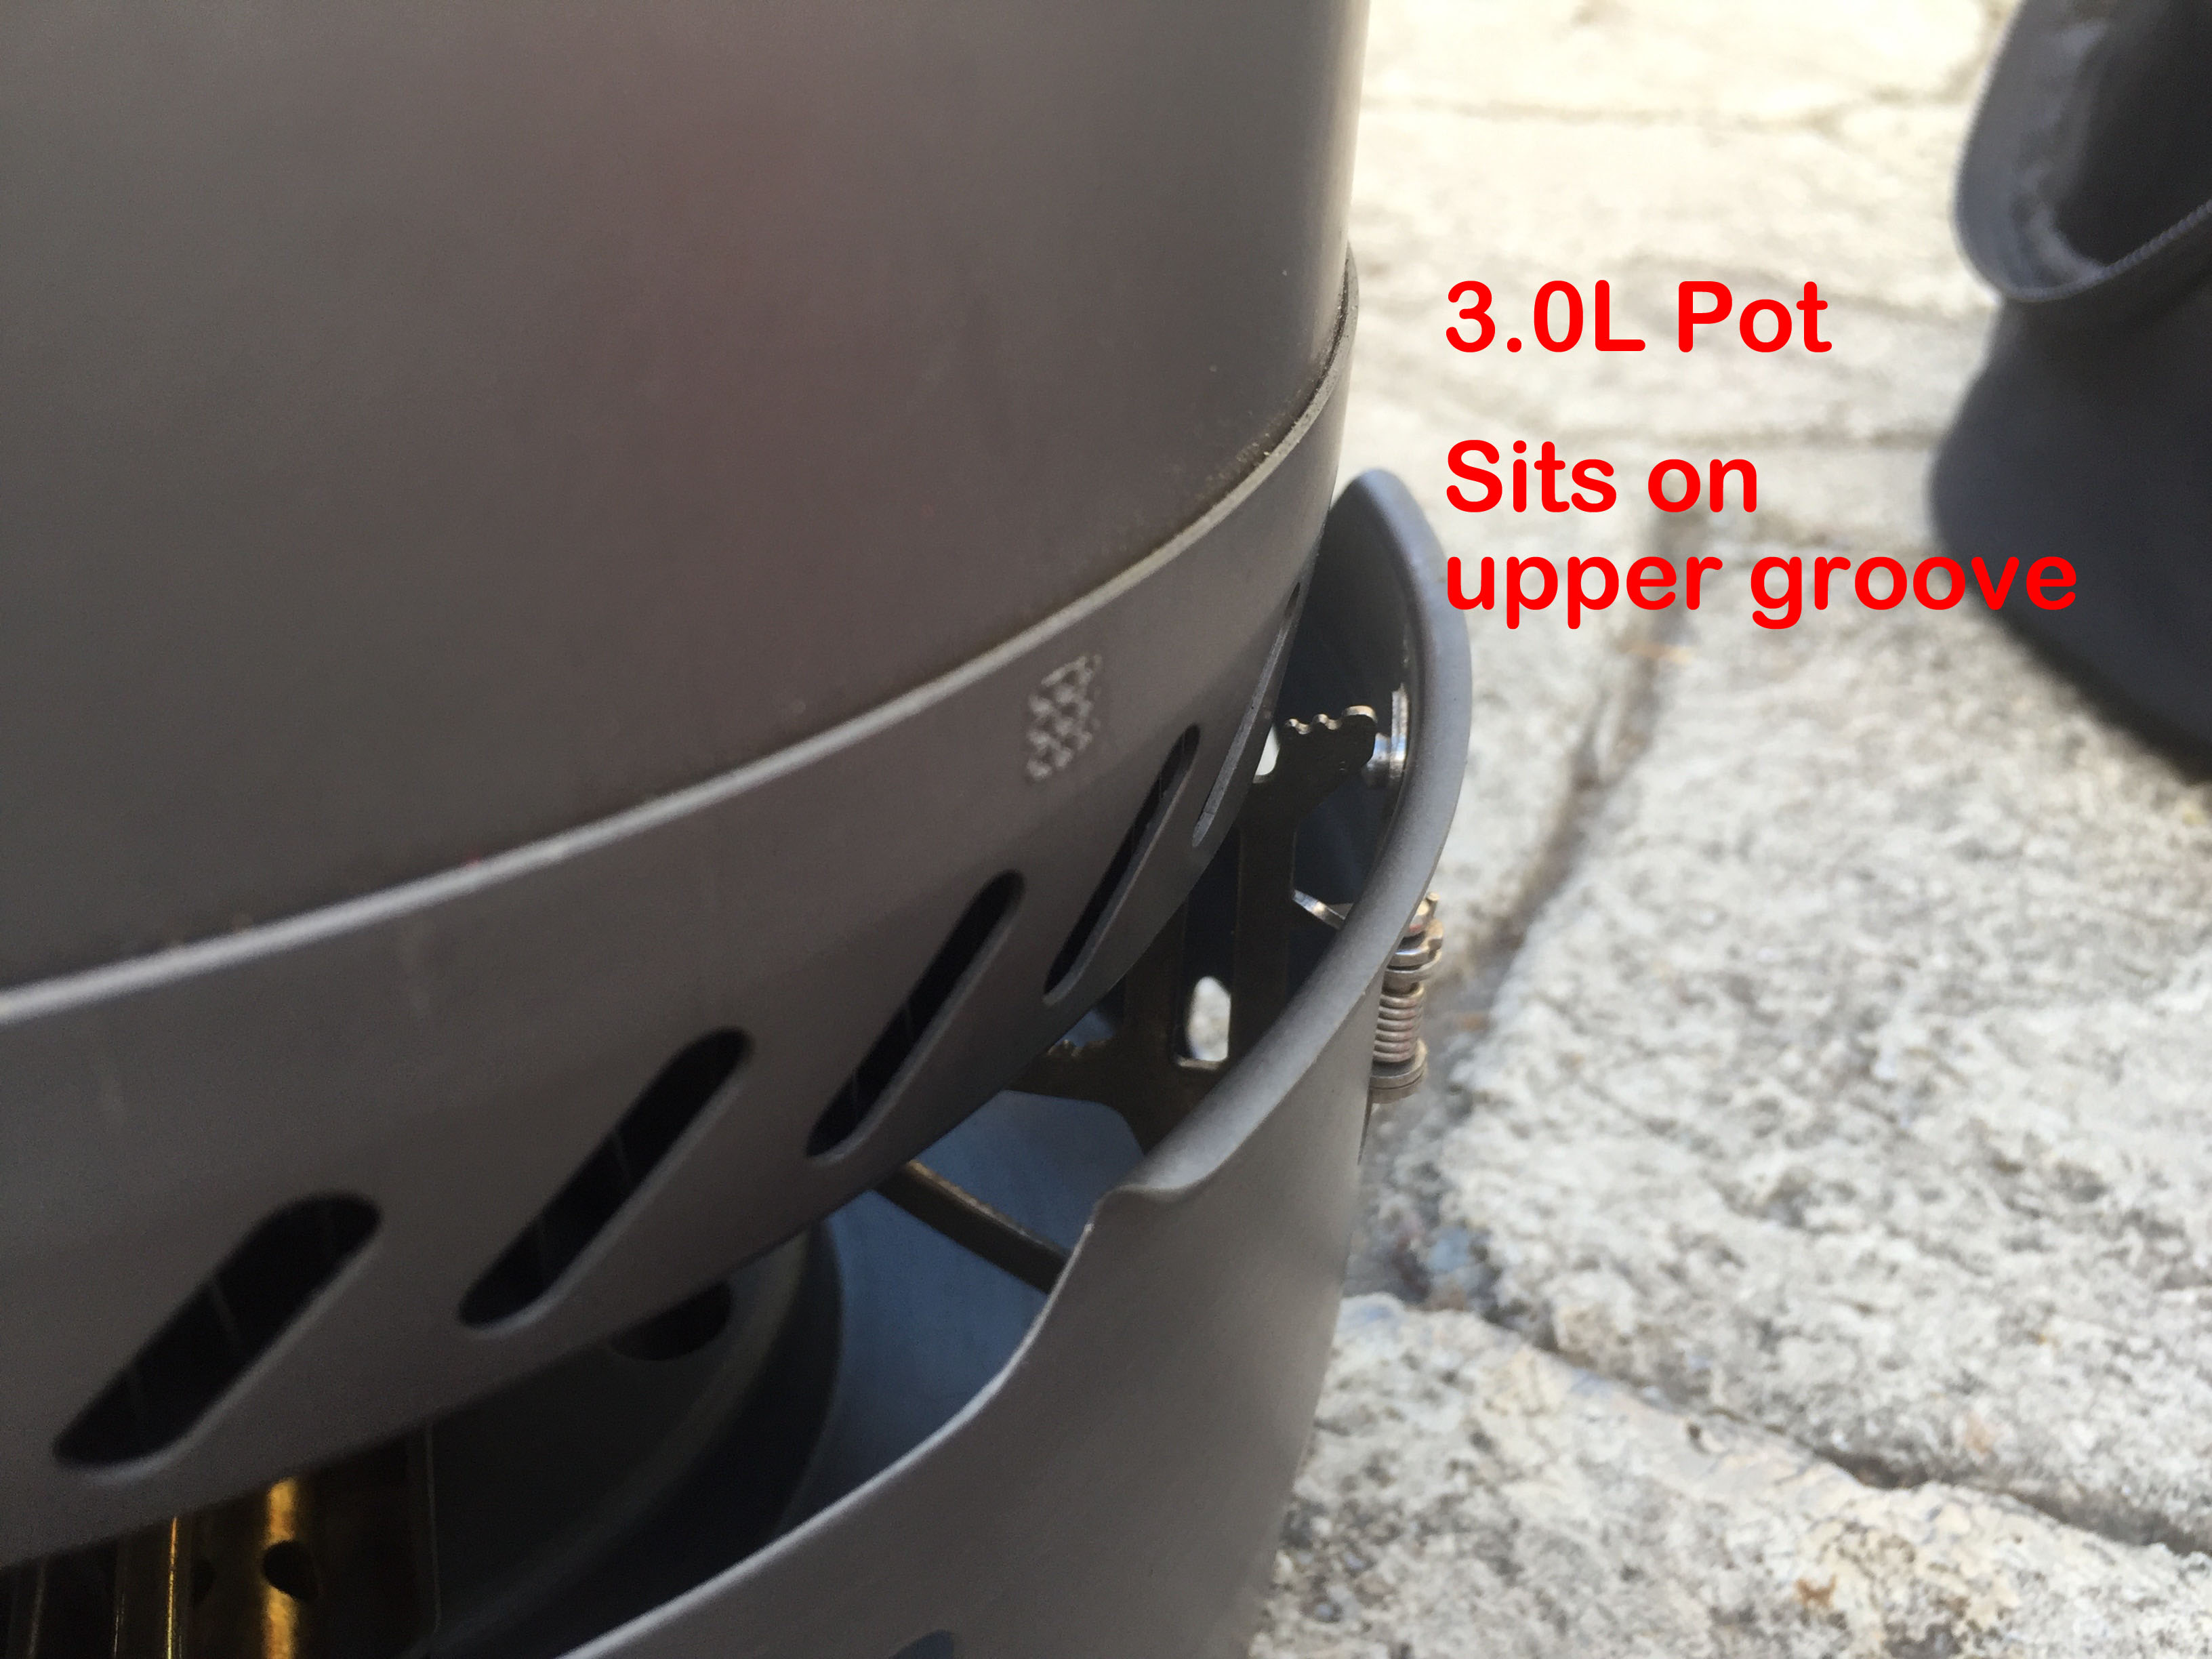
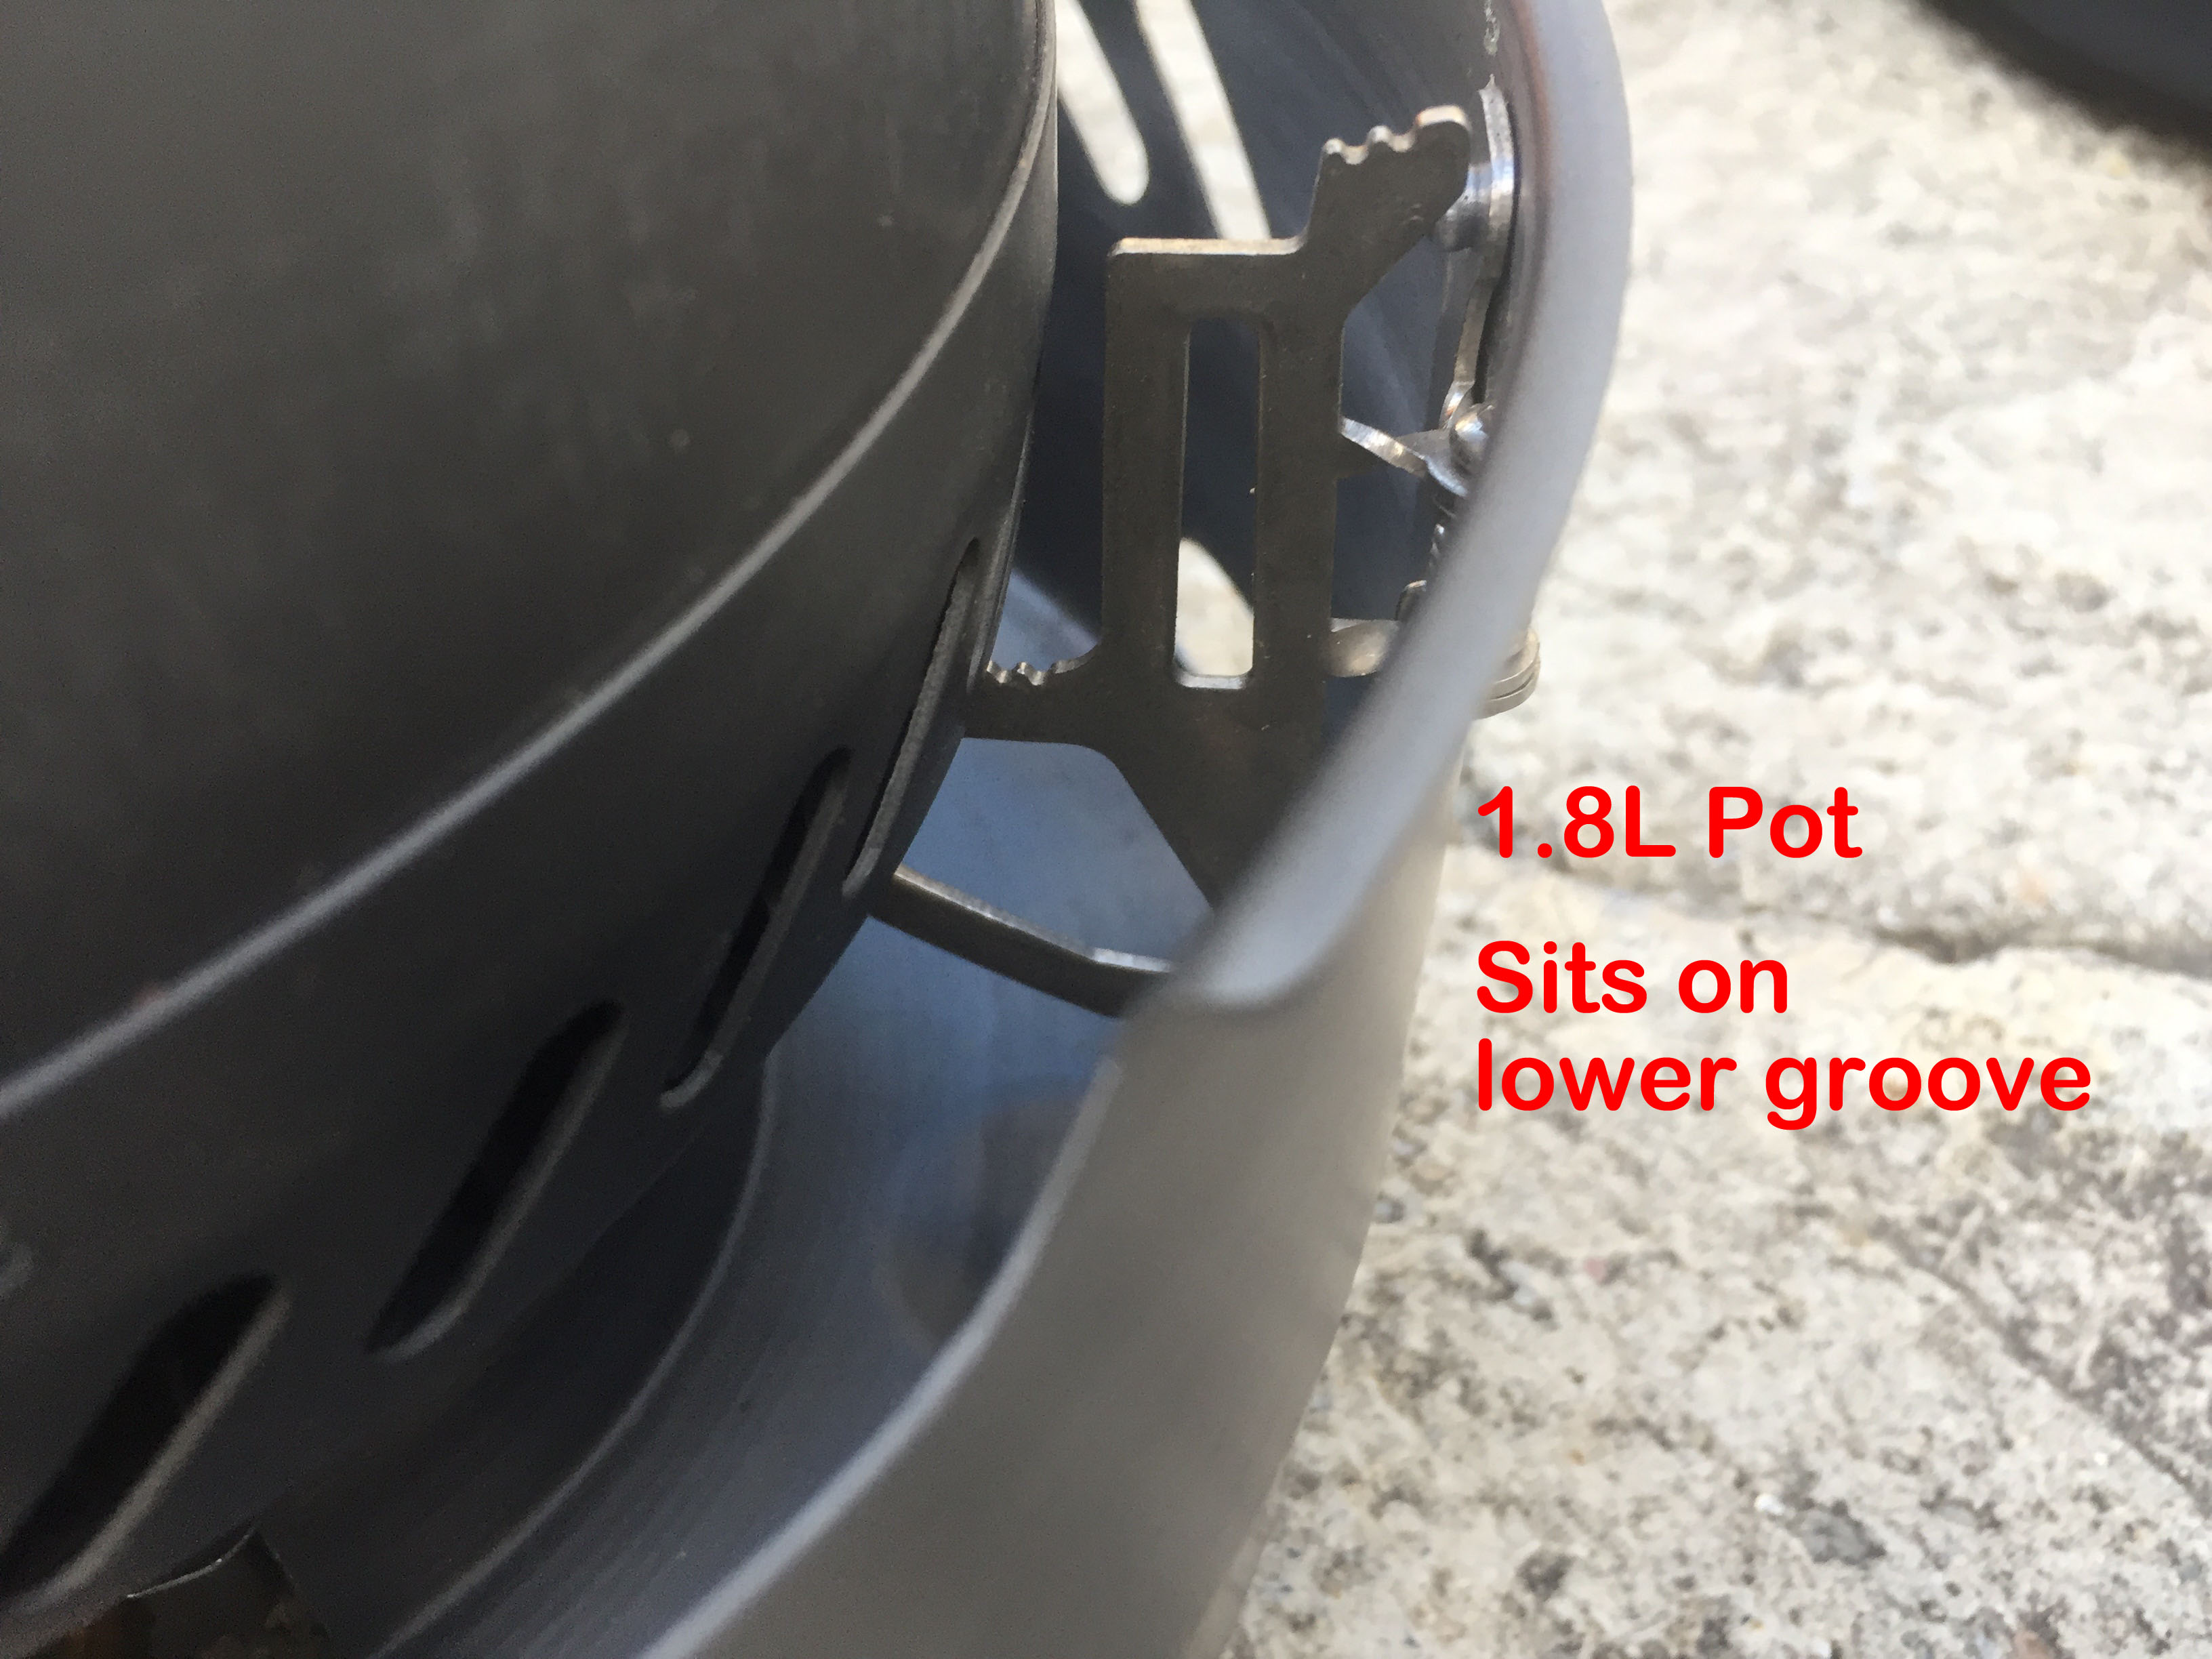
Incidentally, when purchasing the ETA Power EF, it comes with a 1.8L pot. There is also a separately sold 3.0L pot, and there are secondary grooves designed for it. While it doesn’t go to the lower groove set, it still works very well.


Unfortunately, the 3.0L pot, while it can fit into the heat shield for more compact storage, you cannot zip up the cozy if you do.
Either way, this is an amazing piece of kit for cooking for up to 4 people. If that’s your thing, go for it.
For information on the smaller version of this stove, called the ETA Spider, https://somecampingstoves.wordpress.com/2015/04/15/primus-eta-spider-compact-stove/

—-
Excerpt from Gear Junkie (author: shaun):
http://snowboardmountaineer.com/gear-review-jetboil-and-other-canister-gas-explained/
Having some trial and error experience with Jetboil, I can point out a few things about the fuel, and a few things that have worked for me. First, NOT all canister fuel is created equal. Here are a few for comparison, each with the relative temp values of each fuel – canister fuels are generally a mixture, and they are different ratios.
– Brunton/Kovea: 0% n-butane, 70% isobutane, 30% propane
– Coleman: 60% n-butane, 0% isobutane, 40% propane
– Primus: 70% n-butane, 10% isobutane, 20% propane
– Peak1: 70% n-butane, 0% isobutane, 30% propane
– MSR IsoPro: 0% n-butane, 80% isobutane, 20% propane
– JetPower: 0% n-butane, 80% isobutane, 20% propane
– Snow Peak: 0% n-butane, 65% isobutane, 35% propane
This is important since all fuels vaporize at different temps. Without some fuel left in the canister that is vaporized – it will leave no pressure to feed fuel to the stove. n-Butane vaporizes at 31°F. Isobutane vaporizes at 11°F. Propane vaporizes at -43°F. Essentially what that means is that n-Butane will not vaporize below 31°F, while the other mixtures do and leave useless liquid n-butane in the canister. At 11°F the same phenomenon happens with Isobutane.
So.. A low (or no) n-Butane mixture, and higher propane mixture are more suitable for colder temps.
End Excerpt.

Pingback: Primus Eta Spider Review | Camping Stoves and Other Gear Reviews
Great review – I bought this stove on the strength of this review and it’s accurate.
I agree it’s for ‘cooking’ rather than just boiling water. I need to be able to cook proper pasta sauce for a family of 4, and this is about the best setup I have found. I cook pasta, then keep that warm in plastic bowl/case. Then make the sauce, and add the pasta back to it/serve separately.
It’s not as fast as an omnifuel, but the extra minute of boiling time doesn’t bother me, and the setup really does minions heat loss, there is hardly any heat around the side of the pan/windshield. The gas goes about 40% further as result.
LikeLiked by 1 person
So glad you found the review useful, and glad the stove is working out for you. I really love the ETA Power EF, and it’s the best for pasta and stews and thick soups. I do keep the power low, to mitigate burn in, but that works fine even in windy conditions, which is great. Can’t have a low flame with other stoves without it blowing out.
LikeLike
do you still have this stove by any chance? If you do I’d love to purchase it from you.
LikeLike
I do have it still. It’s not for sale right now though. I was just talking about this stove on Facebook in the StoveAholics group earlier this month. Did you happen to search for it because you’ are’re also in that FB group?
LikeLike